

Why integrate Devin with Bitbucket?
Integrating Devin with your Bitbucket repositories allows Devin to create pull requests, read and respond to your PR comments, and collaborate effectively with your team. This lets Devin be a true collaborator on your engineering team.Prerequisites
Before setting up the Bitbucket integration, we recommend:- Dedicated service account - Create a new Bitbucket account specifically for Devin (e.g.,
devin@yourcompany.com) rather than using an existing user account for cleaner access management and audit trails
Using a dedicated service account makes it easier to track Devin’s activity, manage permissions, and maintain security best practices across your organization.
Setting up the Integration
Bitbucket Cloud
The setup is easy! Here’s how to get started:- Create a new Bitbucket account specifically for Devin (just like you’d create a personal account). You’ll use this account, not your personal one, during the integration process.
- In your Devin account, go to Settings > Connections > Bitbucket and click “Connect”.
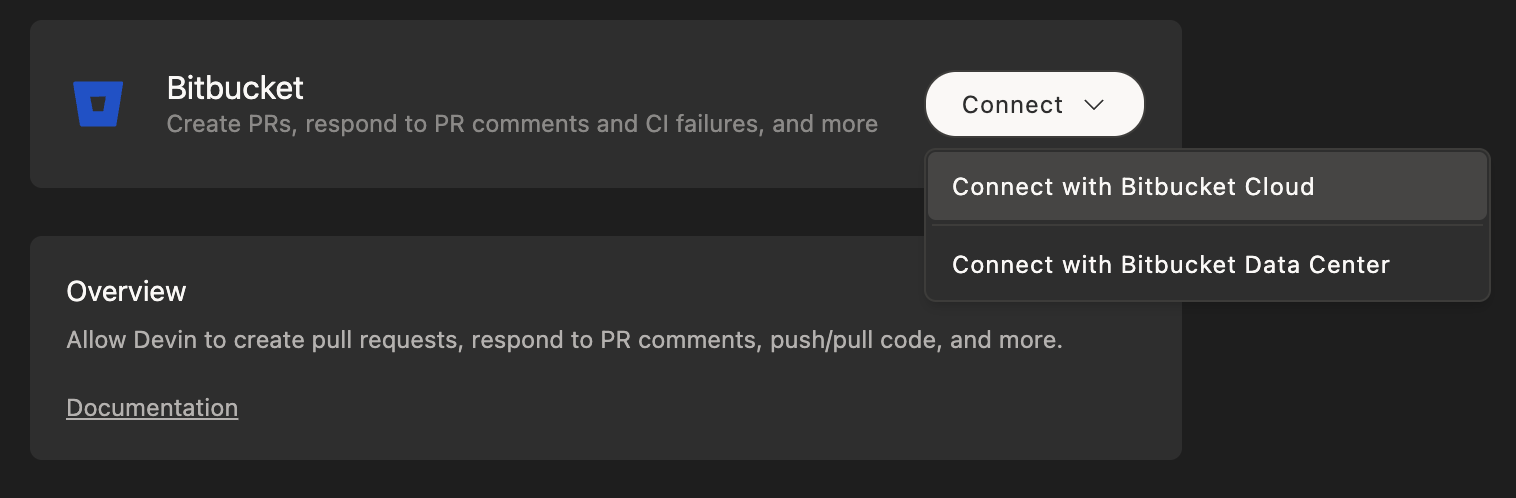
-
You’ll be redirected to Bitbucket where you should:
- Log in with the Bitbucket account you created for Devin (not your personal account)
- Grant the necessary permissions for Devin to work with your repositories
- Once completed, you’ll return to the Devin settings page where you can confirm the integration is active.
Bitbucket Data Center
For organizations using Bitbucket Data Center (self-hosted), follow these steps:- Create a dedicated service account in your Bitbucket Data Center instance for Devin.
- In your Devin account, go to Settings > Connections > Bitbucket, open the dropdown next to the Connect button, and select Connect with Bitbucket Data Center.
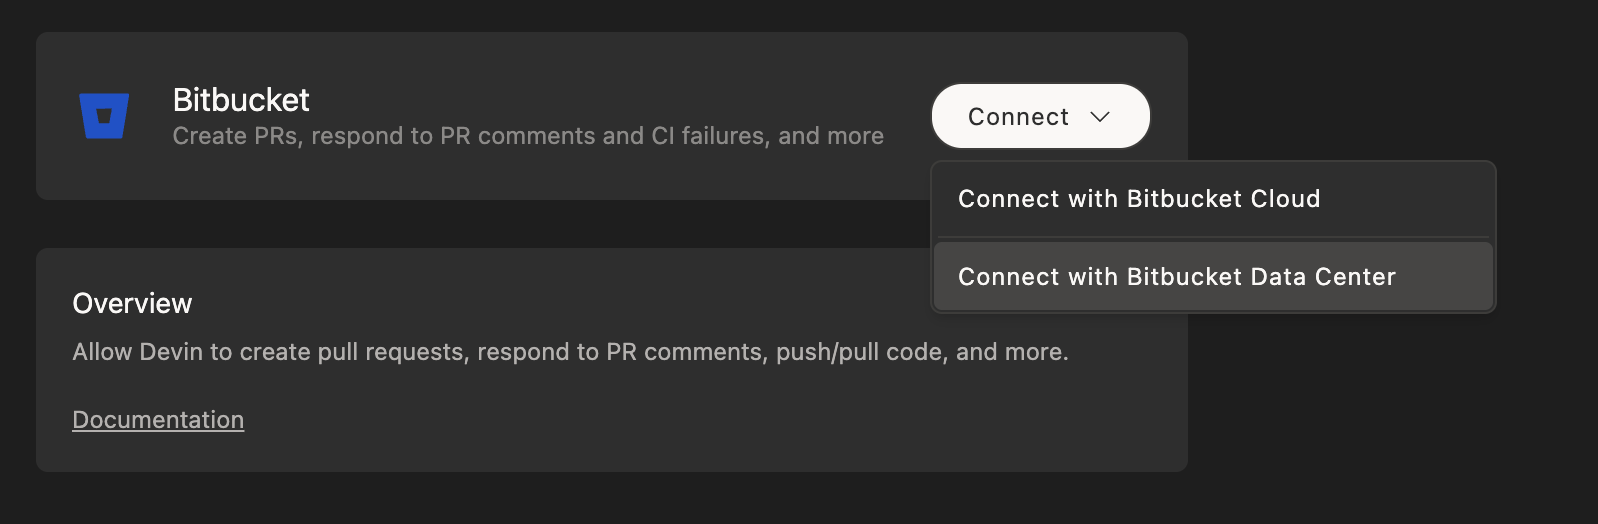
- Configure the connection by providing:
- Bitbucket Host: your Bitbucket Data Center domain (e.g.
bitbucket.mycompany.com) - Bitbucket Username: the service account’s username
- Bitbucket HTTP Access Token: an HTTP access token created for the service account. You can replace it later with Rotate access token in the connection’s details panel.
- Bitbucket Host: your Bitbucket Data Center domain (e.g.
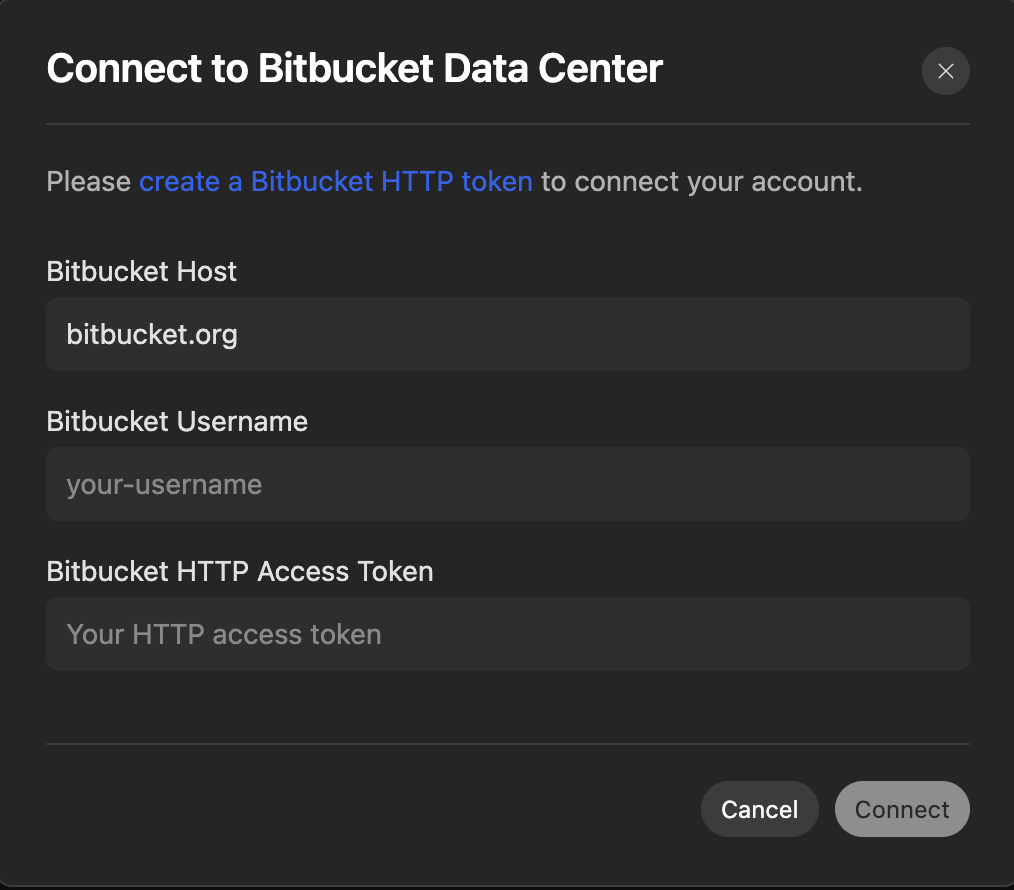
- Grant the service account appropriate project and repository permissions in your Bitbucket Data Center instance.
- Once configured, you’ll see the integration status confirmed in your Devin settings.
Webhook configuration (Bitbucket Data Center)
Configuring a webhook lets Devin receive pull request events from Bitbucket Data Center in real time, so PR status and comments are delivered to the Devin session working on the PR.- In your Devin account, go to Settings > Connections > Bitbucket and click the Bitbucket Data Center connection to open its details panel.
- On the General tab, click Configure in the Webhook row. The dialog shows the webhook URL and a secret token — copy the token now, it is only shown once (you can regenerate it later from the same dialog).
- In Bitbucket Data Center, open the repository or project settings and go to Webhooks.
- Create a webhook and paste the webhook URL.
- Under Pull request events, select Opened, Source branch updated, Merged, Declined, and Comment added.
- Under Authentication, choose Basic, enter any username, and paste the secret token as the password.
Webhooks are only available for Bitbucket Data Center connections. Bitbucket Cloud connections do not have a webhook option.
Link your Bitbucket Data Center account
By default, everything Devin does on Bitbucket Data Center is attributed to the service account. Linking your own account lets you comment, add or remove reviewers, approve, and decline PRs from Devin Review as yourself. Admin setup (once per Bitbucket Data Center host):- In Devin, go to Settings > Connections > Bitbucket and click Register app under Bitbucket Data Center user OAuth. The dialog shows the redirect URL and permissions to use.
- In Bitbucket Data Center, go to Administration > Application links, select Create link, then choose External application and Incoming. Paste the redirect URL and grant the Repositories: Write permission.
- Paste the application’s client ID and client secret into the Devin dialog and click Register.
Removing the registered application in Devin unlinks every user’s Bitbucket Data Center account on that host.
Using Devin with the Bitbucket Integration
After connecting Bitbucket, set up your repositories on Devin’s Machine.How Devin responds to PR comments.
- Bitbucket Cloud: Devin does not wake up automatically for comments on its pull requests. Devin can still address them if you point them out directly in the session.
- Bitbucket Data Center: once the webhook is configured, a comment on a pull request that a Devin session is tracking is delivered to that session and Devin responds. An organization admin can limit this with Require @Devin to respond under Settings > Devin > Pull requests, so Devin only responds to comments that start with
@DevinorDevinas a whole word, such asDevin fix this(thedevinaiprefix is also accepted). Comments that contain(aside)or!aside, or that start withaside, are always ignored. Without a webhook, Data Center behaves like Bitbucket Cloud.
Best Practices
- Create a dedicated Bitbucket account for Devin
- Enable branch protections on main/master branches
- Grant the service account appropriate workspace and repository permissions
- On Bitbucket Data Center, configure the webhook so Devin receives PR events in real time