Now that you’re all set up, kick off your first Devin session! This guide will walk you through the new session interface and help you understand the best ways to interact with Devin.
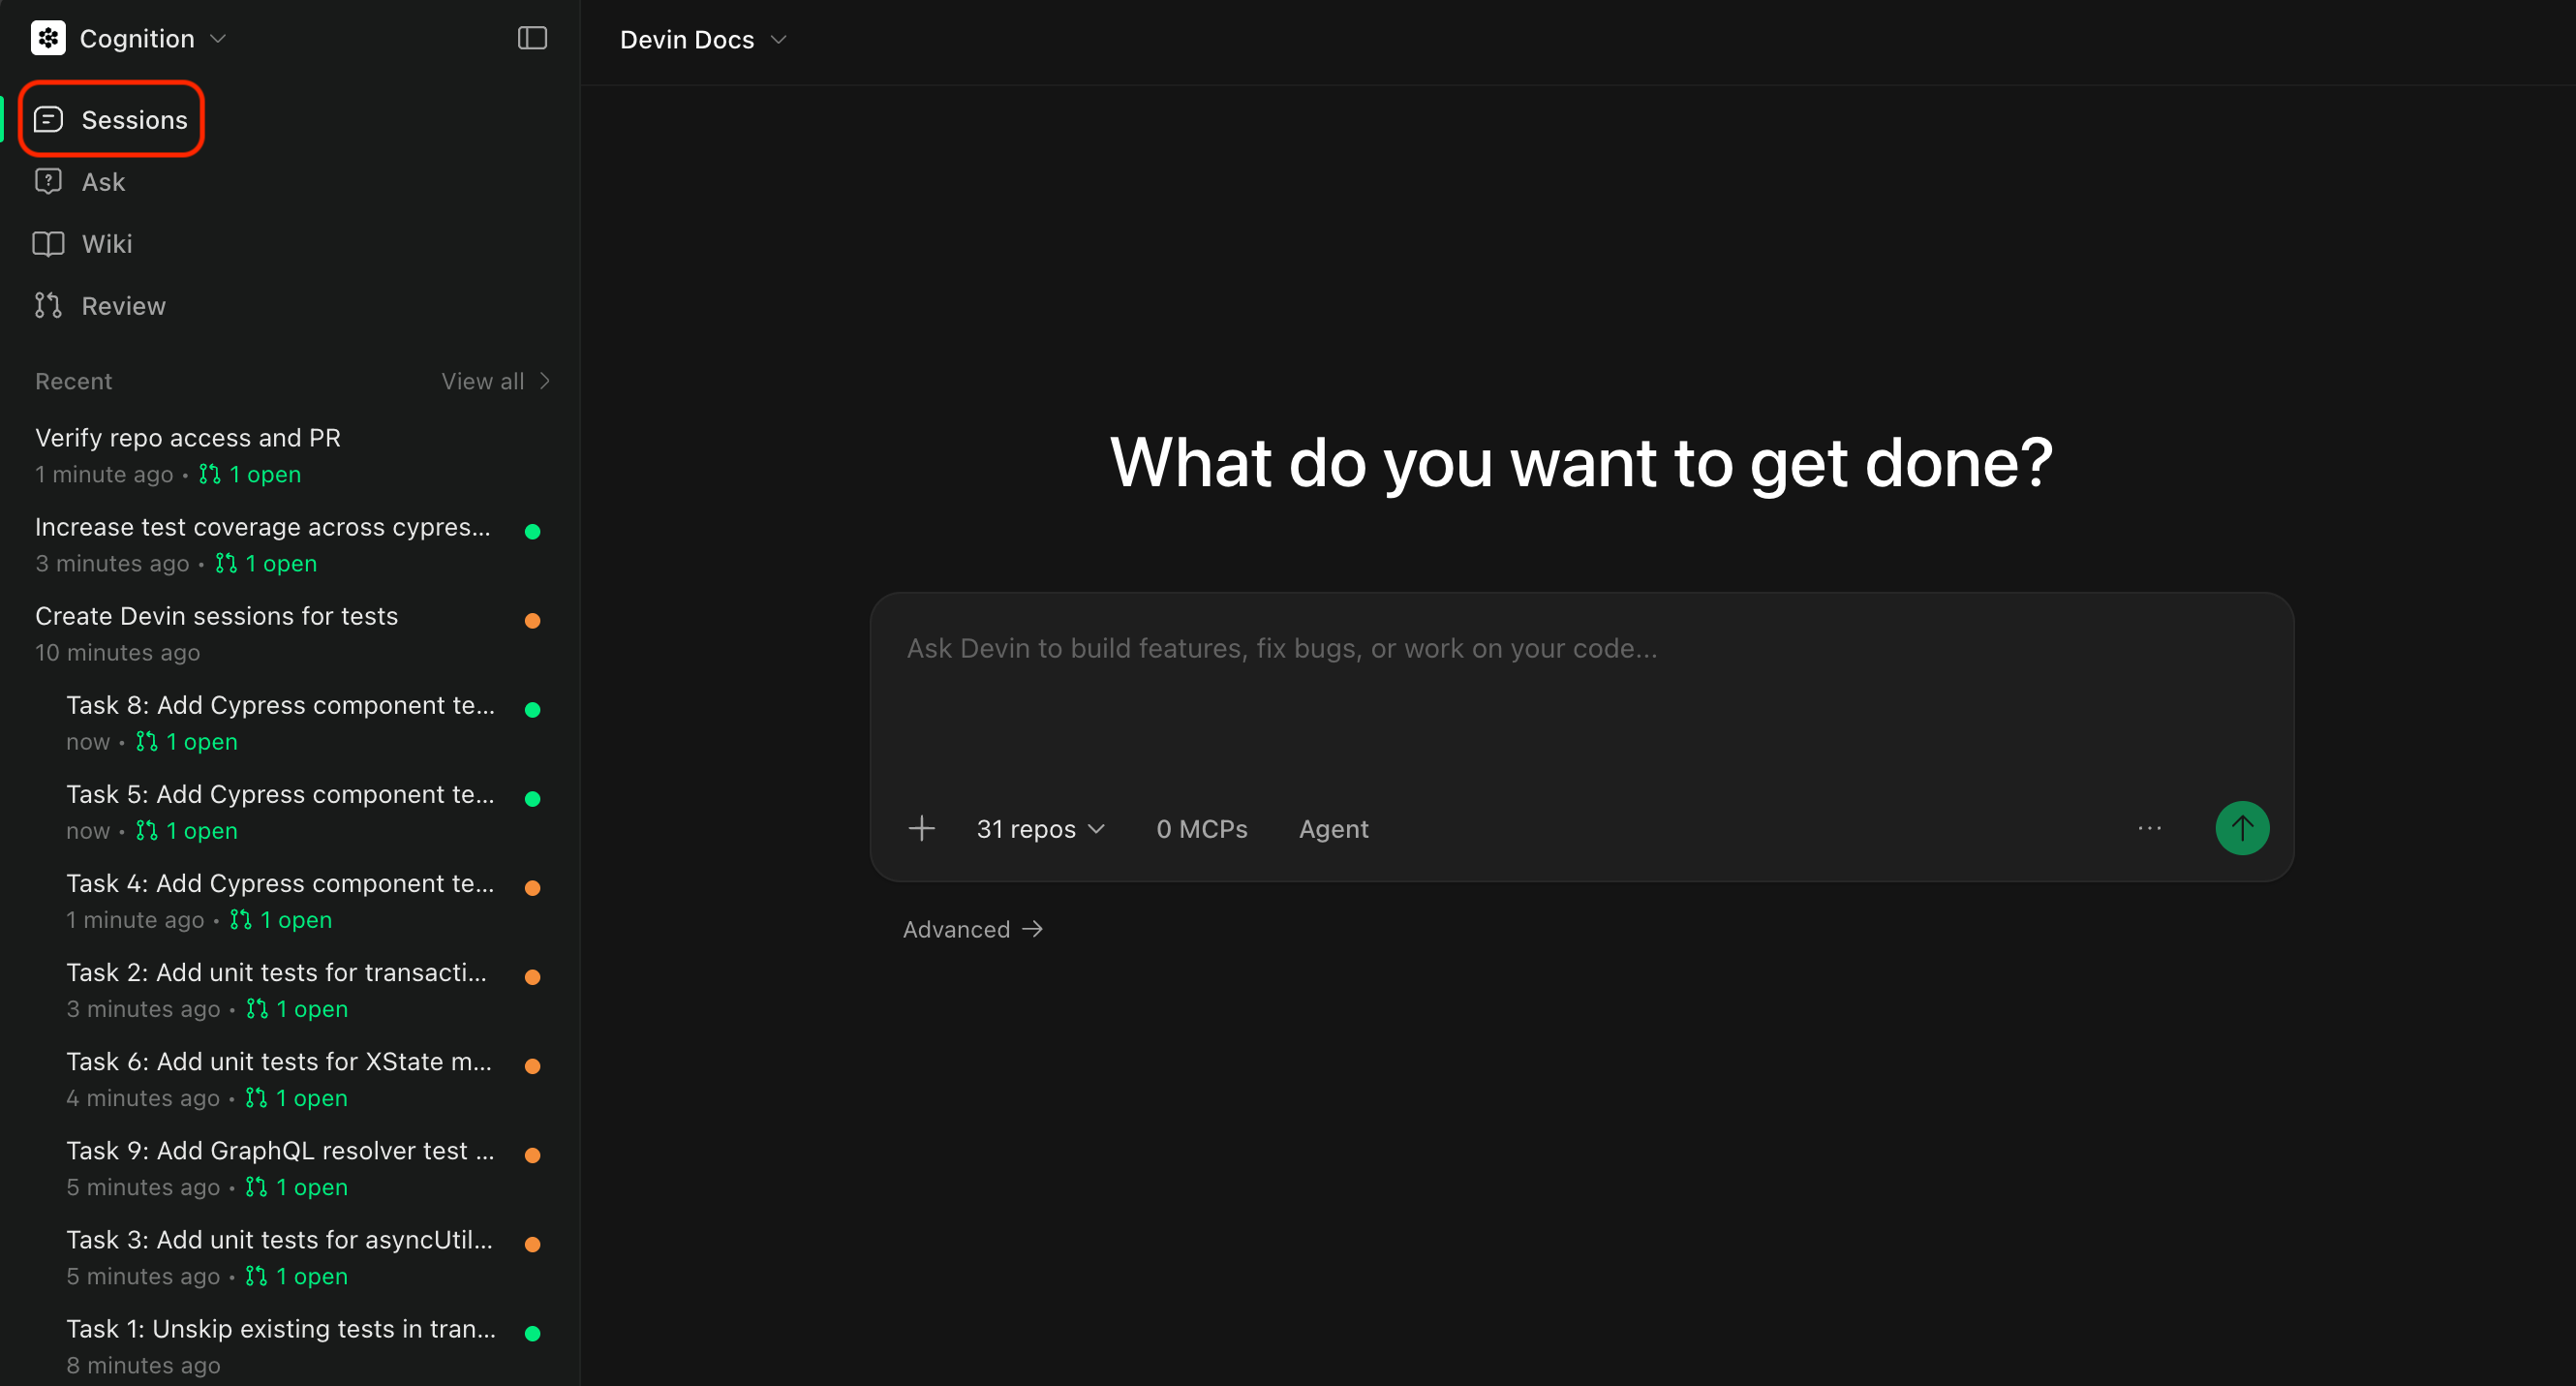
Understanding the Devin Session Page
When you start a new session, you’ll see two primary modes: Ask and Agent.Unless you already have a fully scoped plan, we recommend starting with Ask to work with Devin on constructing a plan, then moving to Agent mode to execute it.
Ask Mode
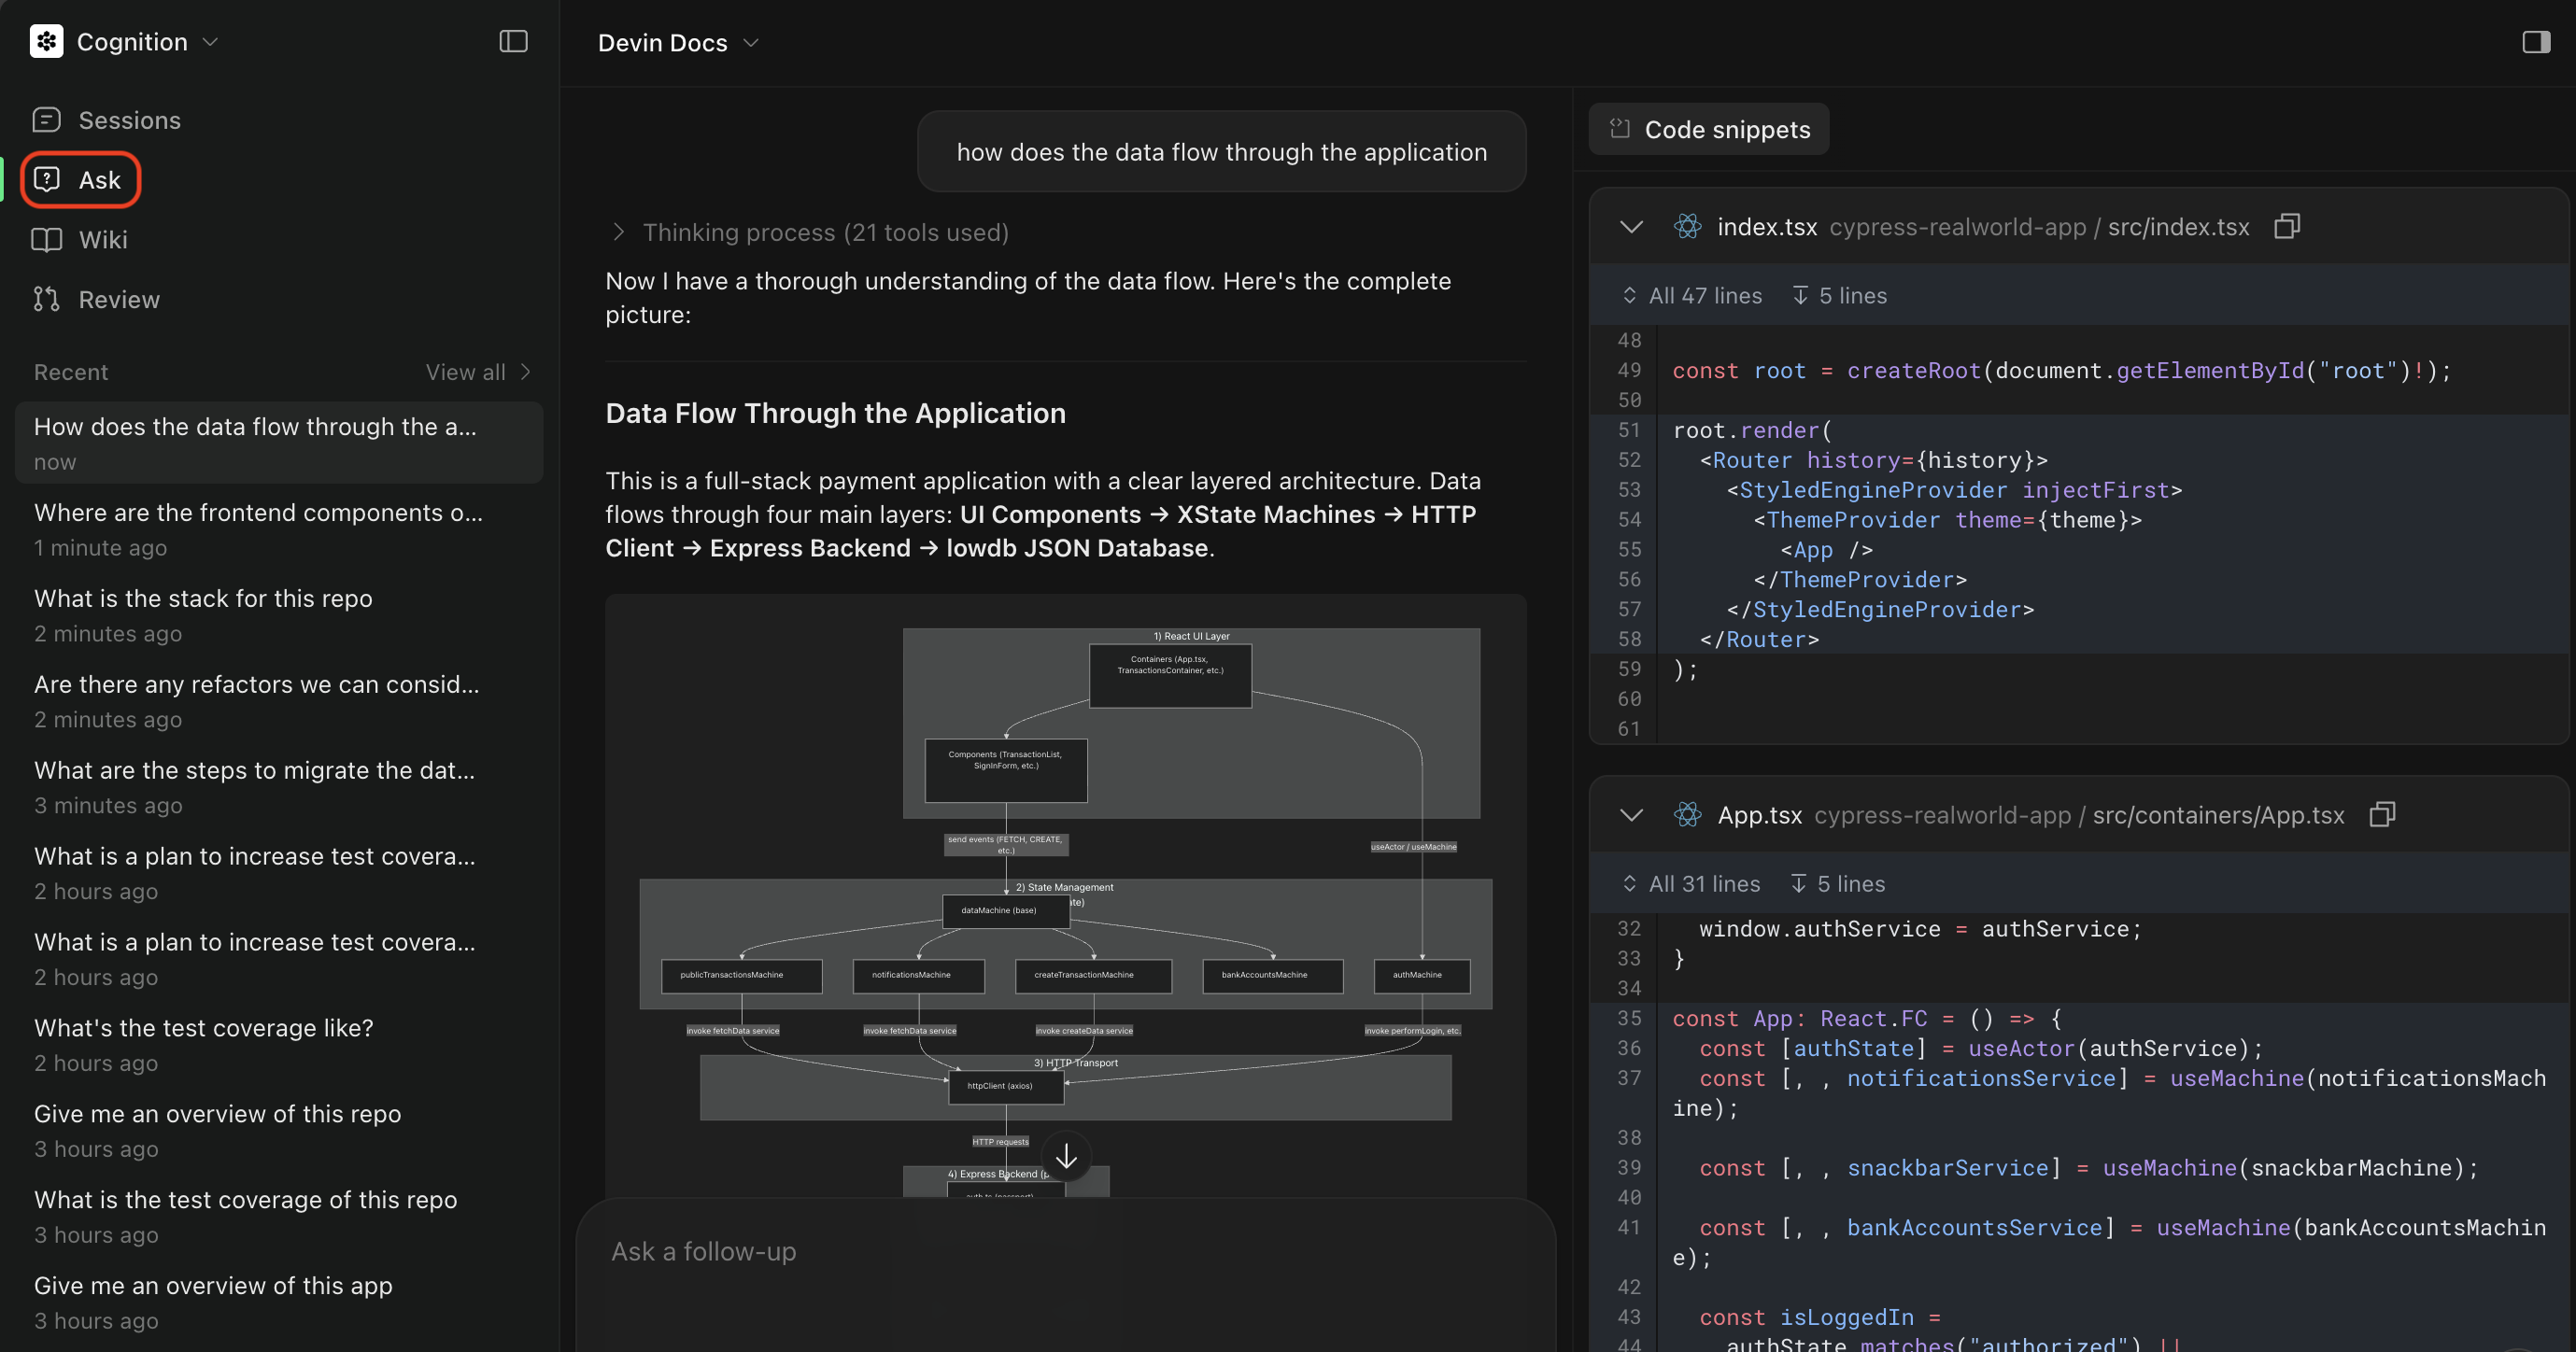
Ask Devin is a lightweight mode for exploring your codebase and planning tasks with Devin, without making changes to the actual code. Ask Devin now supports both asking questions and planning:- Ask questions about how your code works. Uses advanced code search to produce detailed, accurate, and well-cited answers.
- Plan tasks by scoping and planning work before implementation. Devin generates context-rich prompts for Agent sessions.
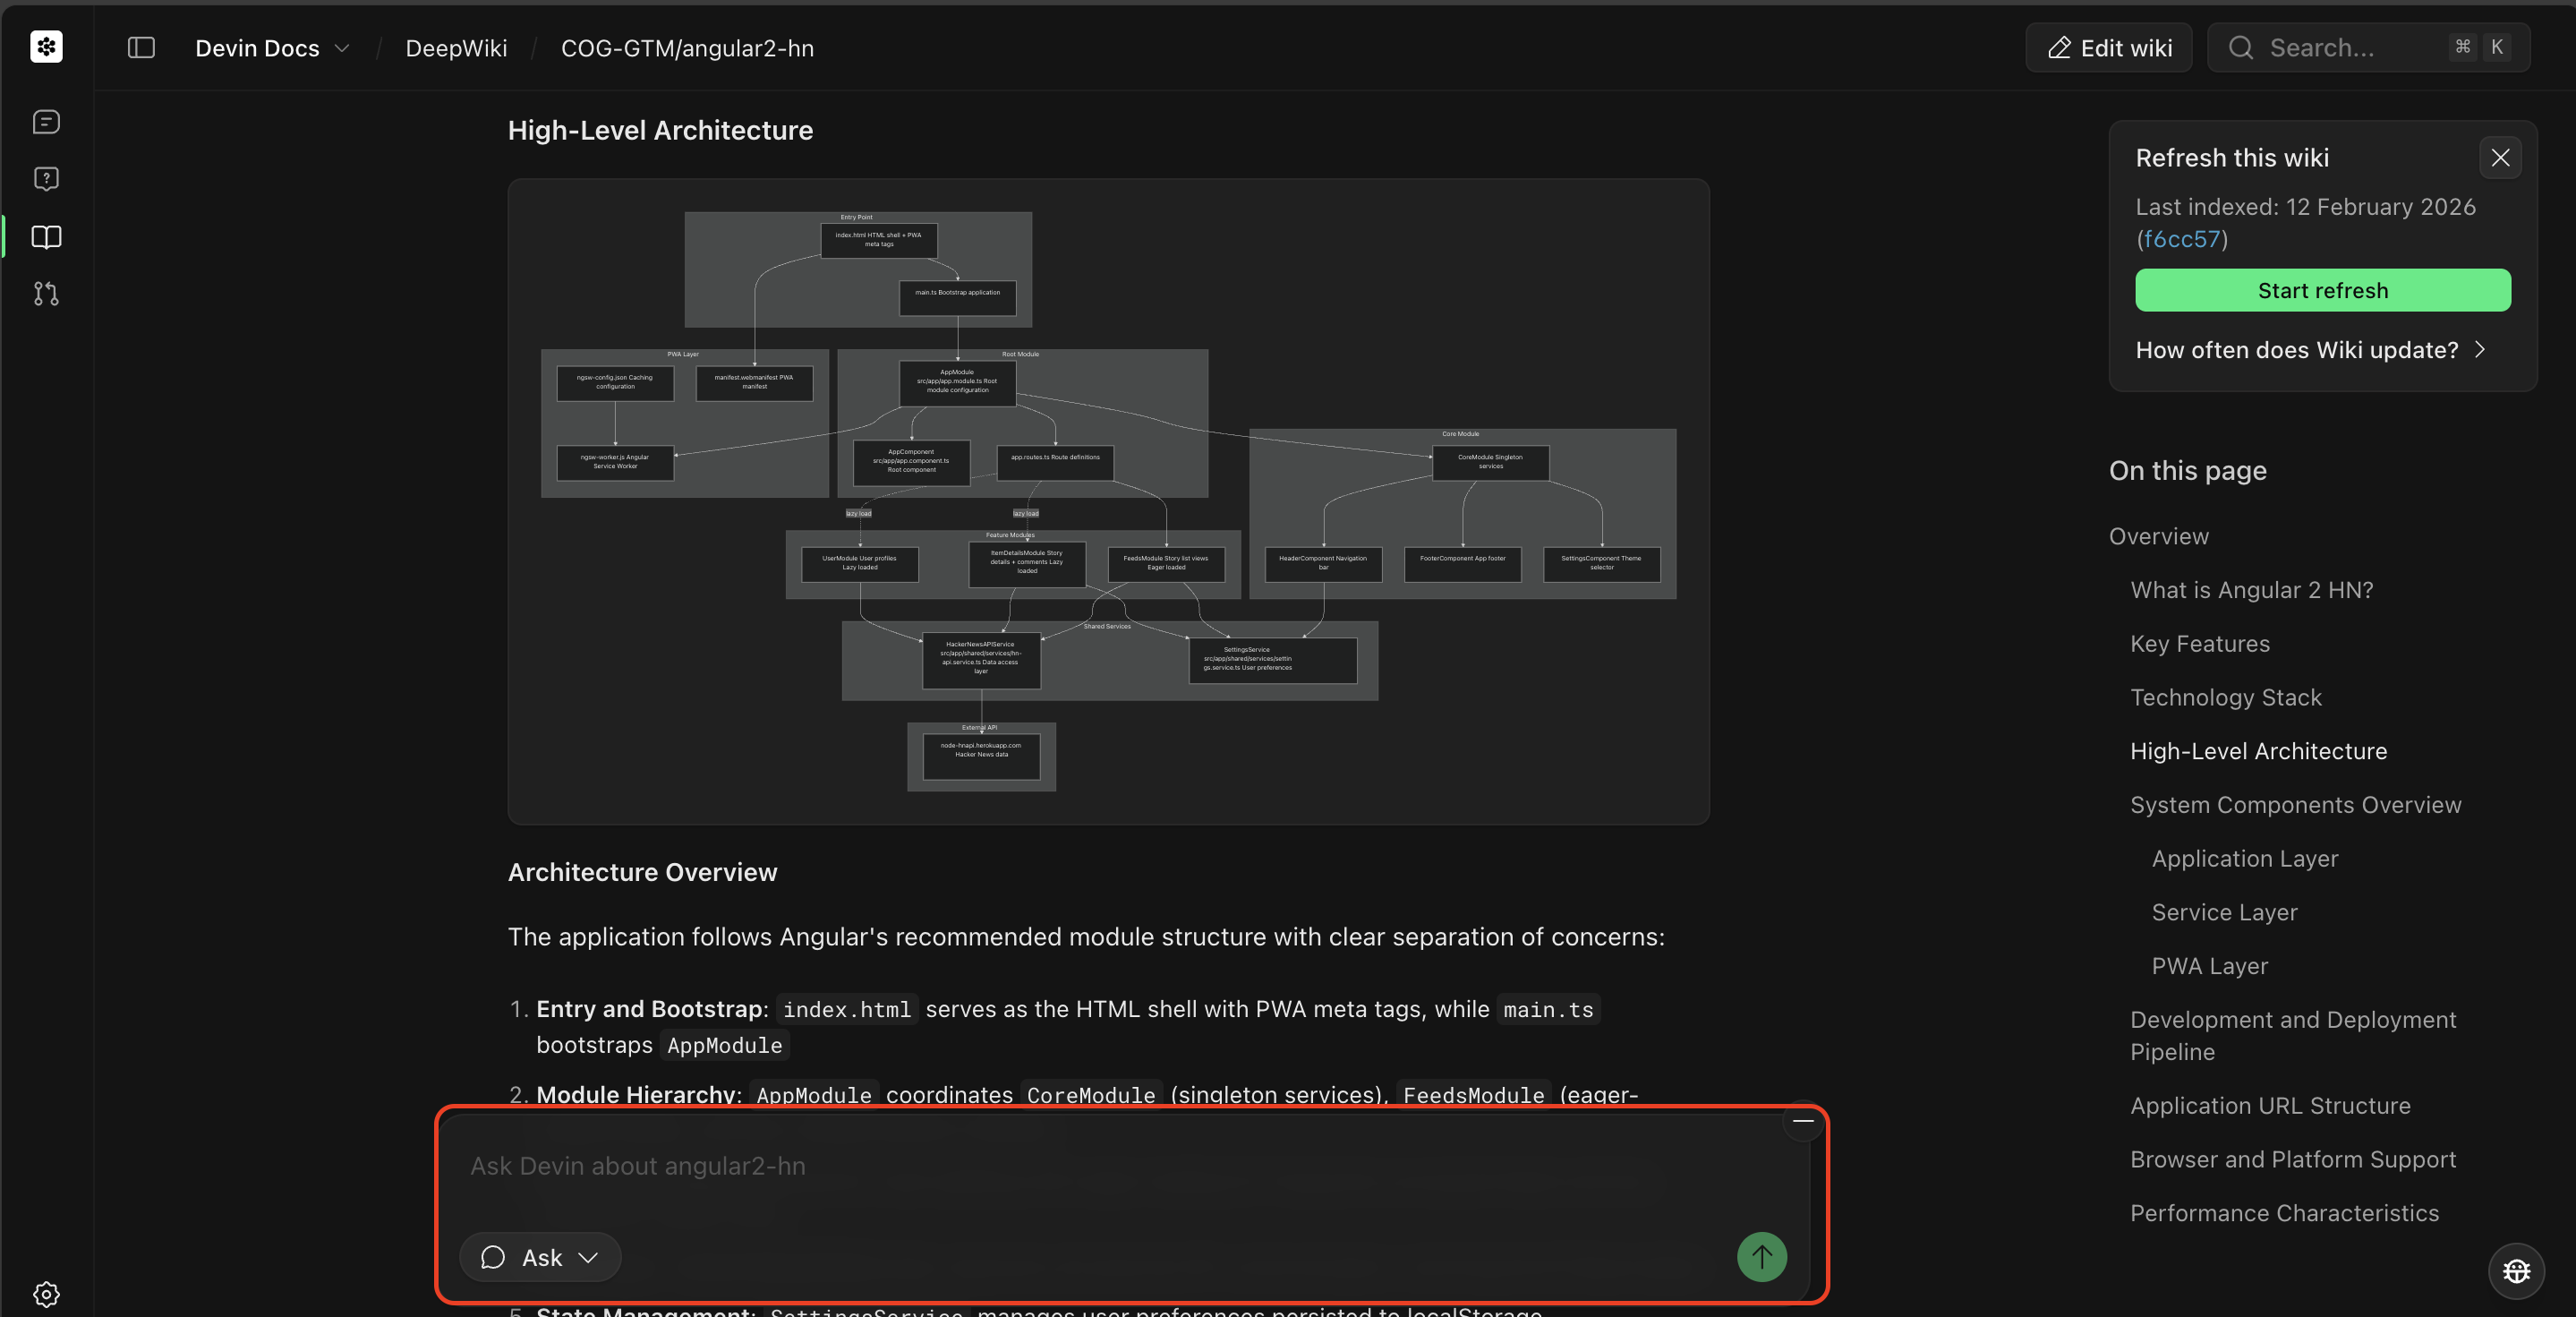
Triggering Ask Mode
You can trigger Ask mode from the main page or from a DeepWiki page. For Ask mode from the main page, toggle to Ask mode and select the repository/repositories you want to ask about.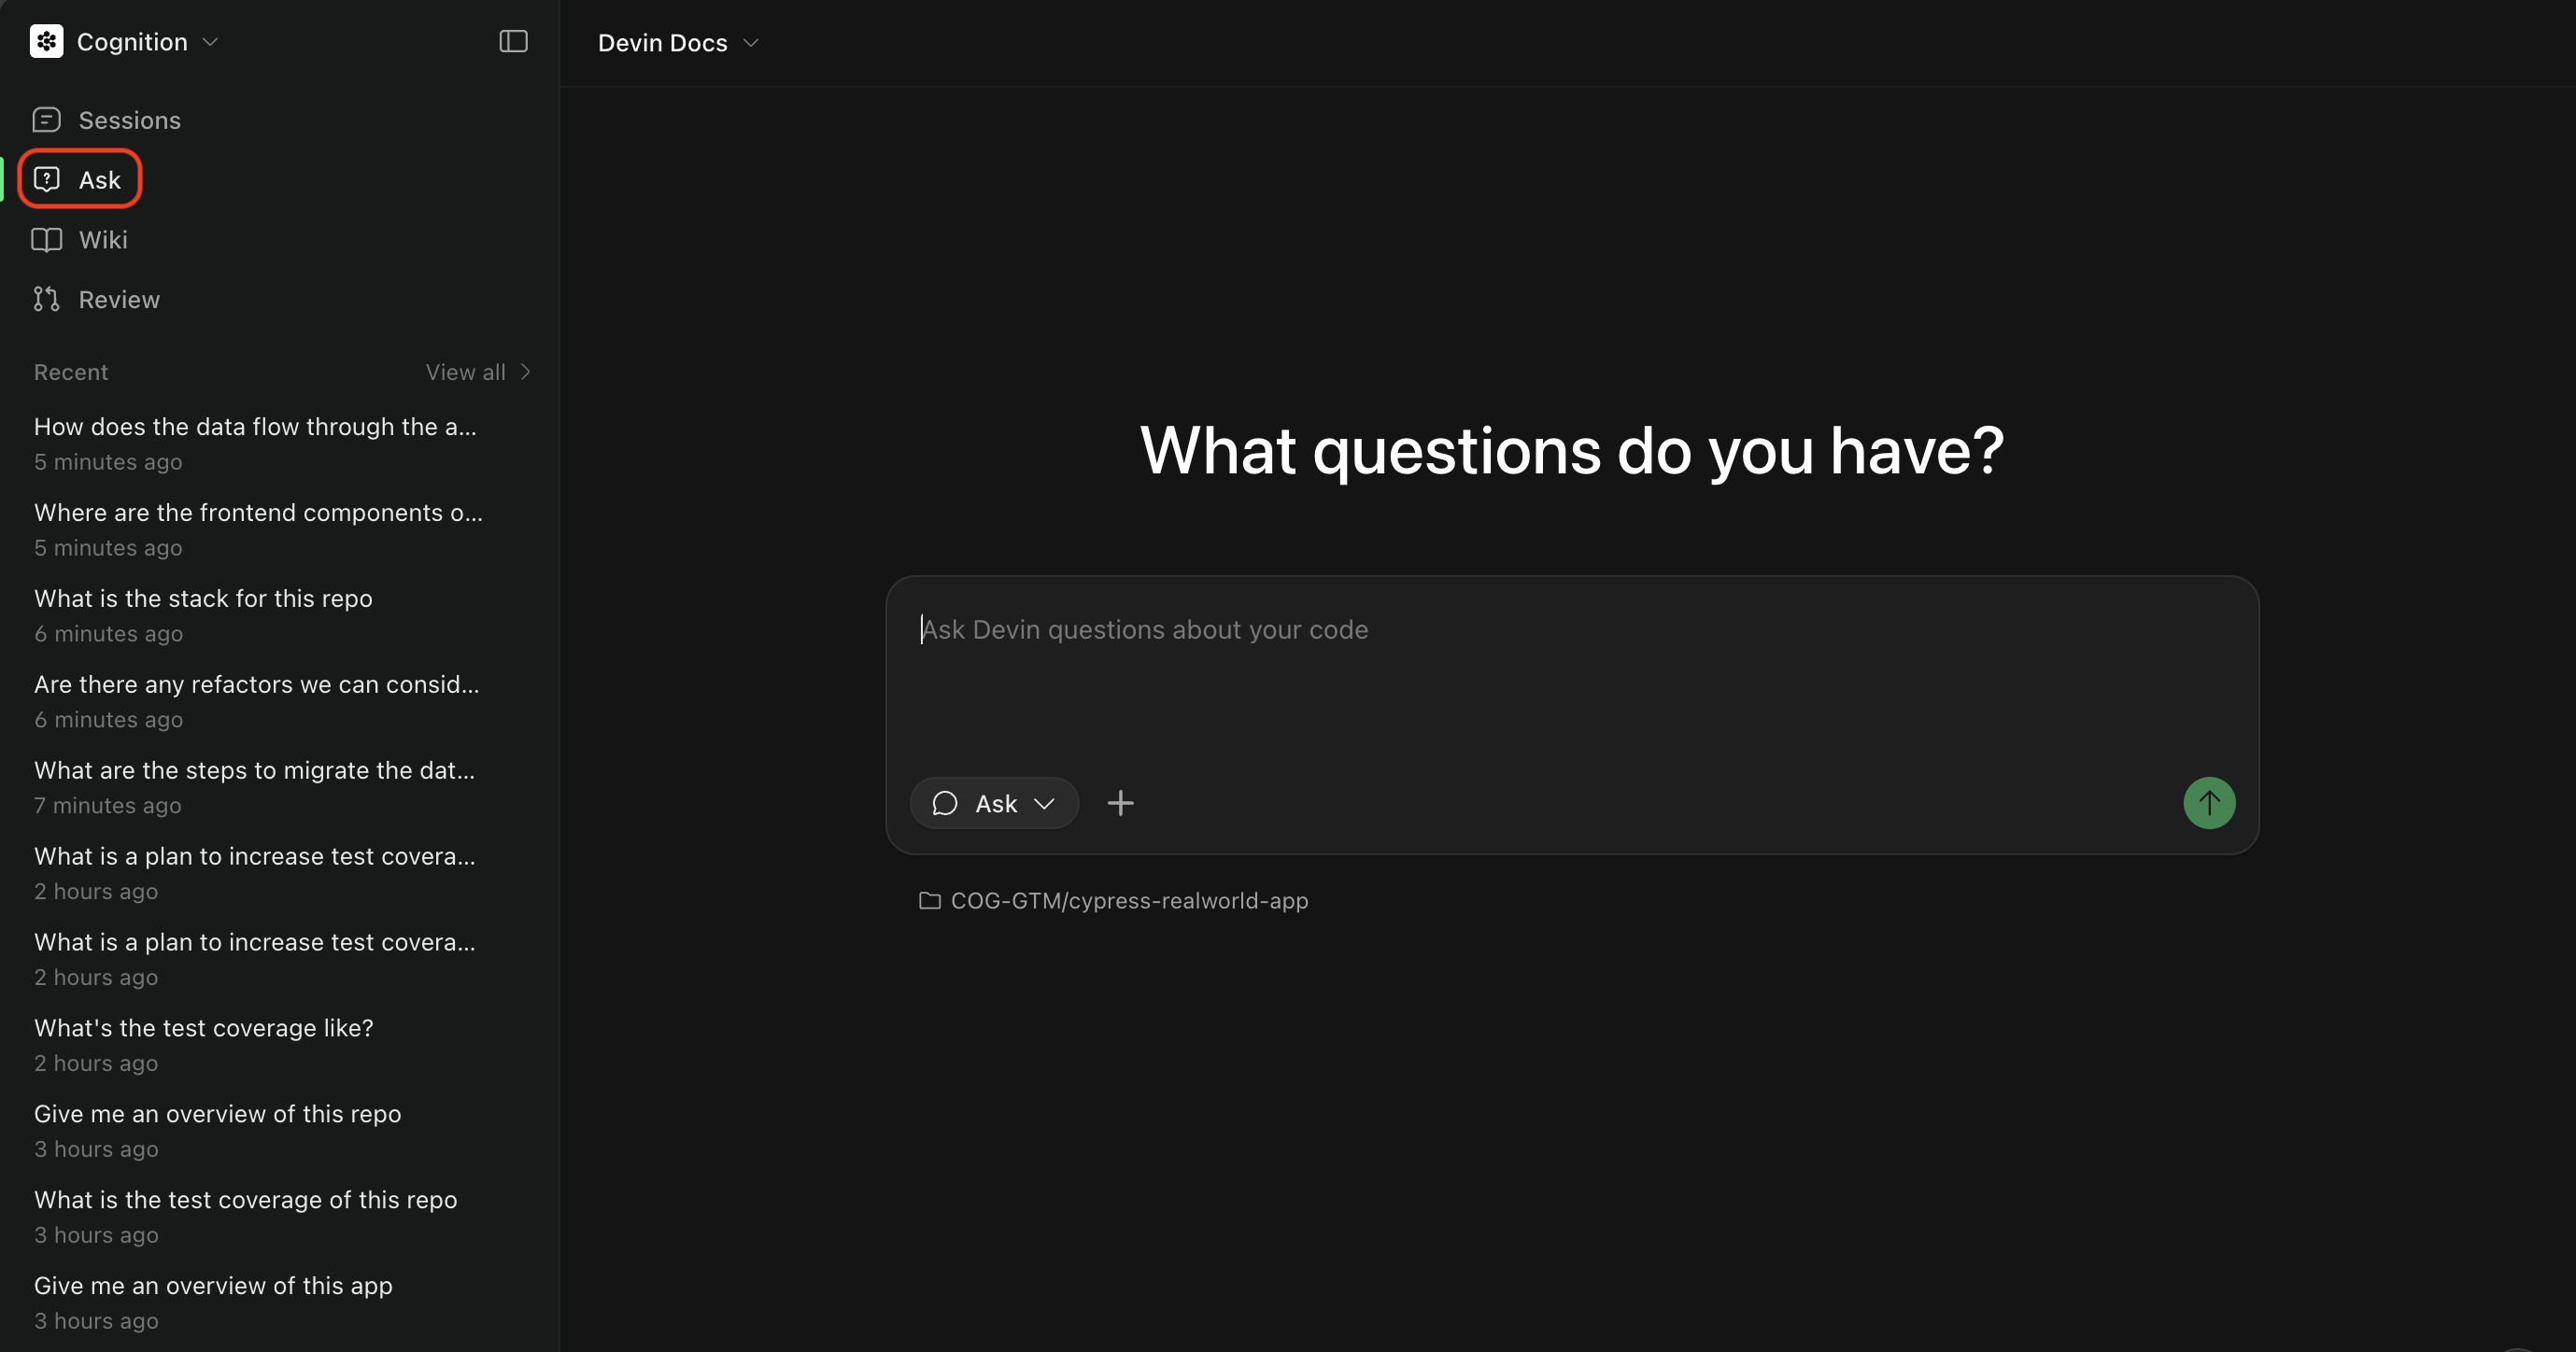
Agent Mode
Agent mode is Devin’s full autonomous mode where it can write code, run commands, browse the web, and complete complex tasks end-to-end. Use Agent mode when you’re ready to:- Implement features or fix bugs
- Create pull requests
- Run tests and debug issues
- Perform multi-step tasks that require code changes
Triggering Agent Mode
You can trigger Agent mode from the main page or from an Ask Devin session. When a session is started from Ask Devin, its status is displayed in the Ask Devin conversation so you can track progress. For tasks that are not fully scoped, we recommend:- Start with Ask mode to plan out the task
- Construct a Devin Prompt, which will draw from your Ask session to create a scoped plan
- Click Send to Devin to move to Agent mode and execute the task
Selecting a Repository
Select the repository you want Devin to work with. Click the repository selector to see all repositories that have been added to Devin’s machine.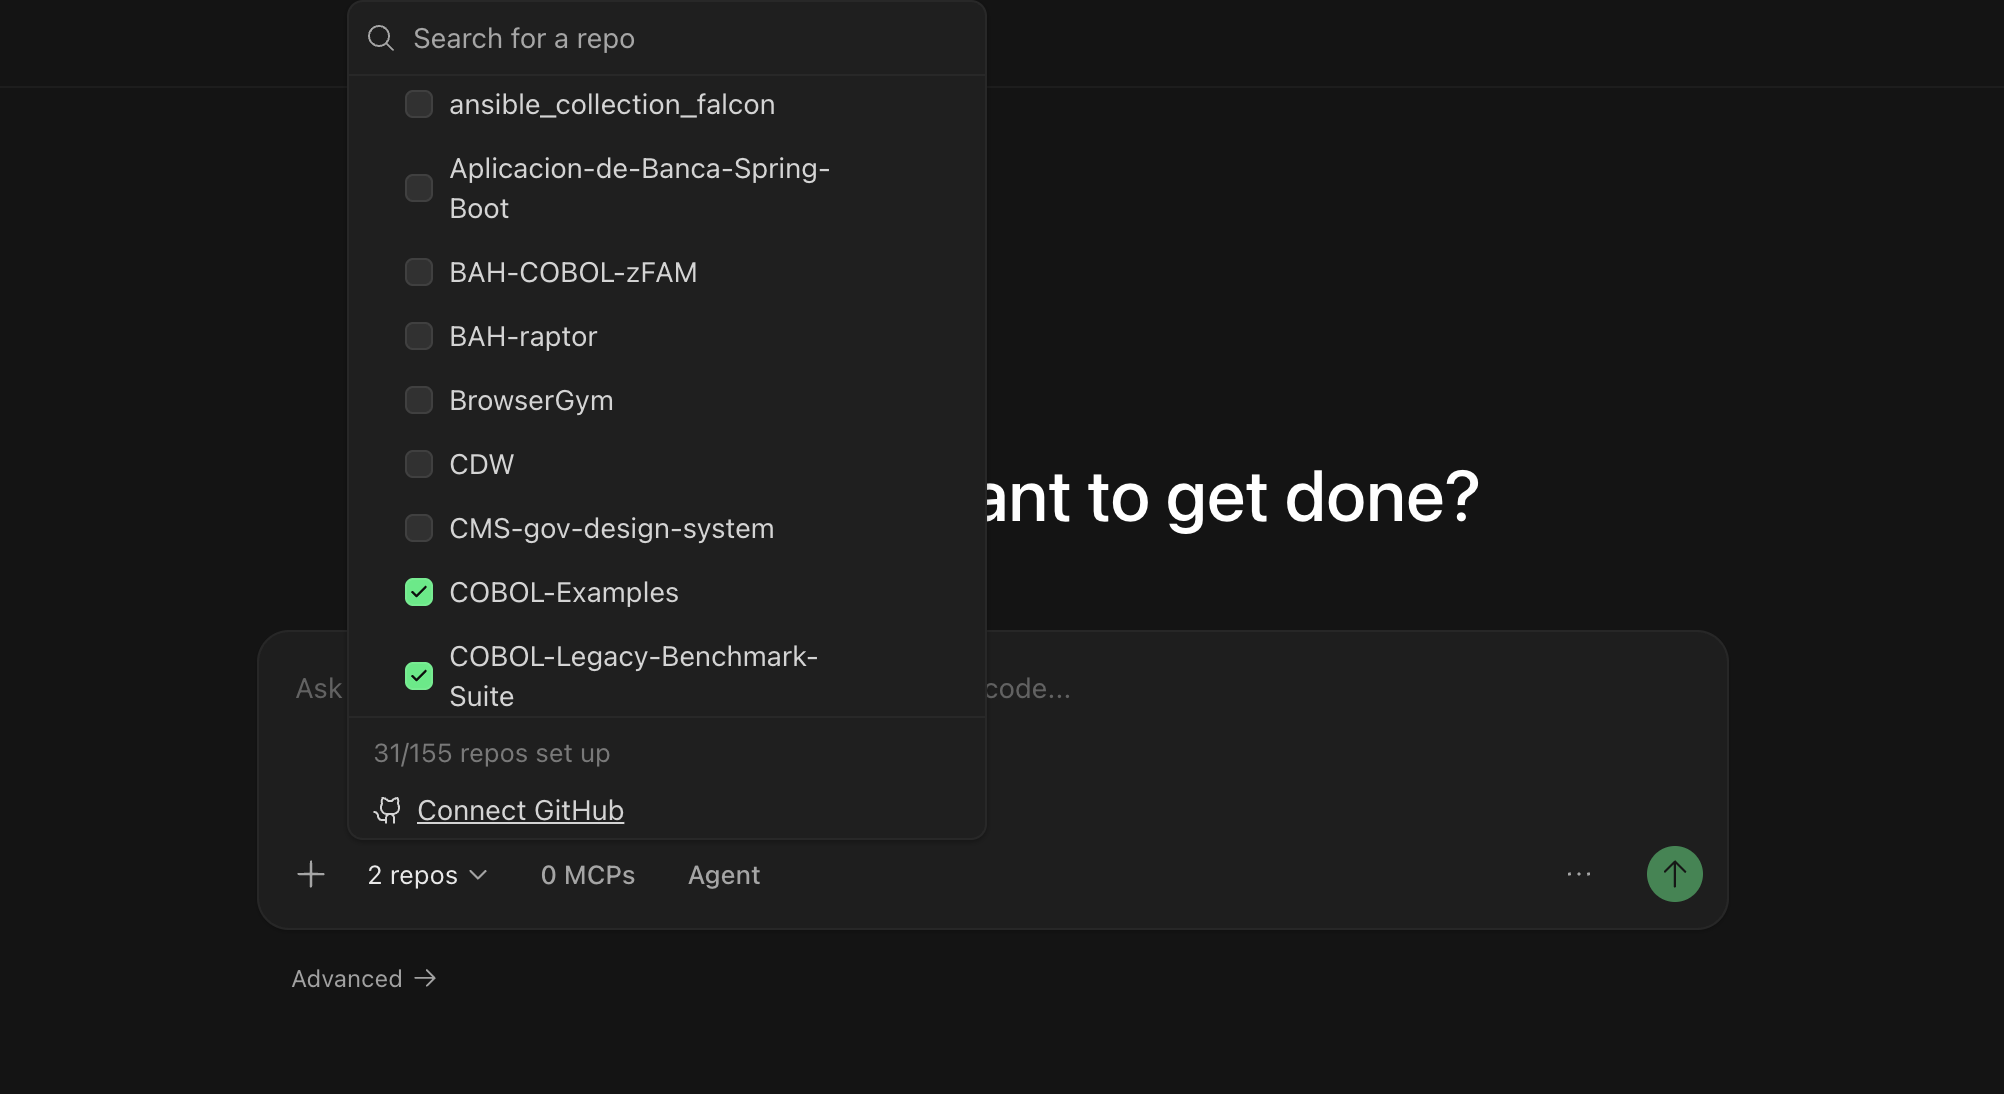
- Has access to your codebase and can make changes
- Uses the correct branch as a starting point
- Can create pull requests to the right repository
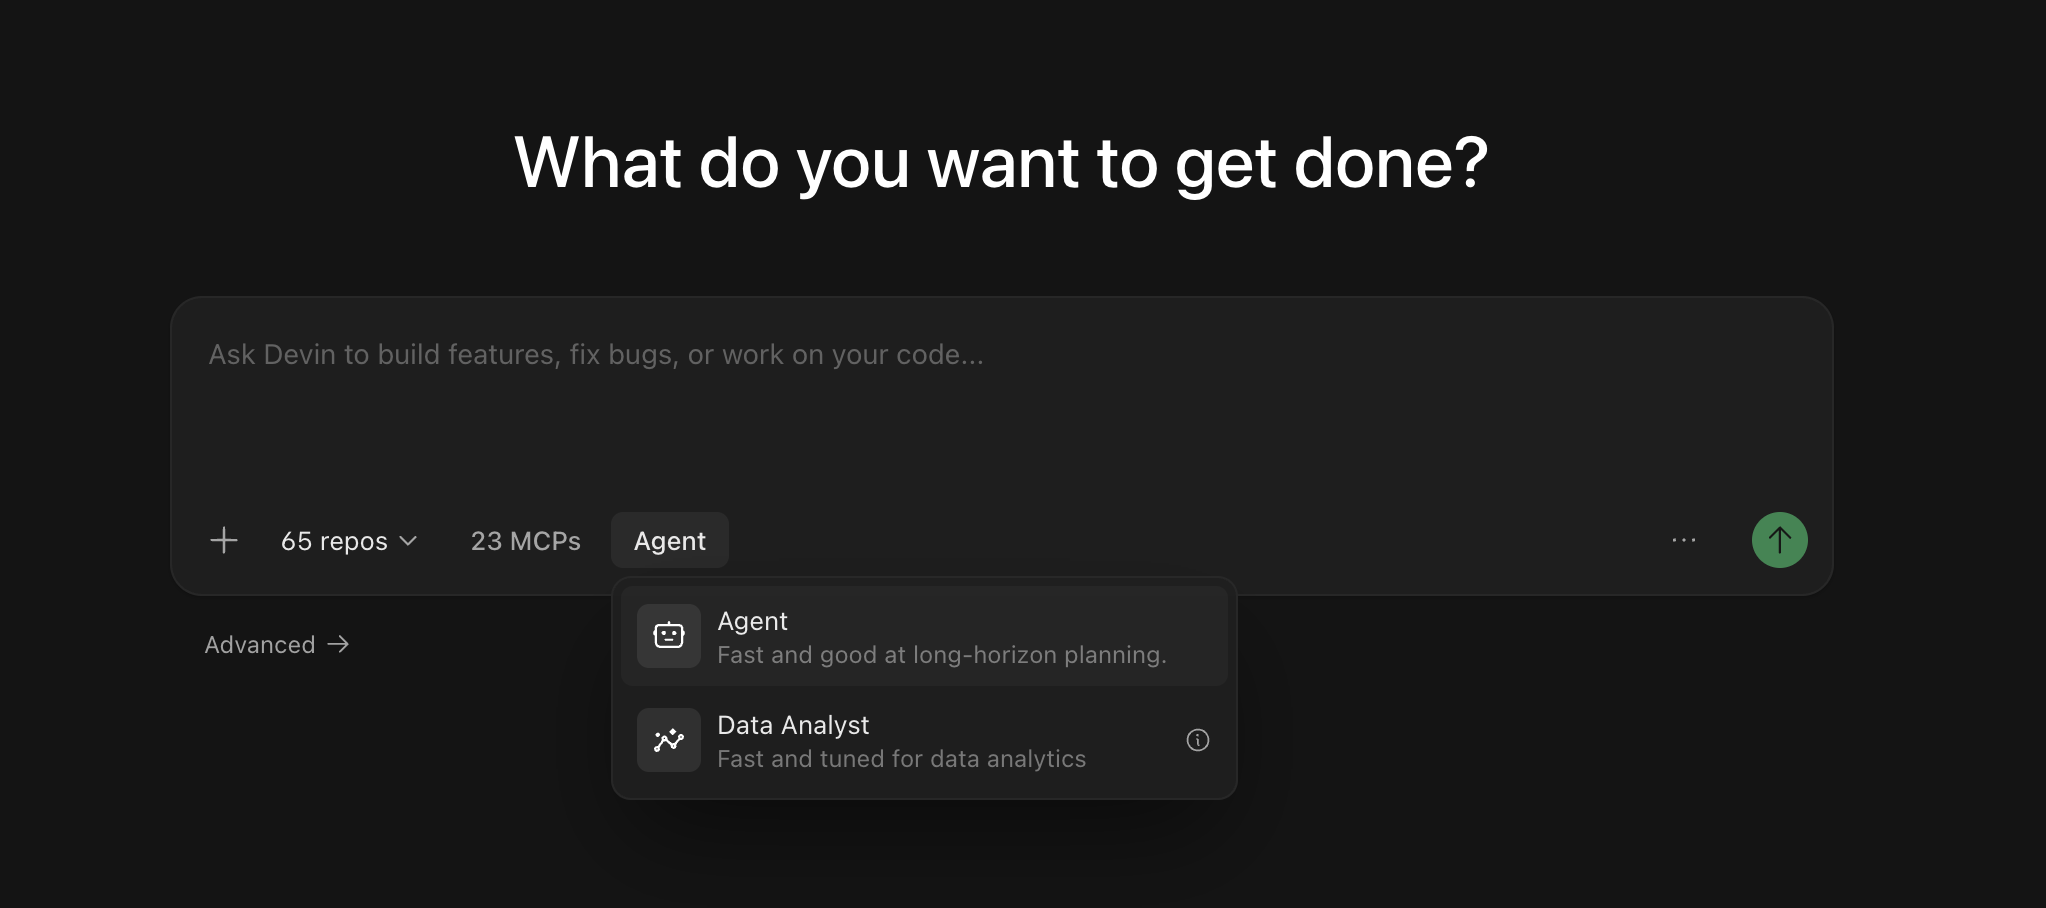
Selecting an Agent
You can choose which agent configuration Devin uses for your session. Different agents may have different capabilities or be optimized for specific types of tasks. Available agents include:- Devin (default) — A general-purpose AI software engineer for building features, fixing bugs, refactoring code, and most development tasks.
- Fast Mode — An optimized mode for quick, well-scoped tasks.
- Dana — A data analyst agent optimized for querying databases, analyzing data, and creating visualizations.
You don’t need to start a new session to change modes. You can switch the agent mid-session using the agent toggle next to the message input on the session page — the change takes effect with your next message. In Slack, you can switch modes mid-session by starting a message with
!ultra, !fast, !lite, !fusion, !swe, or !normal (see Slack mode keywords).Using @ Mentions
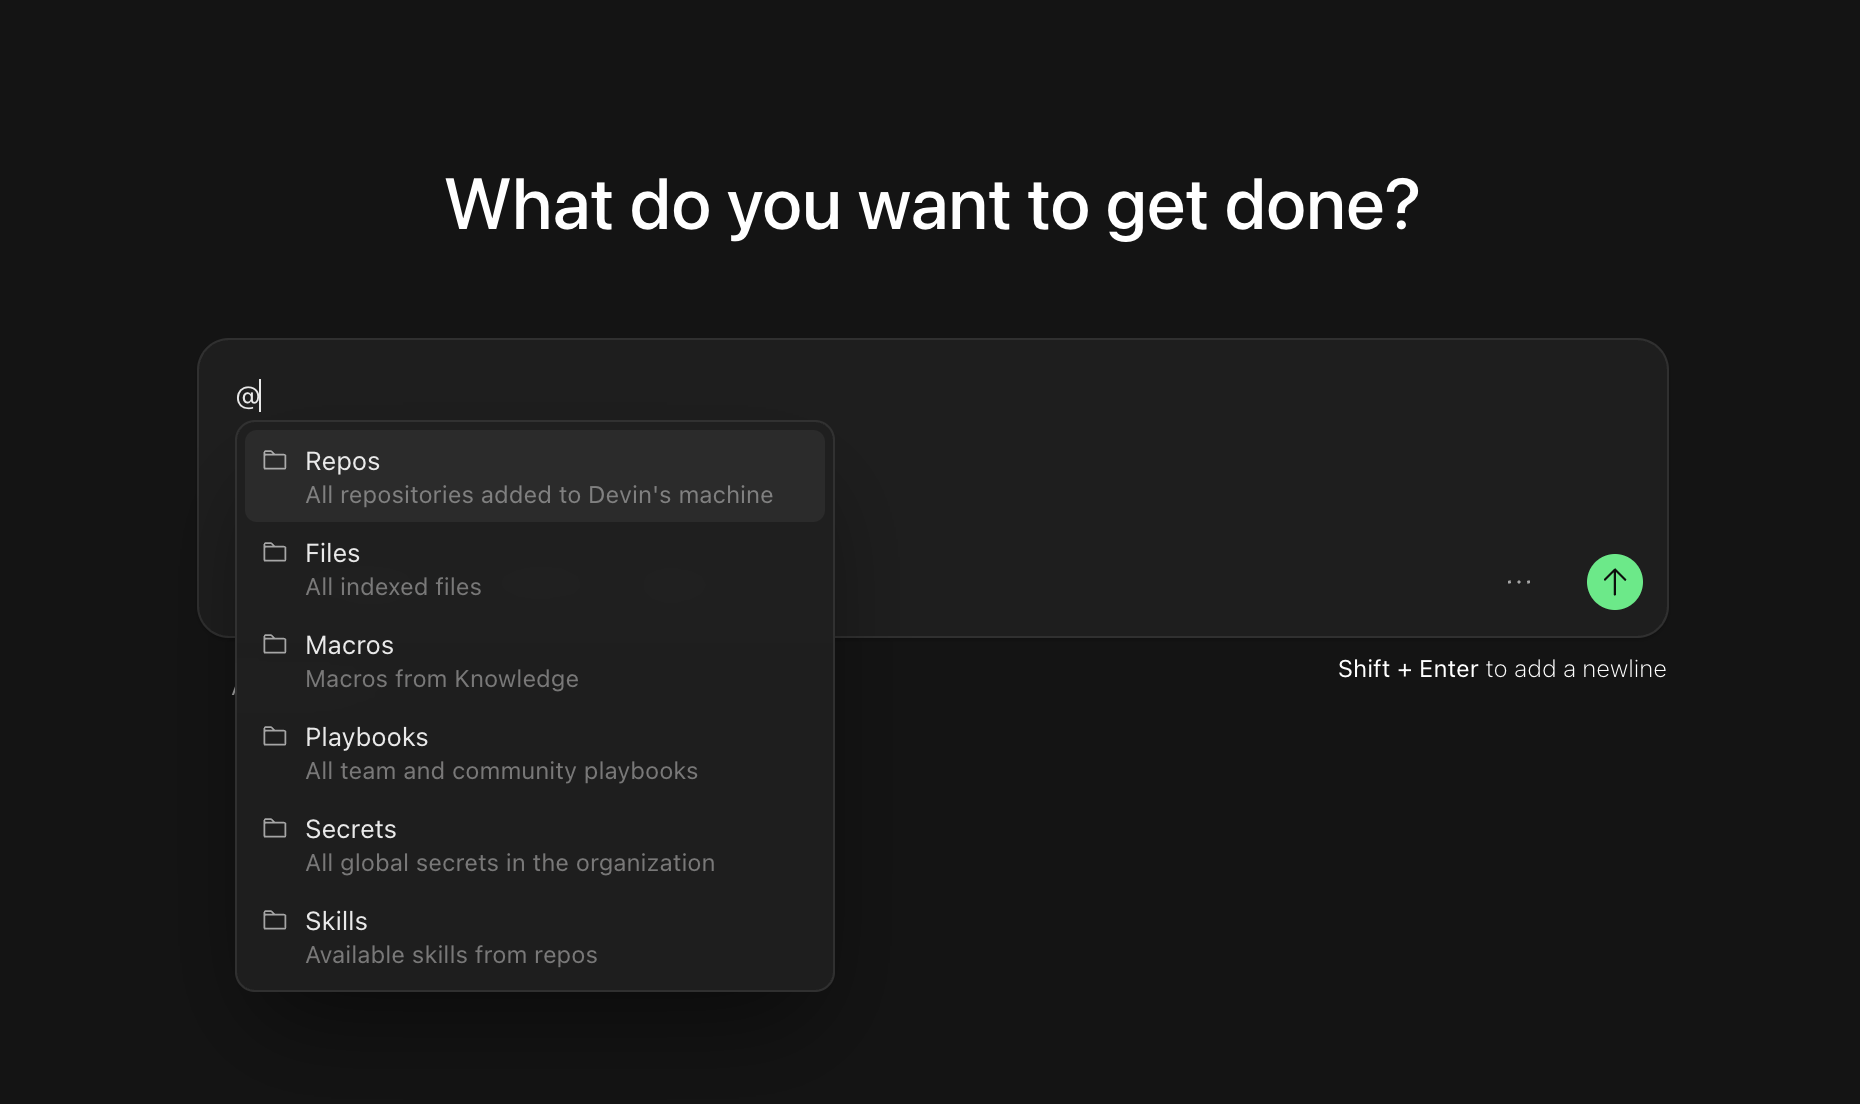
Use@ mentions to give Devin specific context about files, repositories, or other resources. When you type @ in the chat input, you’ll see a dropdown of available mentions:
- @Repos - Reference a specific repository
- @Files - Reference a specific file in your codebase
- @Macros - Reference a macro for a Knowledge entry
- @Playbooks - Reference a team or community playbook, which are detailed prompt templates that can be used to guide Devin’s behavior
- @Skills - Reference a skill defined in your repository (reusable procedures committed as
SKILL.mdfiles) - @Secrets - Reference a specific secret (e.g. API keys, credentials, etc.) from Devin’s session manager
- @Sessions - Reference a previous Devin session for context
Scoping Your First Session
Start with tasks that have clear success criteria and provide Devin with the context it needs — just as you would when handing off work to a teammate. As you get comfortable, try progressively more complex tasks. We’ve seen users work with Devin on everything from fixing small bugs to targeted refactors to large-scale migrations and building entire features from scratch.First-time Prompt Ideas
Adding a new API endpoint
Adding a new API endpoint
Small frontend features
Small frontend features
Write unit tests
Write unit tests
Migrating or refactoring existing code
Migrating or refactoring existing code
Updating APIs or database queries
Updating APIs or database queries
Create a quick PR (we recommend using this prompt in a Playbook)
Create a quick PR (we recommend using this prompt in a Playbook)
Browse Use Cases
Explore practical examples across engineering workflows — each includes prompts you can try immediately.
After Your Session
Once Devin finishes, open Session Insights and click Generate Analysis — you’ll get a timeline of what happened, actionable feedback, and an improved prompt you can use for similar tasks in the future.Next Steps
Once you’re comfortable with basic sessions, explore these resources to get more out of Devin:Integrations
Connect Devin to your existing tools like GitHub, Slack, Jira, and more.
Playbooks
Learn how to use Playbooks to implement tasks.
Knowledge
Add knowledge to help Devin understand your team’s practices.