> ## Documentation Index
> Fetch the complete documentation index at: https://docs.devin.ai/llms.txt
> Use this file to discover all available pages before exploring further.
# Bitbucket
> 直接在 Bitbucket 仓库中与 Devin 协作
## 为什么要将 Devin 与 Bitbucket 集成?
将 Devin 与你的 Bitbucket 仓库集成后,Devin 就可以创建拉取请求(Pull Request)、读取并回复你的 PR 评论,并与你的团队高效协作。这样,Devin 就能成为你工程团队中真正的协作伙伴。
## 前置条件
在设置 Bitbucket 集成之前,我们建议:
* **专用服务账号** - 为 Devin 单独创建一个新的 Bitbucket 账号(例如 `devin@yourcompany.com`),而不是使用现有用户账号,以便更规范地进行访问管理并保留清晰的审计记录
使用专用服务账号可以更轻松地跟踪 Devin 的活动、管理权限,并在整个组织中遵循安全最佳实践。
## 设置集成
### Bitbucket Cloud
**设置非常简单!** 按以下步骤开始:
1. 为 Devin 专门创建一个新的 Bitbucket 账户 (就像你创建个人账户那样) 。在集成过程中,你将使用这个账户,而不是你的个人账户。
2. 在你的 Devin 账户中,进入 [Settings > **Connections** > **Bitbucket**](https://app.devin.ai/settings/connections),然后点击“Connect”。
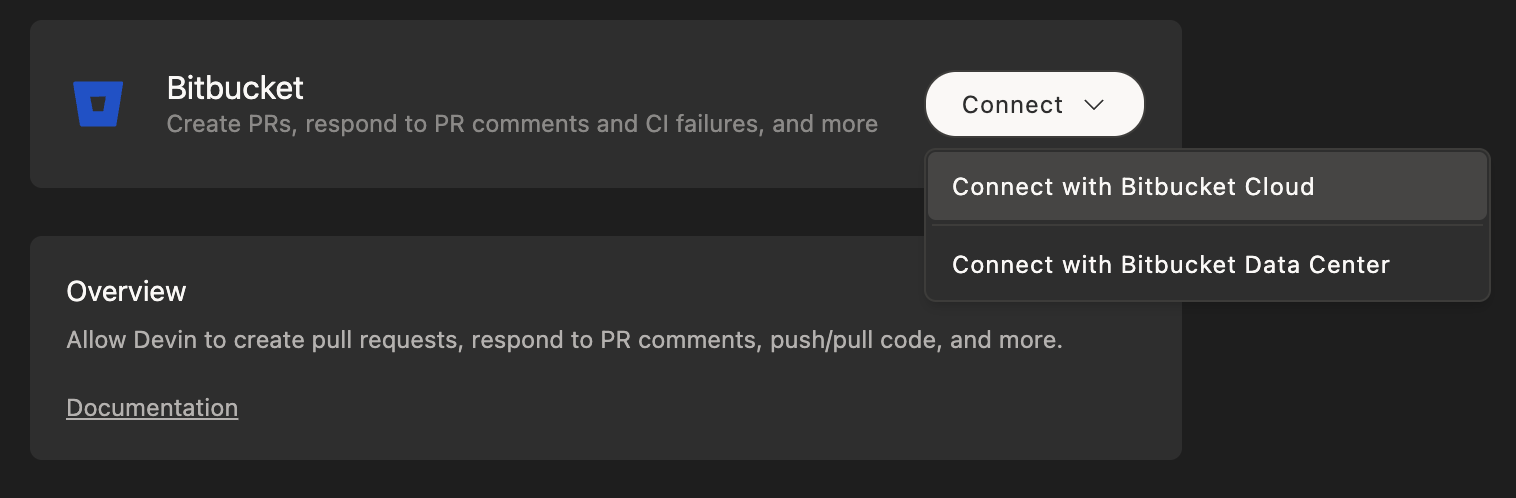 3. 你会被重定向到 Bitbucket,在那里你需要:
* 使用你为 Devin 创建的 Bitbucket 账户登录 (而不是你的个人账户)
* 授予 Devin 访问你的仓库并与之协同工作的必要权限
4. 完成后,你会回到 Devin 的设置页面,在那里你可以确认集成已启用。
3. 你会被重定向到 Bitbucket,在那里你需要:
* 使用你为 Devin 创建的 Bitbucket 账户登录 (而不是你的个人账户)
* 授予 Devin 访问你的仓库并与之协同工作的必要权限
4. 完成后,你会回到 Devin 的设置页面,在那里你可以确认集成已启用。
### Bitbucket Data Center
对于使用 Bitbucket Data Center (自托管) 的组织,请按照以下步骤操作:
1. 在 Bitbucket Data Center 实例中为 Devin 创建一个专用服务账号。
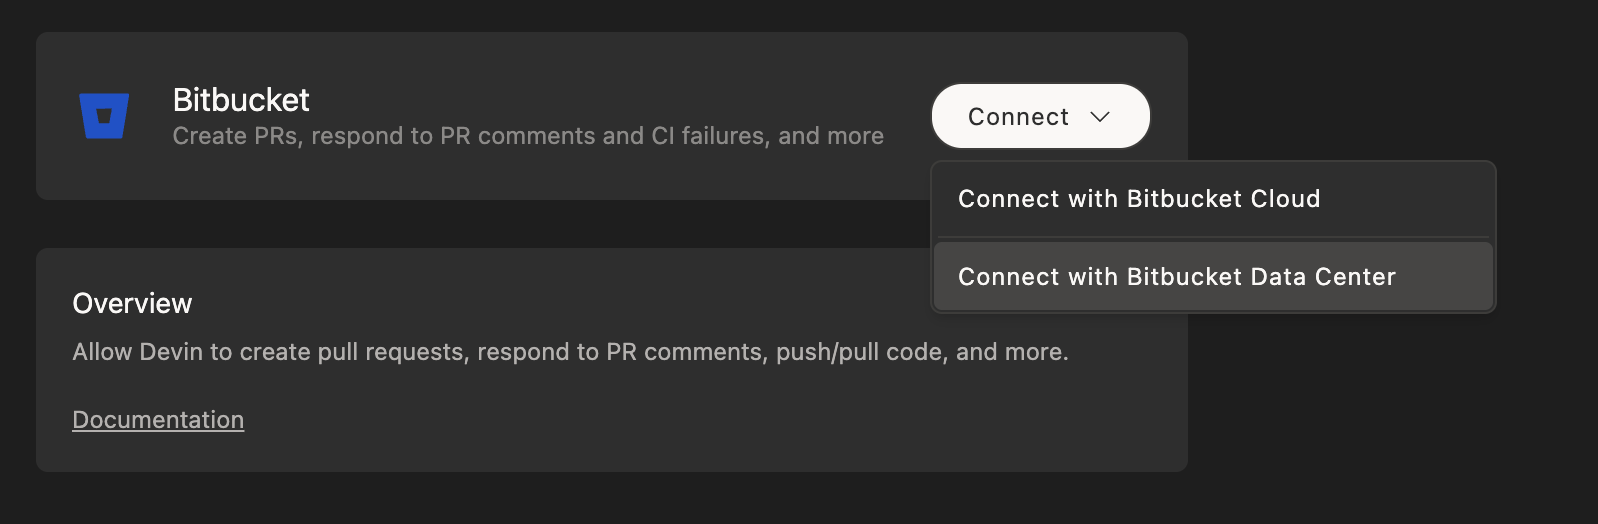
2. 在 Devin 账号中,前往 [Settings > **Connections** > **Bitbucket**](https://app.devin.ai/settings/connections),并选择 “Bitbucket Data Center”。
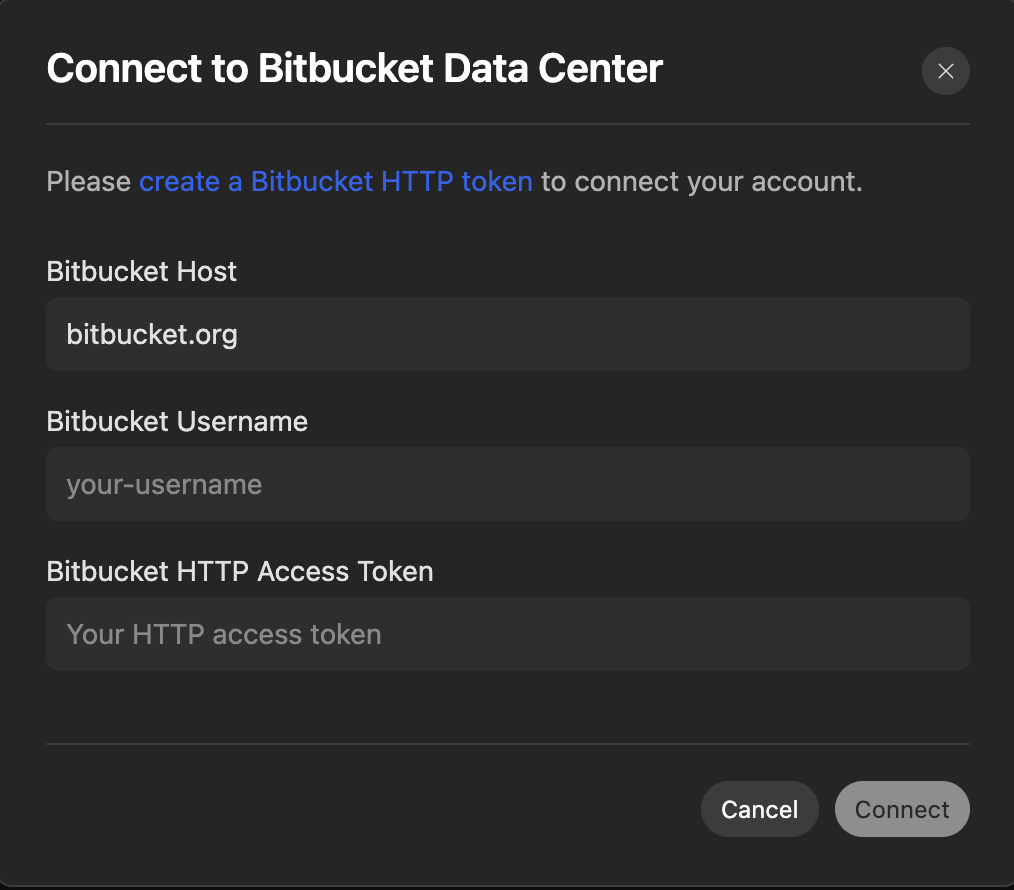
 3. 通过提供以下信息来配置连接:
* Bitbucket Data Center 的 URL
* 该服务账号的身份验证凭据
3. 通过提供以下信息来配置连接:
* Bitbucket Data Center 的 URL
* 该服务账号的身份验证凭据
 4. 在 Bitbucket Data Center 实例中,为该服务账号授予相应的项目和代码仓库权限。
5. 配置完成后,你会在 Devin 设置中看到集成状态显示为已连接。
4. 在 Bitbucket Data Center 实例中,为该服务账号授予相应的项目和代码仓库权限。
5. 配置完成后,你会在 Devin 设置中看到集成状态显示为已连接。
## 将 Devin 与 Bitbucket 集成使用
连接 Bitbucket 之后,在 [Devin's Machine](https://app.devin.ai/machine) 上完成代码仓库的设置。
虽然在你直接提出请求时,Devin 可以查看并处理你在其拉取请求上留下的评论,但 Devin 不会自动唤醒来回复这些评论。
## 最佳实践
* 为 Devin 创建一个专用的 Bitbucket 账户
* 在 main/master 分支上启用分支保护
* 为该服务账户授予合适的工作区和仓库权限