```Adding a new API 端点 theme={null}
创建一个新的 API 端点 /users/stats,返回一个包含用户数量和平均注册年龄的 JSON 对象。
使用我们在 PostgreSQL 中现有的 users 表。
可以参考 statsController.js 中的 /orders/stats 端点,了解我们如何构造响应。
确保新端点纳入 StatsController.test.js 测试套件的覆盖范围。
```
```Small frontend features theme={null}
在 UserProfileComponent 中添加一个下拉菜单,用于显示用户角色列表(admin、editor、viewer)。
使用 DropdownBase 的样式。
当选择某个角色时,调用现有的 API 来设置用户角色。
通过检查所选角色是否更新了数据库中的用户角色来进行验证。请参考你的 Knowledge,了解如何正确进行测试。
```
```Write theme={null}
为 AuthService 的 login 和 logout 方法添加 Jest 测试。
确保这两个函数的测试覆盖率至少为 80%。
使用 UserService.test.js 作为示例。
实现完成后,运行 `npm test -- --coverage`,并确认覆盖率报告中这两个函数的覆盖率均超过 80%。
同时确认在凭据有效和无效两种情况下测试都能通过,并且 logout 能正确清除会话数据。
```
```Migrating or refactoring existing code theme={null}
将 logger.js 从 JavaScript 迁移到 TypeScript。
我们已经有用于验证的 tsconfig.json 和 LoggerTest.test.js 测试套件。
确保编译无错误,并且不要修改现有配置!
迁移完成后,请通过以下方式验证:
1) 运行 `tsc`,确认没有类型错误
2) 运行 `npm test LoggerTest.test.js`,确保所有测试通过
3) 检查代码库中所有现有的 logger 方法调用,确认它们仍然可以正常工作且没有类型错误。
```
```Updating APIs or database queries theme={null}
我们正在从 pg 迁移到 sequelize(参见 https://sequelize.org/api/v6/identifiers)。
请将 UserModel 中的查询更新为使用 Sequelize 方法。
可以参考本代码库中的 OrderModel,了解我们的具体实现方式。
实现完成后,请按以下步骤进行验证:
1) 运行 `npm run test:integration UserModel.test.js`,确认所有集成测试通过
2) 在包含 1000 个用户的测试数据集上检查执行时间,确认查询性能未下降
3) 运行 `npm run test:e2e user-flows.test.js`,验证所有 CRUD 操作仍然能够保证数据完整性
```
```txt Quick PR theme={null}
## Overview
The task is to make a quick pull request to a repository.
Since this is a 'quick' PR, you will not need to run any code or test anything; simply make a PR and the user will handle the testing. Your only responsibility is reading and writing code.
## What's Needed From User
- 用于创建 PR 的代码仓库
## Procedure
### Prepare your workspace
1. Navigate to the relevant repository on your machine (clarify with the user if you can't figure it out).
- Check out the main branch and note down the name of the main branch.
- Checkout to a new branch since you'll be making a pull request. 分支名称必须符合 `devin/-` 的格式。例如 `devin/1700000000-fix-popup`。运行 `git remote -v && git pull && git checkout -b devin/$(date +%s)-{branch-name}`,并将 `{branch-name}` 替换为你想要创建的分支名称。
2. Study the request, codebase, and plan out the changes
- Review the most relevant files and code sections, identifying relevant snippets.
- Inform the user of your plan
### Work on the PR itself
3. Make the code changes
- Don't change anything that wasn't specifically requested by the user
4. Make the PR
- Commit and push the changes and tell the user.
- See advice section for the exact command to make the PR
- Make a pull request & review the pr to make sure it looks OK.
- Ensure all GitHub actions pass successfully & make necessary changes until they do
- Send the PR link to the user and summarize what you changed.
5. Address any feedback from the review; send the PR link again every time you make any changes
- If you need to make updates, just push more commits to the same branch; don't create a new one
## Task Specification
- PR link is included in your messages to the user
- PR was reviewed after creation
- PR does not include any stray changes
- PR does not change anything that wasn't specifically requested by the user
- PR description should include a summary of the changes, formatted as a checklist
- PR description should mention that the code was written without testing, and include - [ ] Test the changes as an item
- PR description should include the following footer: "This PR was written by [Devin](https://devin.ai/) :angel:"
- PR description should include any metadata that the user has provided (e.g. linear ticket tags in the appropriate syntax)
- PR description should not be malformatted (use --body-file instead of --body if the newlines are garbled!)
## Forbidden Actions
- Do NOT try to access github.com through the browser, you will not be authenticated.
- NEVER force push on branches! Prefer merging over rebasing so that you don't lose any work.
- Do NOT push directly to the main branch.
## Advice and Pointers
- Double check the name of the main branch (which could be `main` or `master`) using `git branch`.
- For repos with CI/CD on github actions, you can check build logs using the gh cli. if you're asked to fix a build/fix lint, you should start by looking at recent build logs
- Check `git status` before committing or adding files.
- Use `git diff` to see what changes you have made before committing.
- If you're updating an existing repo, use `gh cli` to make pull requests.
- Send the PR link to the user every time you update & ask them to re-review so that it's convenient for them
- You should already be authorized to access any repositories the user tells you about. If not, ask the user for access.
```
如果你想进一步了解 Devin 能做什么以及如何实现这些能力,请查看我们的**使用场景**。
探索工程工作流中的实用示例——每个示例都包含可以立即尝试的提示词。
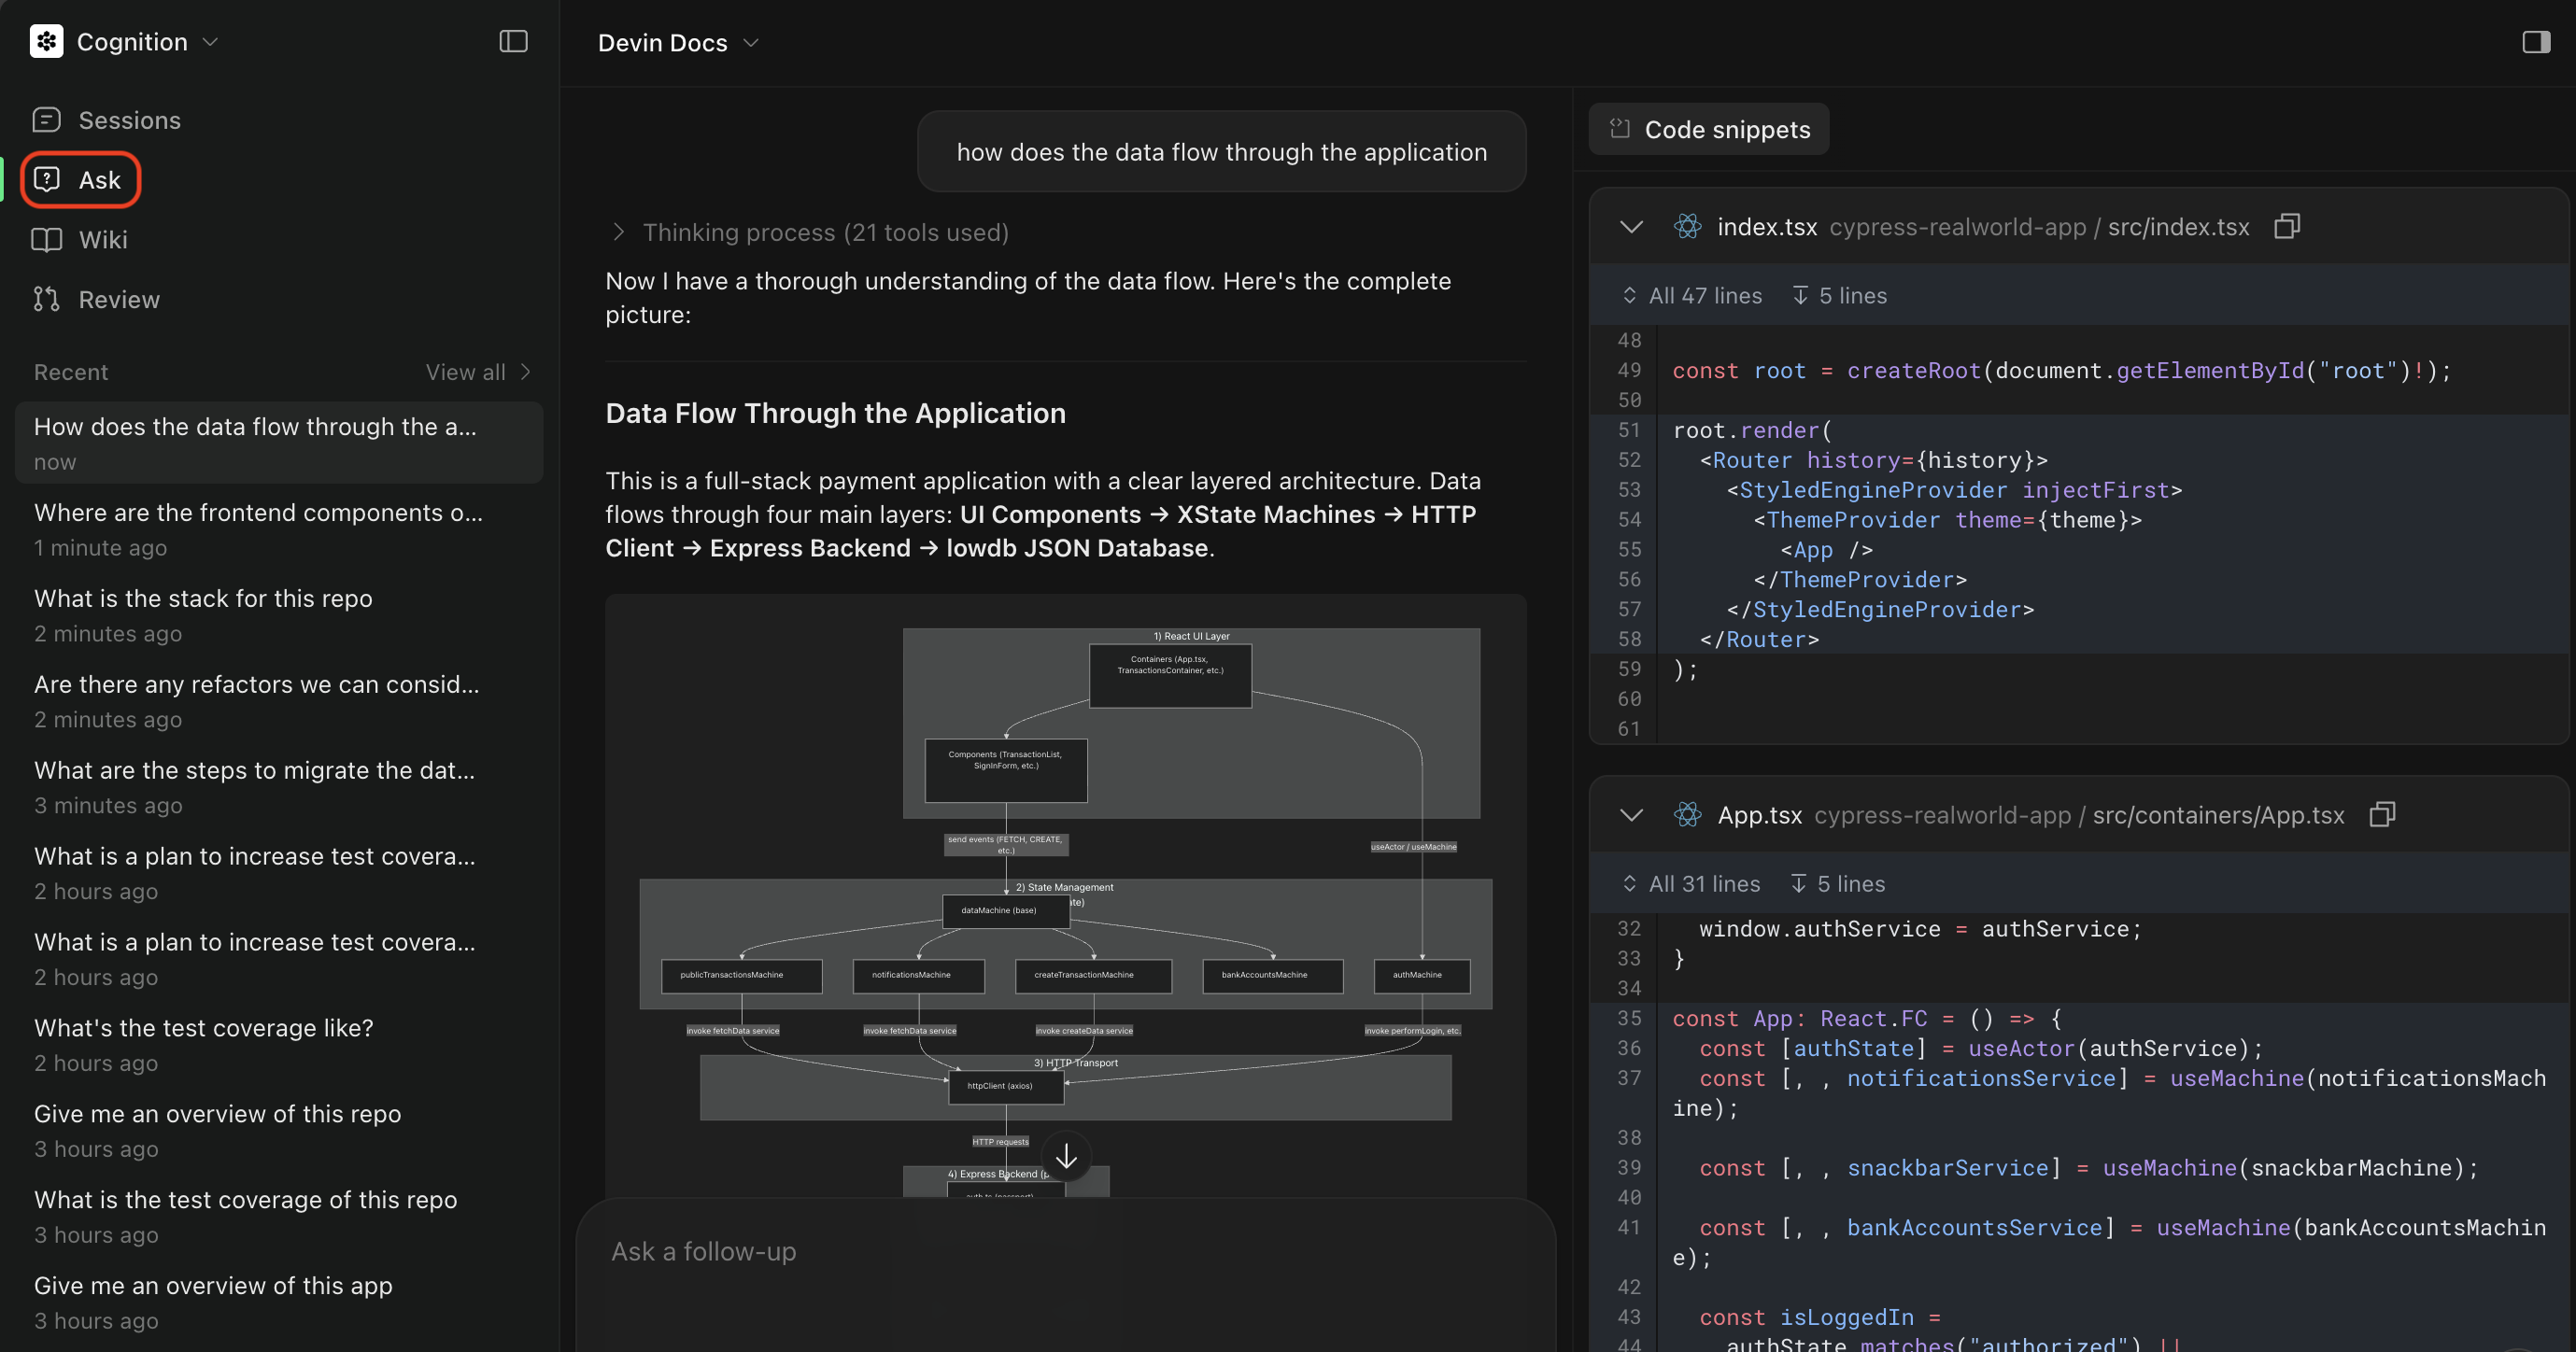
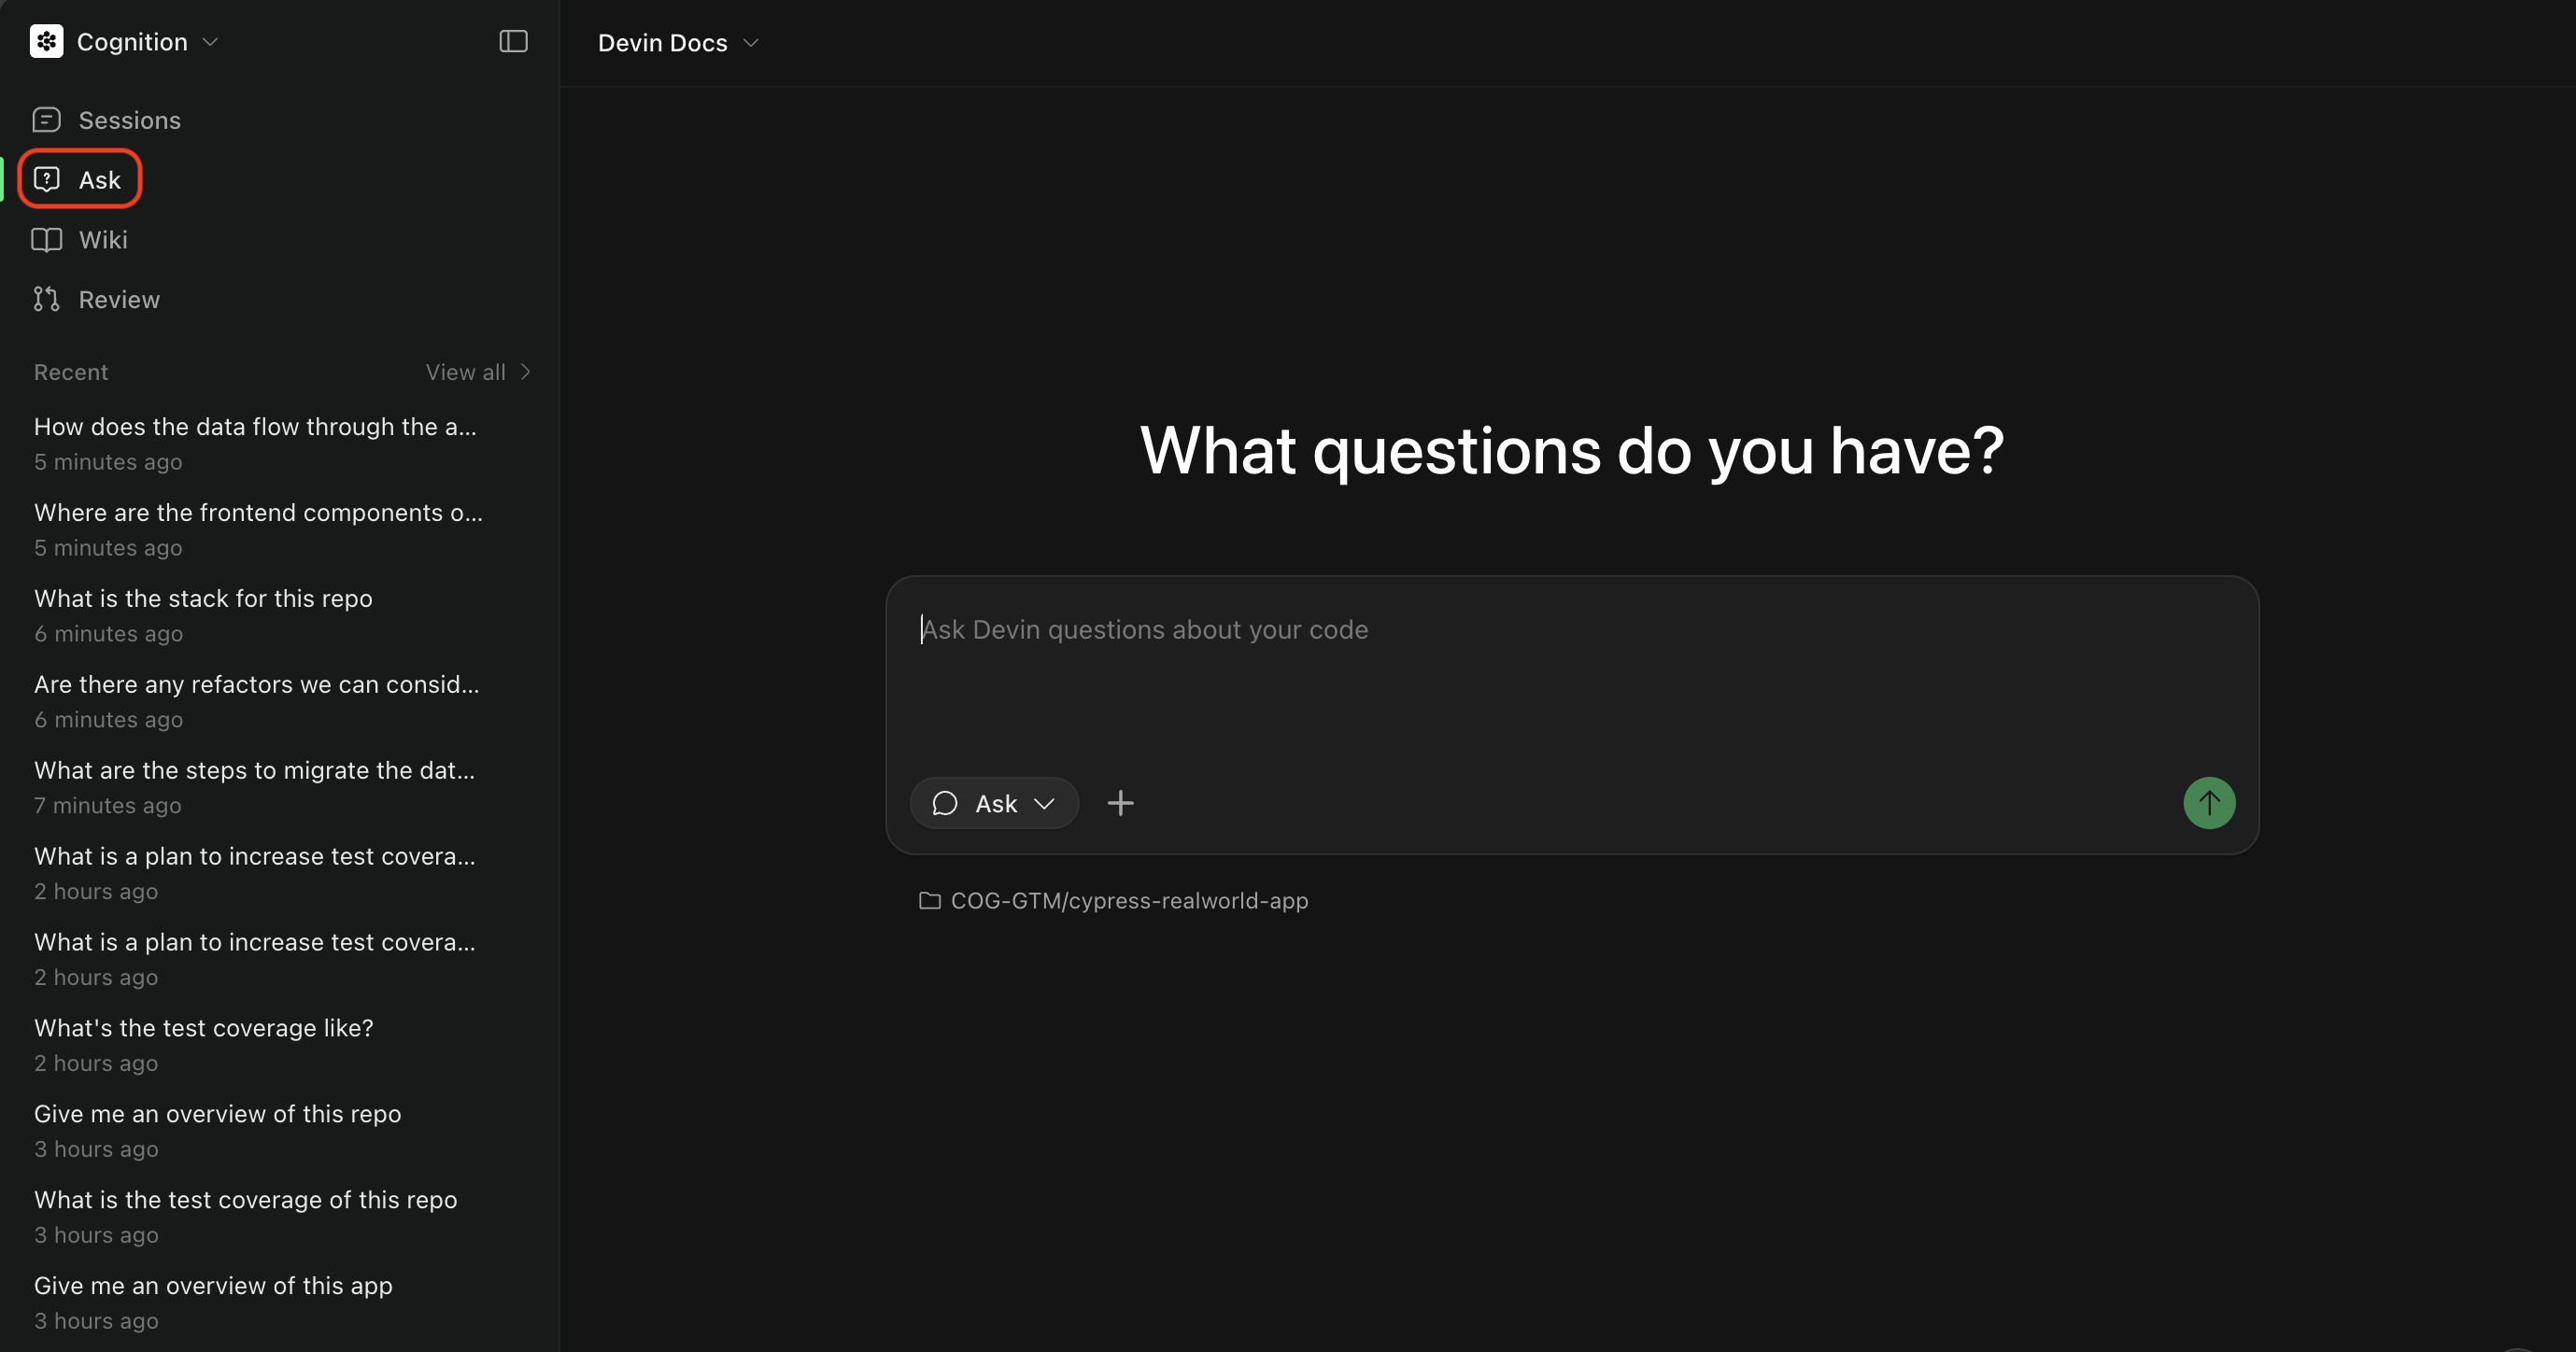 要在 DeepWiki 页面使用 Ask 模式,在页面底部的聊天输入框中输入你的问题并点击 Ask。Devin 的 Knowledge 将会自动限定在该代码仓库范围内。
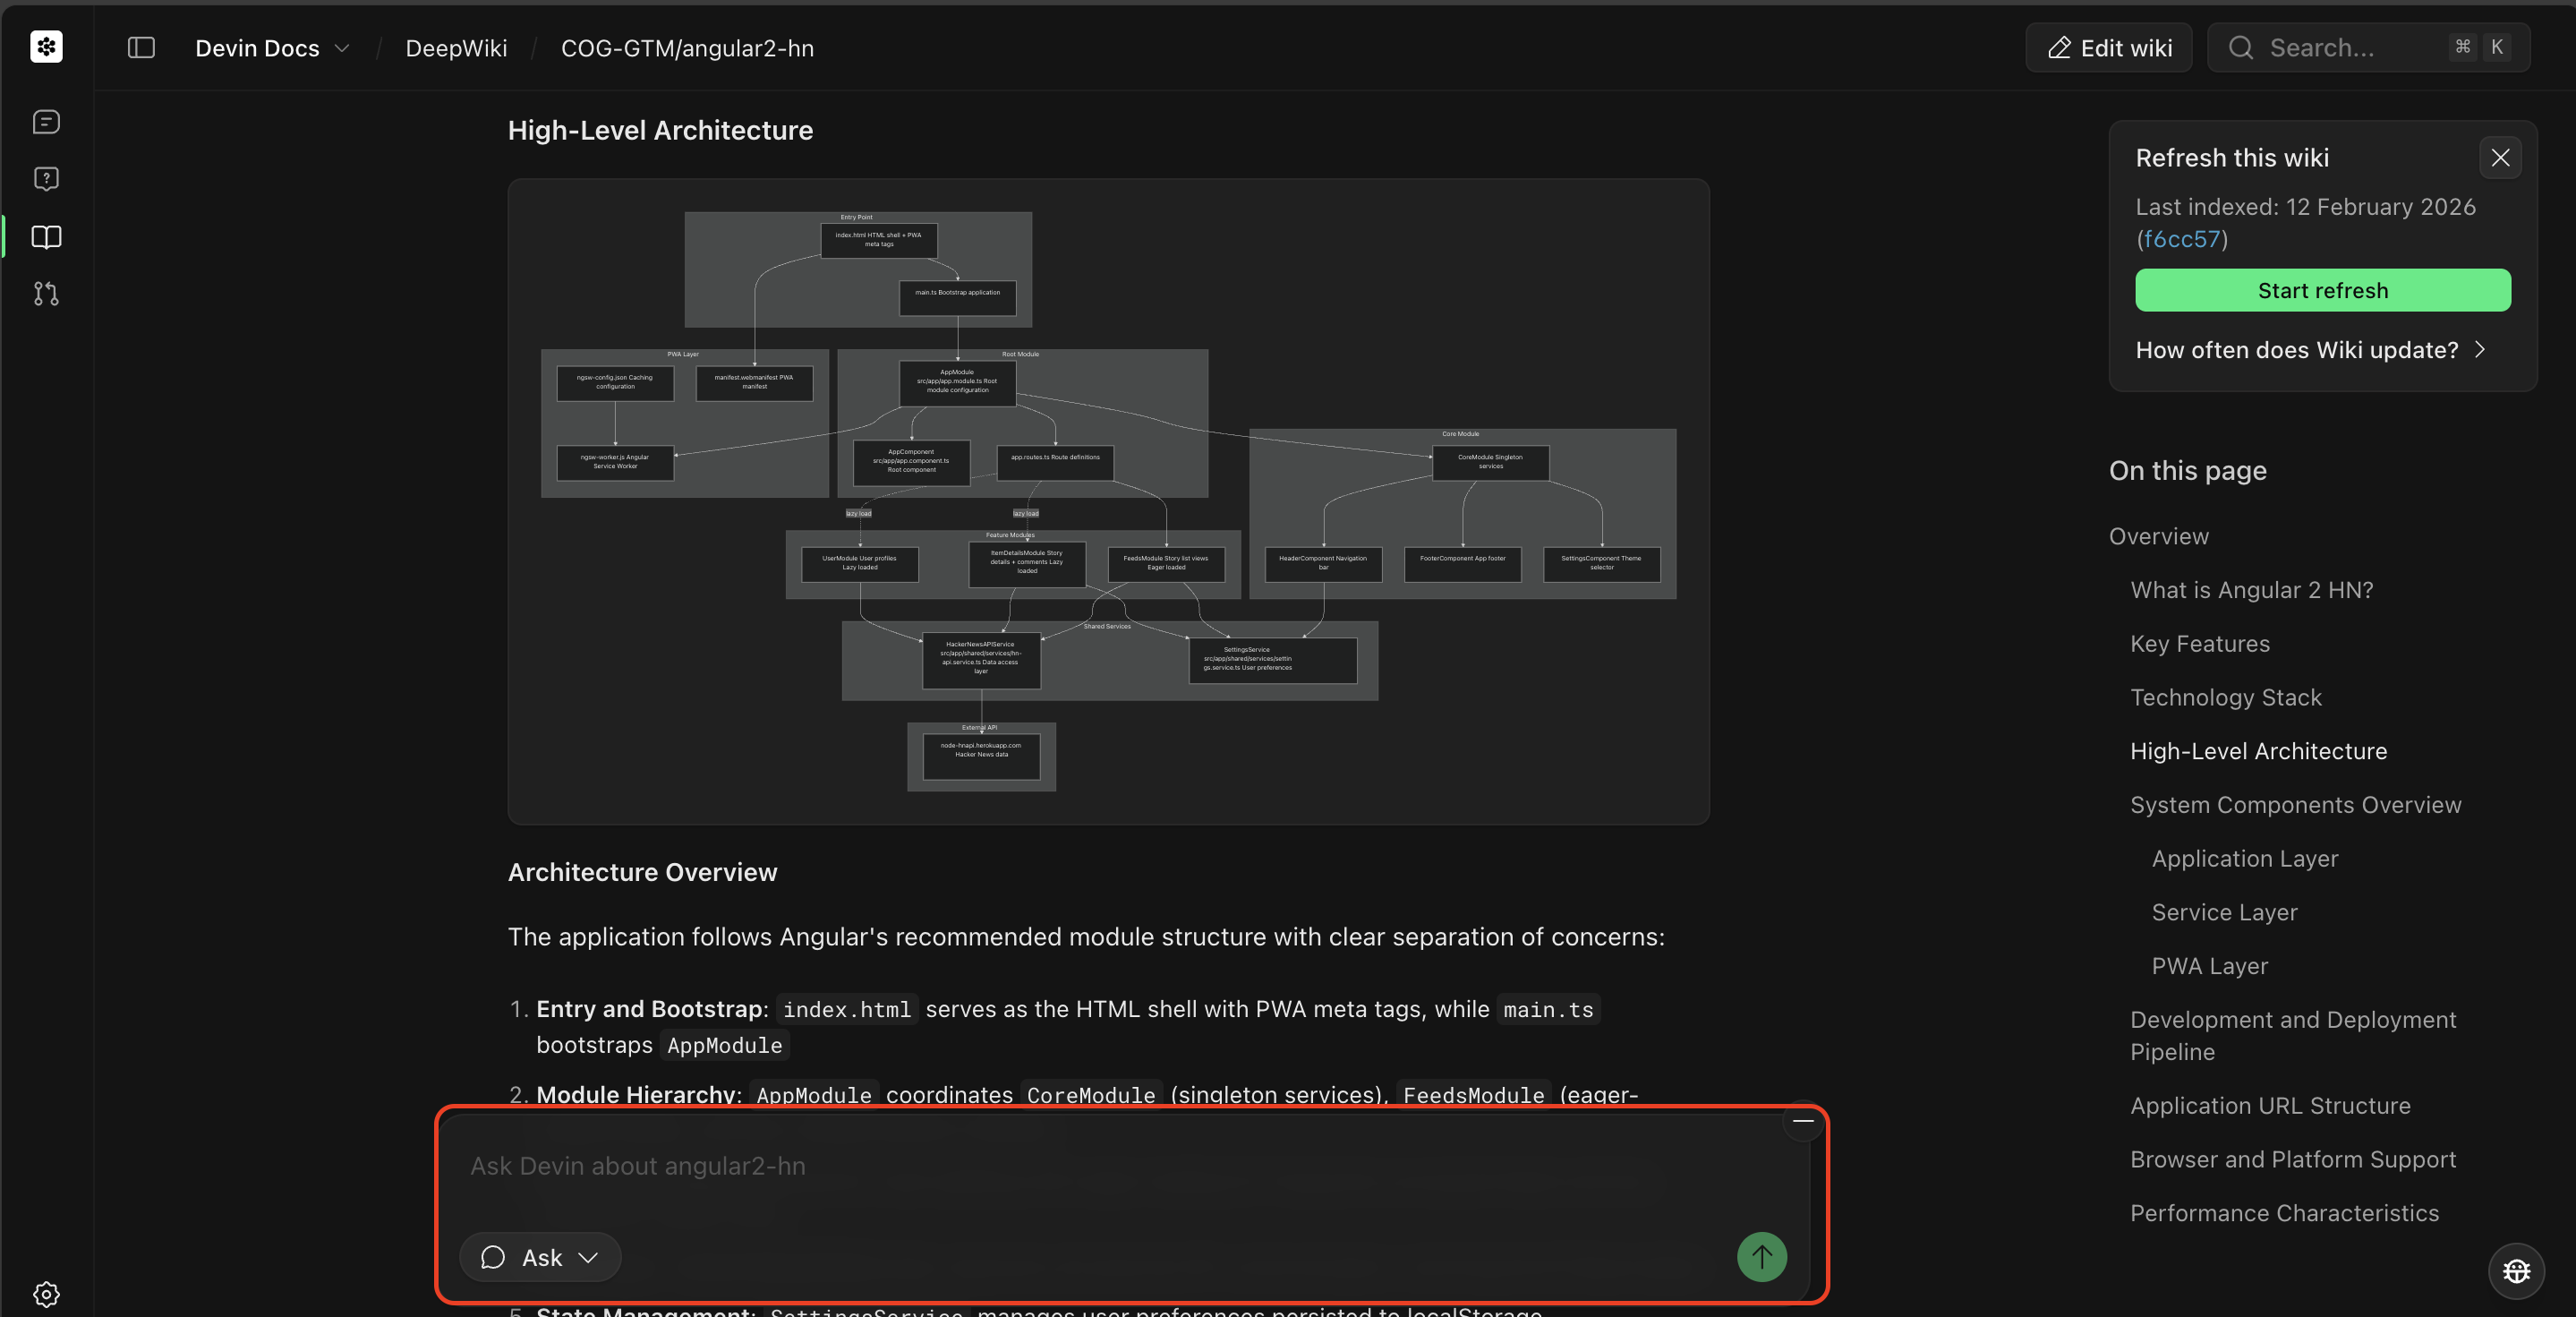 在我们的 [Ask Devin 指南](/zh/work-with-devin/ask-devin)中了解更多信息。
一旦你已与 Devin 一起理解了问题并制定了计划,就可以切换到 Agent 模式了。
在我们的 [Ask Devin 指南](/zh/work-with-devin/ask-devin)中了解更多信息。
一旦你已与 Devin 一起理解了问题并制定了计划,就可以切换到 Agent 模式了。
 若要从主页面进入 Agent 模式,将模式切换到 Agent,并选择你要处理的一个或多个代码仓库。
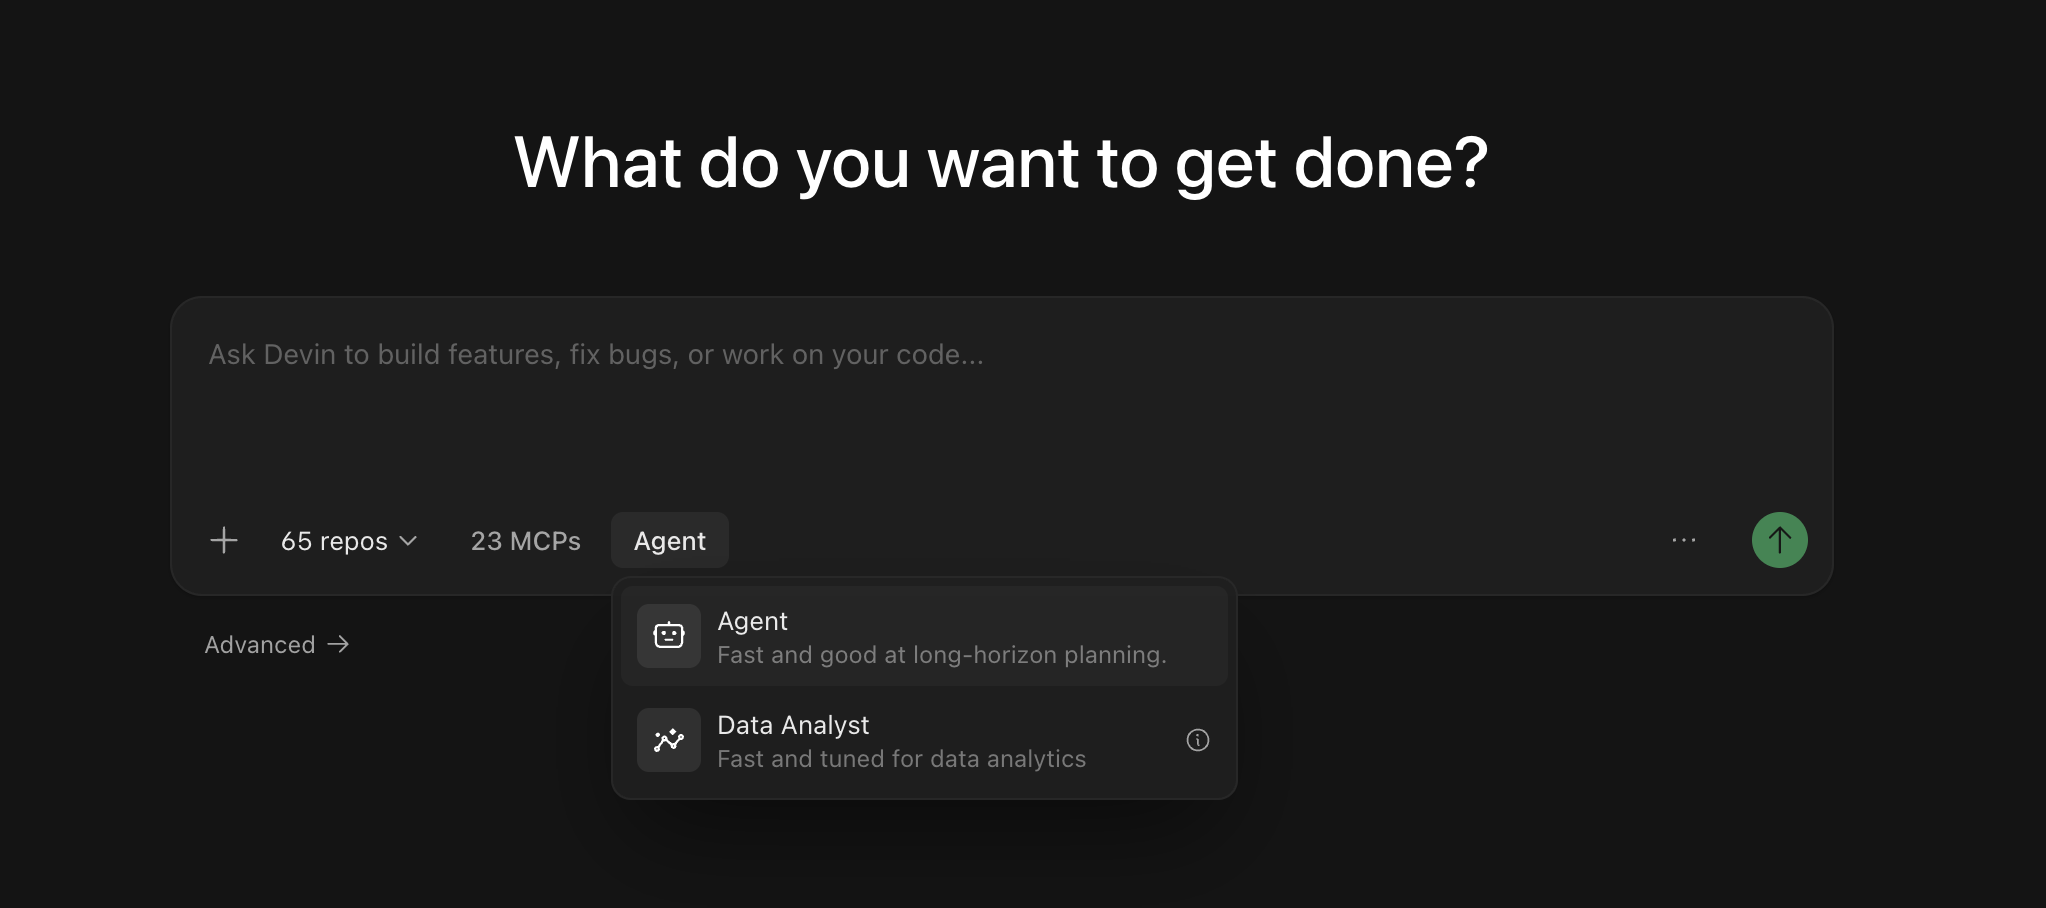
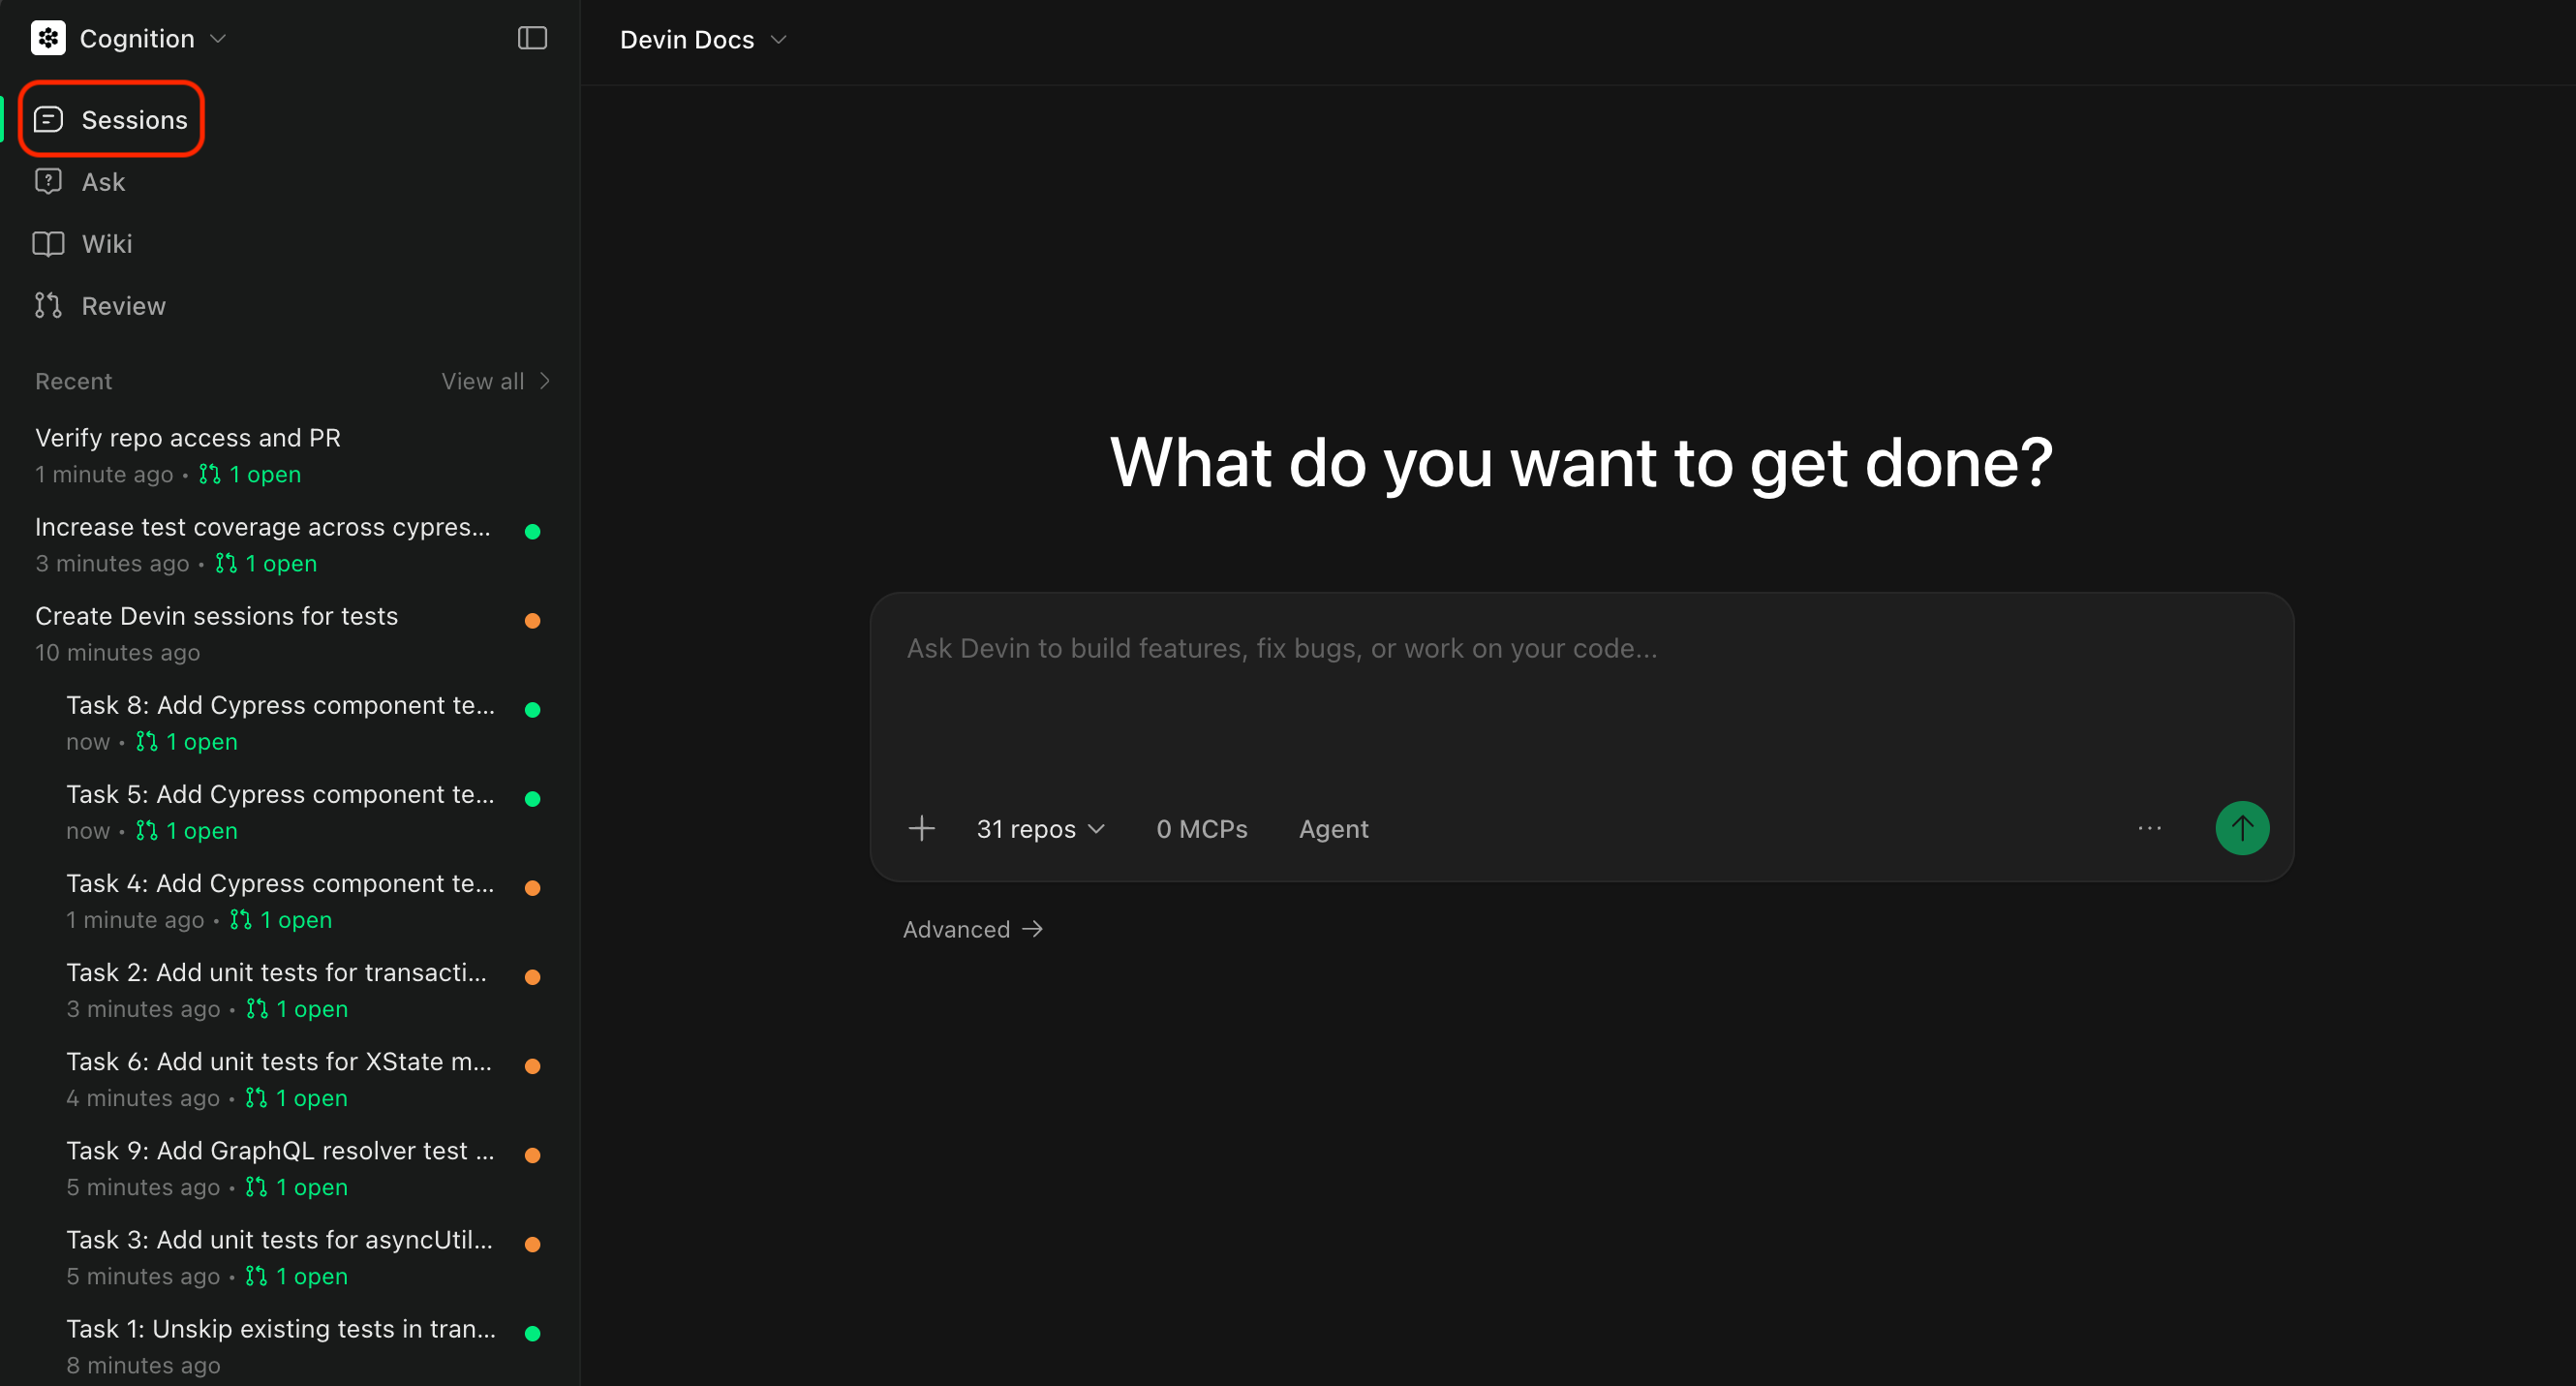 启动 Agent 会话时,你需要配置几个选项:选择代码仓库,以及选择一个 Agent。
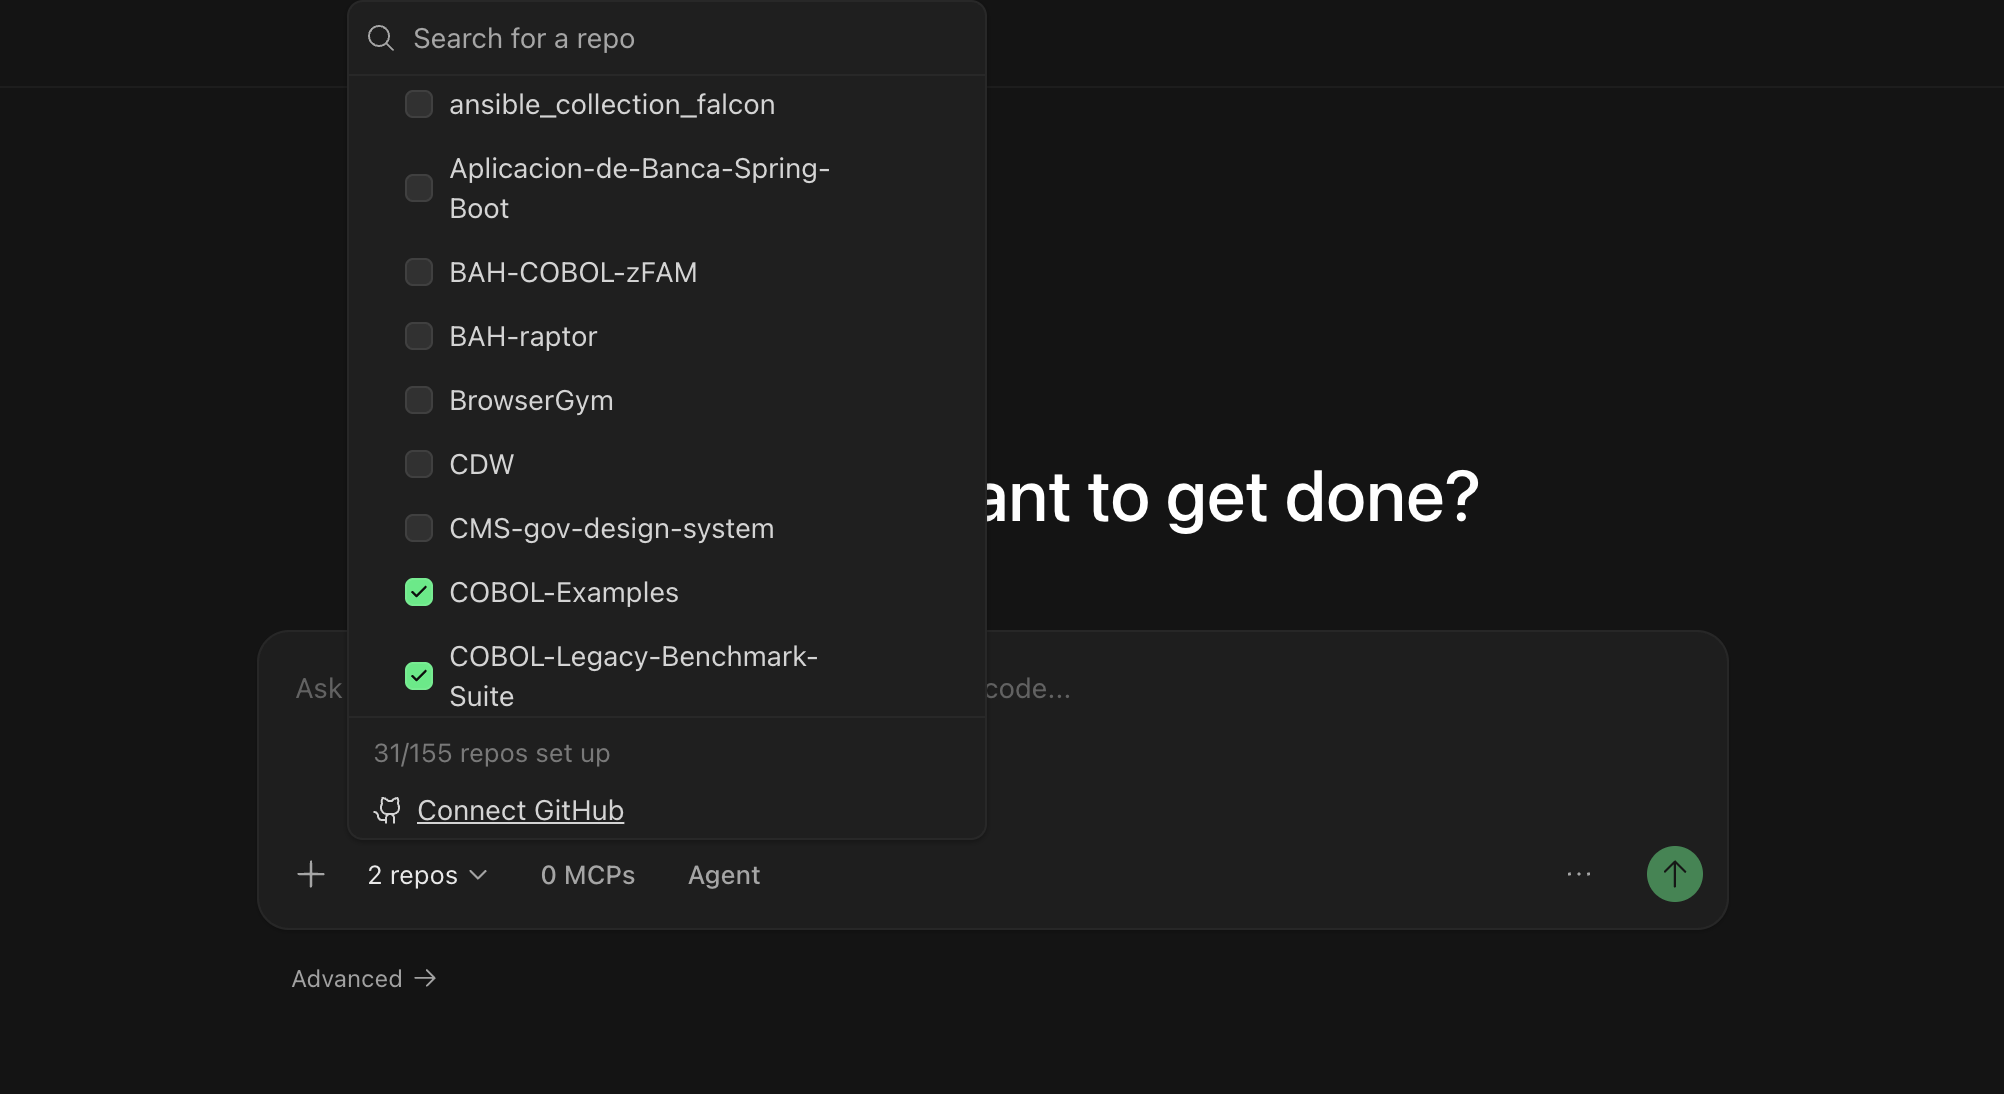 选择代码仓库可以确保 Devin:
* 能访问你的代码库并进行修改
* 使用正确的分支作为起点
* 能向正确的代码仓库创建 pull request
选择代码仓库可以确保 Devin:
* 能访问你的代码库并进行修改
* 使用正确的分支作为起点
* 能向正确的代码仓库创建 pull request
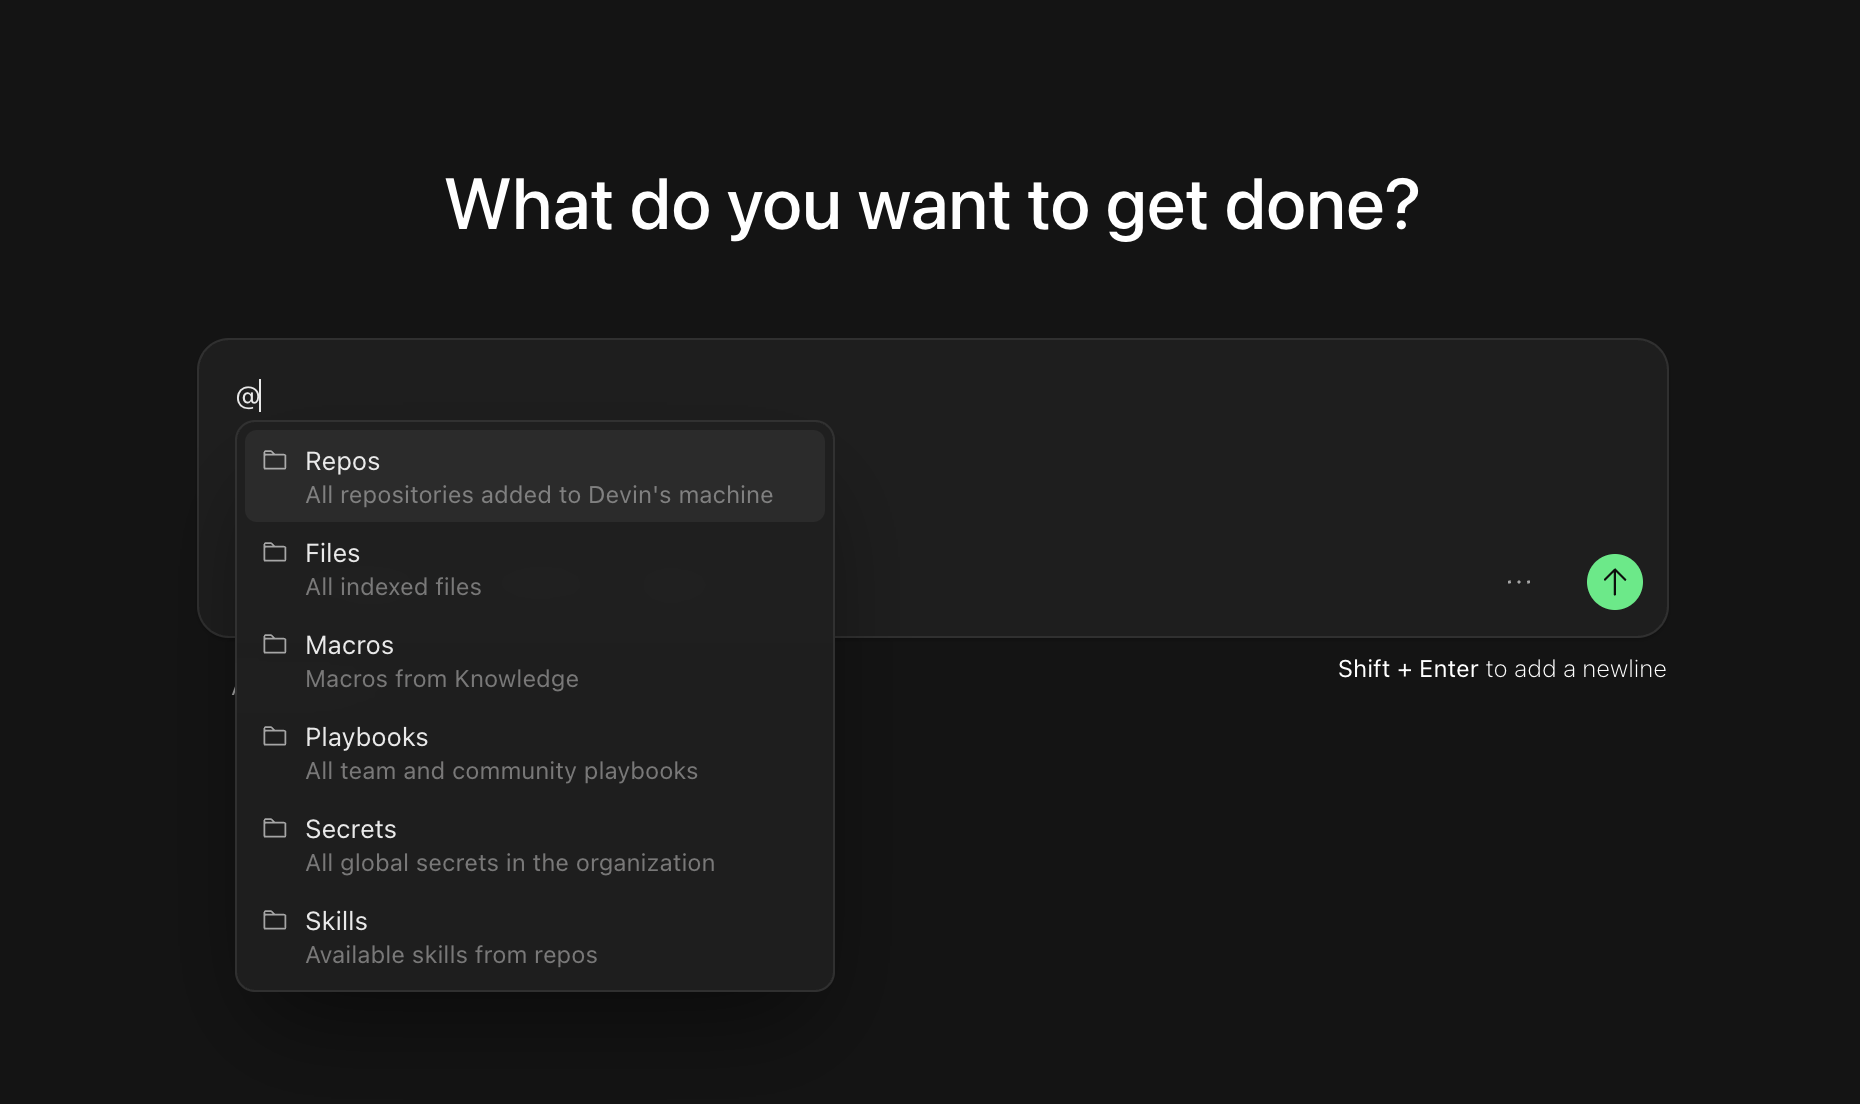 @ 提及可以帮助 Devin 准确理解你正在处理的内容,并减少提示中的歧义。