
> ## Documentation Index
> Fetch the complete documentation index at: https://docs.devin.ai/llms.txt
> Use this file to discover all available pages before exploring further.

# Windsurf Plugins へようこそ

> JetBrains、VS Code、Visual Studio、Vim、NeoVim、Jupyter、Chrome、その他の IDE 向けの Windsurf Plugins をインストールしてセットアップし、AI によるコーディング支援を利用できます。

**Windsurf Plugins** を使うと、お好みの IDE やエディタで AI によるコーディング支援を利用できます。

<Card title="Teams と Enterprise" icon="users" href="/ja/desktop/accounts/teams-getting-started">
  チームで使い始めましょう！
</Card>

<CardGroup cols={3}>
  <Card
    title="Cascade"
    icon={
<svg
width="25"
height="25"
viewBox="0 0 1292 1292"
fill="none"
xmlns="http://www.w3.org/2000/svg"
>
<path
  d="M1195 599C1195 848.08 993.08 1050 744 1050C494.92 1050 293 848.08 293 599C293 349.92 494.92 148 744 148C993.08 148 1195 349.92 1195 599ZM411.5 599C411.5 782.635 560.365 931.5 744 931.5C927.635 931.5 1076.5 782.635 1076.5 599C1076.5 415.365 927.635 266.5 744 266.5C560.365 266.5 411.5 415.365 411.5 599Z"
  fill="#34E8BB"
/>
<path
  d="M1096.19 1053.62C1116.8 1078.03 1113.86 1114.77 1087.65 1133.04C1002.41 1192.46 903.441 1229.92 799.584 1241.61C676.505 1255.46 552.082 1232.51 442.049 1175.65C332.016 1118.79 241.314 1030.58 181.415 922.172C130.87 830.693 104.172 728.301 103.33 624.396C103.071 592.449 131.338 568.79 163.173 571.479C195.007 574.168 218.29 602.208 219.218 634.143C221.573 715.175 243.206 794.78 282.679 866.22C331.512 954.6 405.457 1026.51 495.161 1072.87C584.866 1119.22 686.302 1137.94 786.643 1126.64C867.75 1117.51 945.198 1089.11 1012.66 1044.15C1039.24 1026.44 1075.58 1029.21 1096.19 1053.62Z"
  fill="#34E8BB"
/>
<path
  d="M177.334 450.08C146.261 442.514 126.947 411.072 137.349 380.829C160.687 312.983 195.56 249.512 240.566 193.267C285.571 137.023 339.851 89.0802 400.928 51.4326C428.153 34.6511 463.065 46.5999 477.261 75.2582C491.457 103.917 479.508 138.389 452.641 155.738C406.542 185.506 365.436 222.584 330.994 265.627C296.552 308.67 269.39 356.906 250.456 408.411C239.421 438.428 208.408 457.646 177.334 450.08Z"
  fill="#34E8BB"
/>
</svg>
}
    href="/ja/windsurf/plugins/cascade/cascade-overview"
  >
    Windsurfのコーディングエージェント。
  </Card>

  <Card title="使用量" icon="bars-progress" href="/ja/desktop/accounts/usage">
    クレジットと使用量。
  </Card>

  <Card title="モデル" icon="robot" href="/ja/windsurf/plugins/cascade/models">
    利用できるモデル。
  </Card>
</CardGroup>

<div id="jetbrains-local">
  ## JetBrains (ローカル)
</div>

<Note>
  これらの手順は、セルフホスト型プランのEnterpriseには適用されません。
  Enterpriseユーザーの場合は、Enterpriseポータル内の手順を参照してください。
</Note>

<Note>
  リモート開発環境では、代わりに "Windsurf (Remote Development)" プラグインを利用してください。詳しくは下記の[リモート開発セクション](#remote-development)を参照してください。
</Note>

<Steps>
  <Step title="ローカルプラグインをインストール">
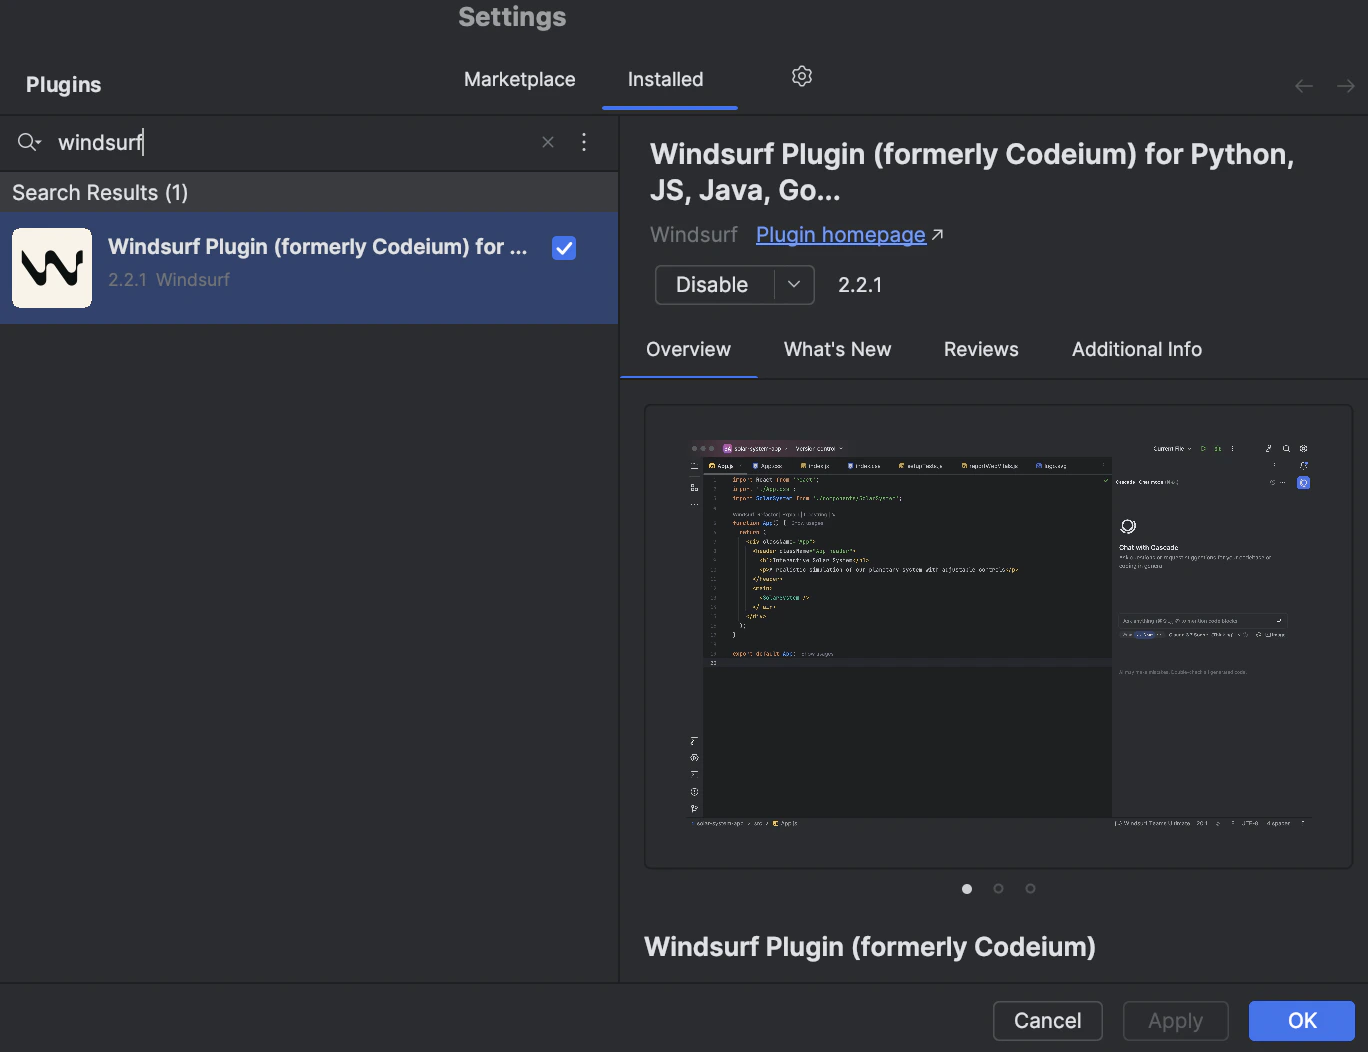
    JetBrains IDEで `Plugins` メニューを開きます。ショートカットは、Mac では `⌘+,`、Linux/Windows では `Ctrl+,` です。設定メニューから開くこともできます。
    Windsurf プラグインを検索してインストールします。インストール後、プラグインローダーから IDE の再起動を求められます。

    <Frame>
      <img src="https://mintcdn.com/cognitionai/-PTA3zzo2bR9Qfc8/desktop/assets/jetbrains_plugin_install.png?fit=max&auto=format&n=-PTA3zzo2bR9Qfc8&q=85&s=dd4f7af540fb84d92187b363bca749e5" width="1368" height="1052" data-path="desktop/assets/jetbrains_plugin_install.png" />
    </Frame>
  </Step>

  <Step title="言語サーバーのダウンロードを待つ">
    インストールが正常に完了すると、Windsurf は言語サーバーのダウンロードを開始します。
    これは、Windsurf の AI 機能を利用できるようにするために、当社の API と通信するプログラムです。
    ダウンロードには通常 10〜20 秒かかりますが、速度はインターネット接続状況によって異なる場合があります。
    その間も、IDE は通常どおり利用できます。

    右下に、ダウンロードの進行状況を示す通知が表示されます。

    <Frame>
      <img src="https://mintcdn.com/cognitionai/-PTA3zzo2bR9Qfc8/desktop/assets/jetbrains_ls_download_bar.png?fit=max&auto=format&n=-PTA3zzo2bR9Qfc8&q=85&s=7c42a7e984909d4c116541d29e27c821" width="1174" height="158" data-path="desktop/assets/jetbrains_ls_download_bar.png" />
    </Frame>
  </Step>

  <Step title="認証">
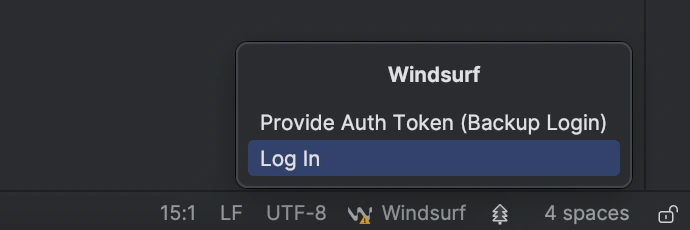
    プロジェクトを開きます。右下にログインページへのリンク付きの通知ポップアップが表示され、Windsurf からサインインを求められます。
    または、下部のステータスバー右側にあるウィジェットをクリックし、そこからログインオプションを選択します。

    <Frame>
      <img src="https://mintcdn.com/cognitionai/-PTA3zzo2bR9Qfc8/desktop/assets/jetbrains_login_widget.png?fit=max&auto=format&n=-PTA3zzo2bR9Qfc8&q=85&s=b3d4fedf3729ea04c72acf6ee7db8fc7" width="690" height="230" data-path="desktop/assets/jetbrains_login_widget.png" />
    </Frame>

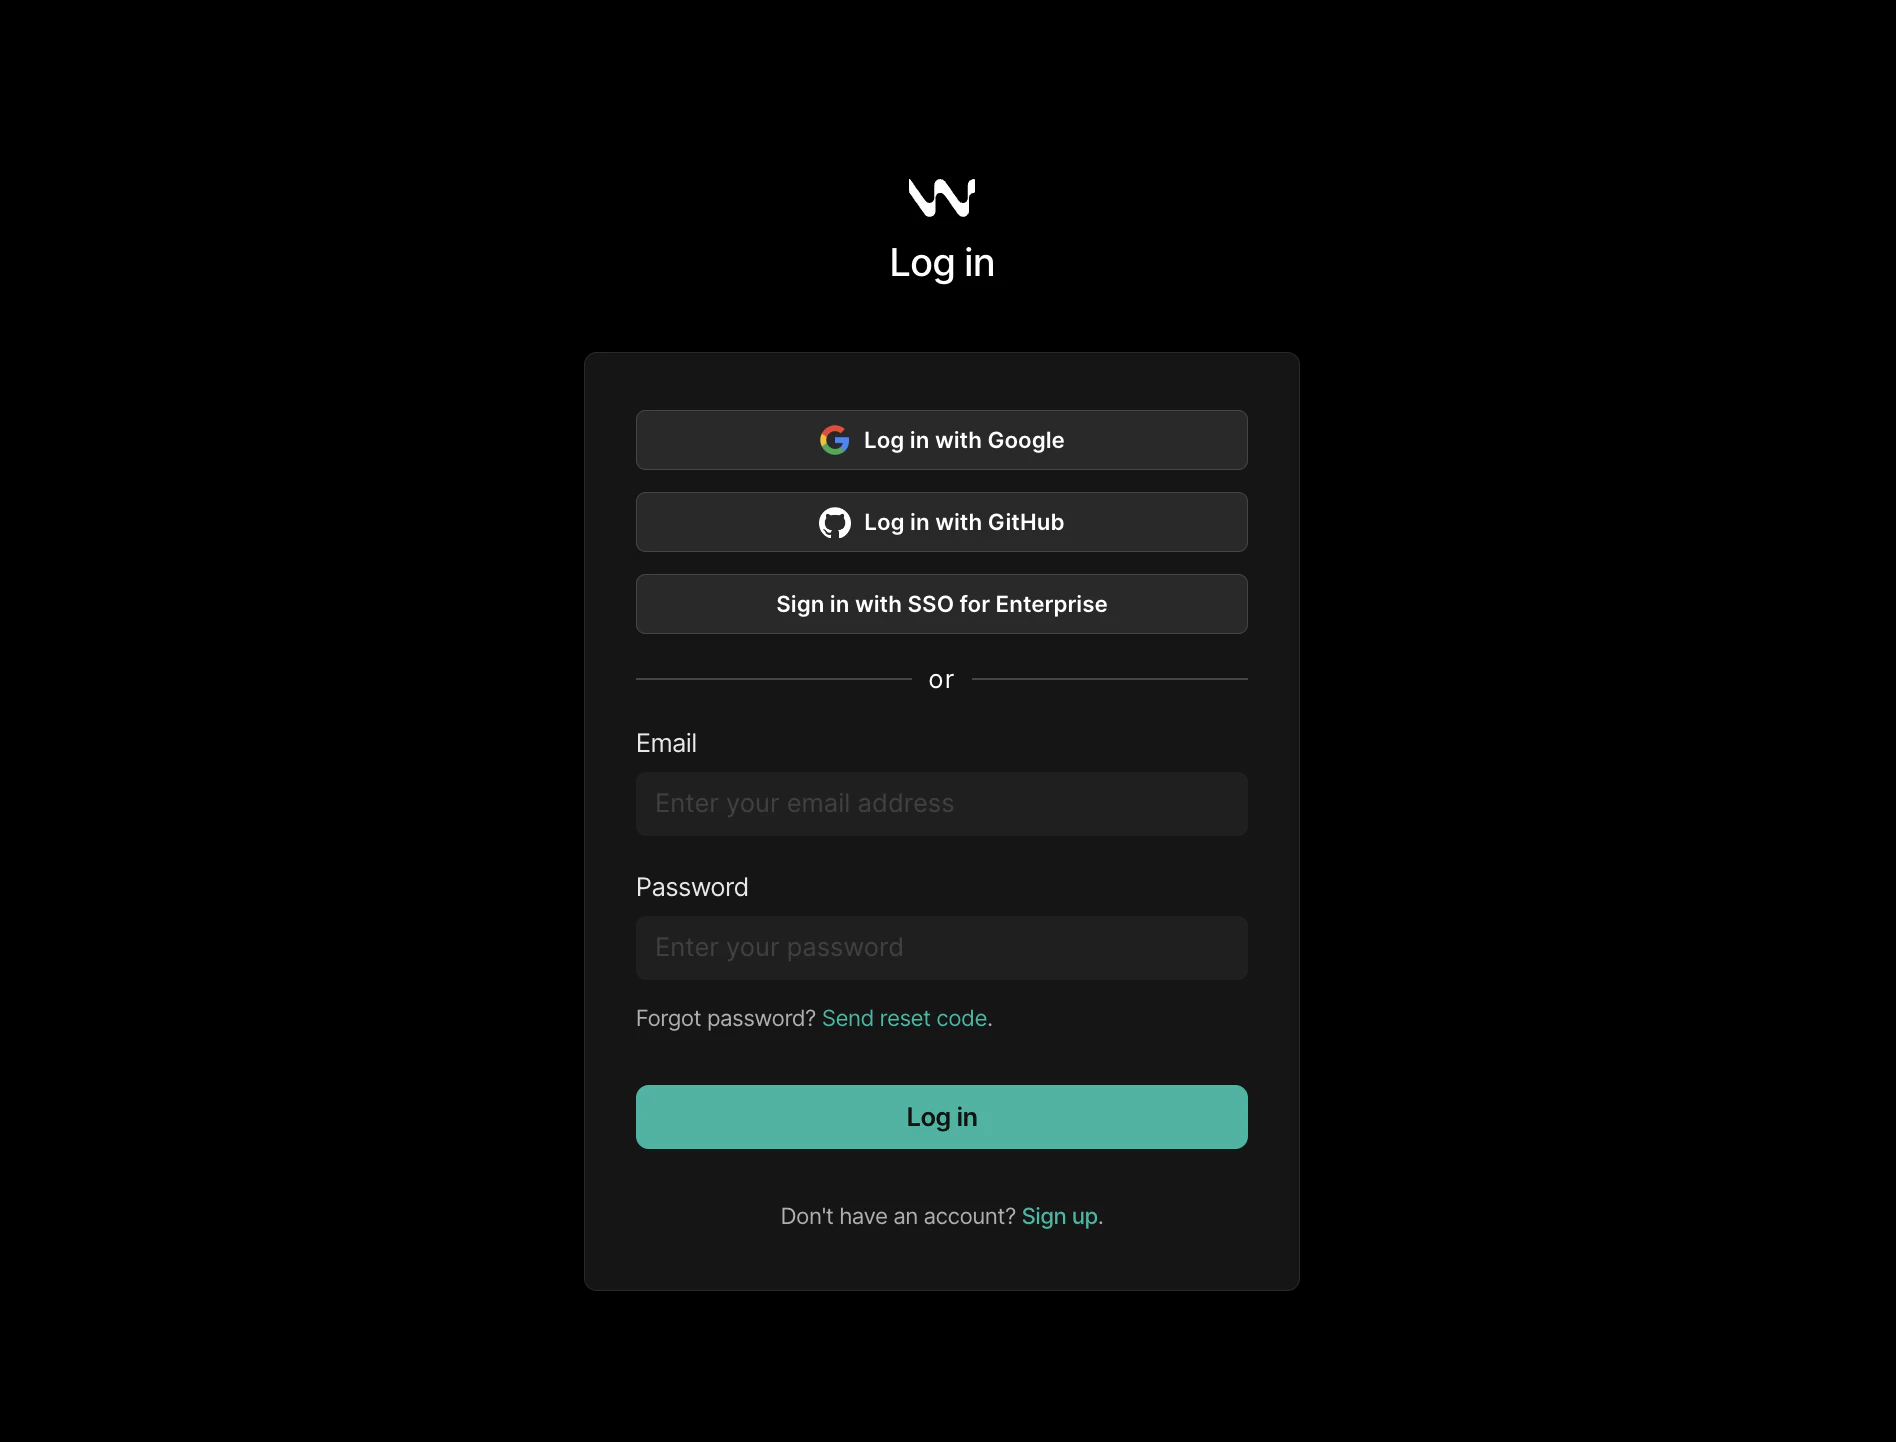
    まだサインインしていない場合は、サインインまたはアカウントの作成を求められます。
    <Frame>
      <img src="https://mintcdn.com/cognitionai/-PTA3zzo2bR9Qfc8/desktop/assets/login_prompt_webpage.png?fit=max&auto=format&n=-PTA3zzo2bR9Qfc8&q=85&s=2dc52c3a7979daa299dc7b652d74cad5" width="1896" height="1442" data-path="desktop/assets/login_prompt_webpage.png" />
    </Frame>

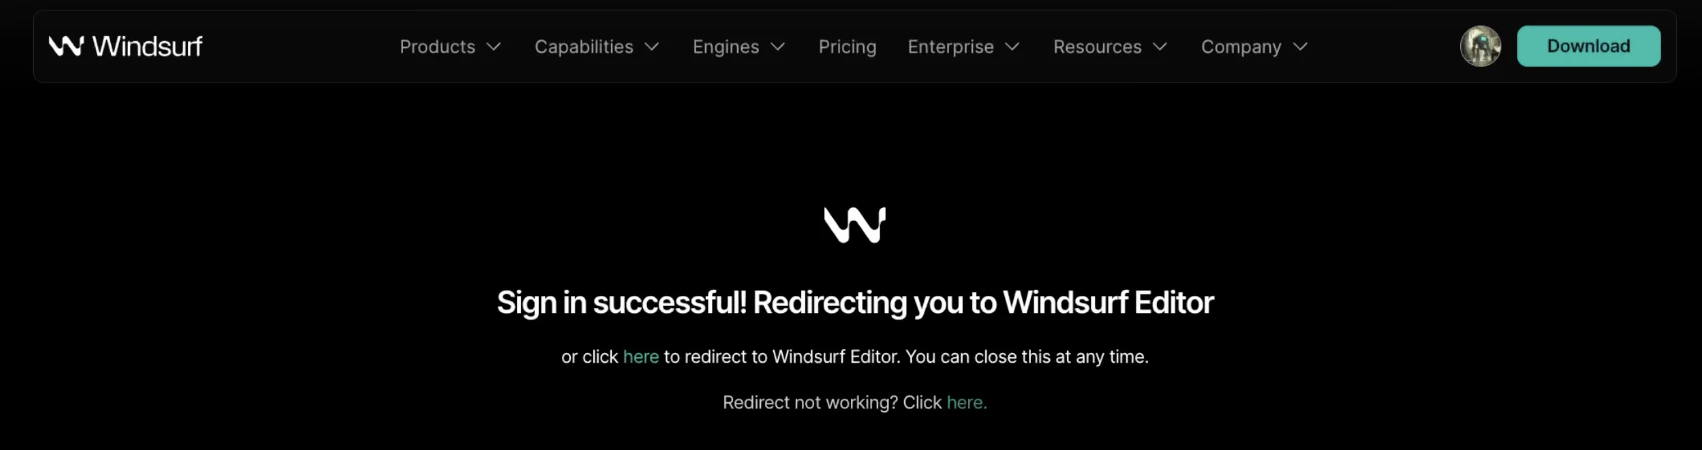
    サインインが完了すると、IDE に戻れることが Web ページに表示されます。
    <Frame>
      <img src="https://mintcdn.com/cognitionai/-PTA3zzo2bR9Qfc8/desktop/assets/login_successful_webpage.png?fit=max&auto=format&n=-PTA3zzo2bR9Qfc8&q=85&s=c4b3cfae5544a8dfcb6199fd3cf3af80" width="1702" height="450" data-path="desktop/assets/login_successful_webpage.png" />
    </Frame>
  </Step>

  <Step title="すべて完了！">
    これで準備完了です。Windsurf の AI 機能 (Autocomplete、Chat、Command など) が利用できるようになります。

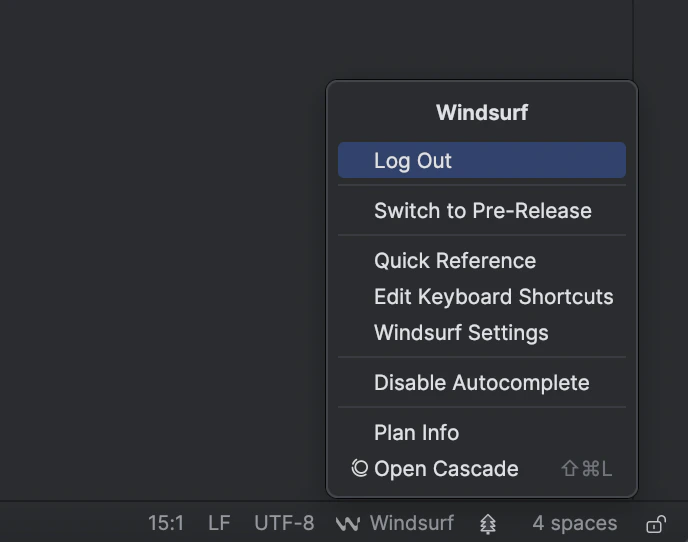
    右下のステータスバーウィジェットをクリックすると、いつでもステータスを確認できます。
    サインインしている場合は、Windsurf の設定やその他のコントロールにアクセスできます。

    新機能への早期アクセスをご希望の場合は、"Switch to Pre-Release" をクリックして、
    プラグインの[最新のプレリリース版](https://plugins.jetbrains.com/plugin/20540-windsurf-plugin-for-python-js-java-go--/versions/pre-release)
    をお試しください。

    <Frame>
      <img src="https://mintcdn.com/cognitionai/-PTA3zzo2bR9Qfc8/desktop/assets/jetbrains_status_bar.png?fit=max&auto=format&n=-PTA3zzo2bR9Qfc8&q=85&s=b6306ecf96e52ca33a184a1b6ea76912" width="688" height="542" data-path="desktop/assets/jetbrains_status_bar.png" />
    </Frame>
  </Step>
</Steps>

<div id="remote-development">
  ### リモート開発
</div>

リモート開発環境で利用する JetBrains IDE では、別途「Windsurf (Remote Development)」プラグインを使用する必要があります。

より高度なエージェント型 AI の機能や最先端の機能を利用するには、ネイティブの Windsurf Editor または JetBrains のローカルプラグインの利用を強く推奨します。このプラグインでは引き続き最新のモデル、互換性アップデート、不具合修正が提供されますが、Windsurf Editor 専用の新しい機能は含まれていません。

<div id="requirements">
  #### 要件
</div>

* JetBrains IDE バージョン 2025.1.3 以降

<div id="installation-steps">
  #### インストール手順
</div>

<Steps>
  <Step title="ホストにインストール">
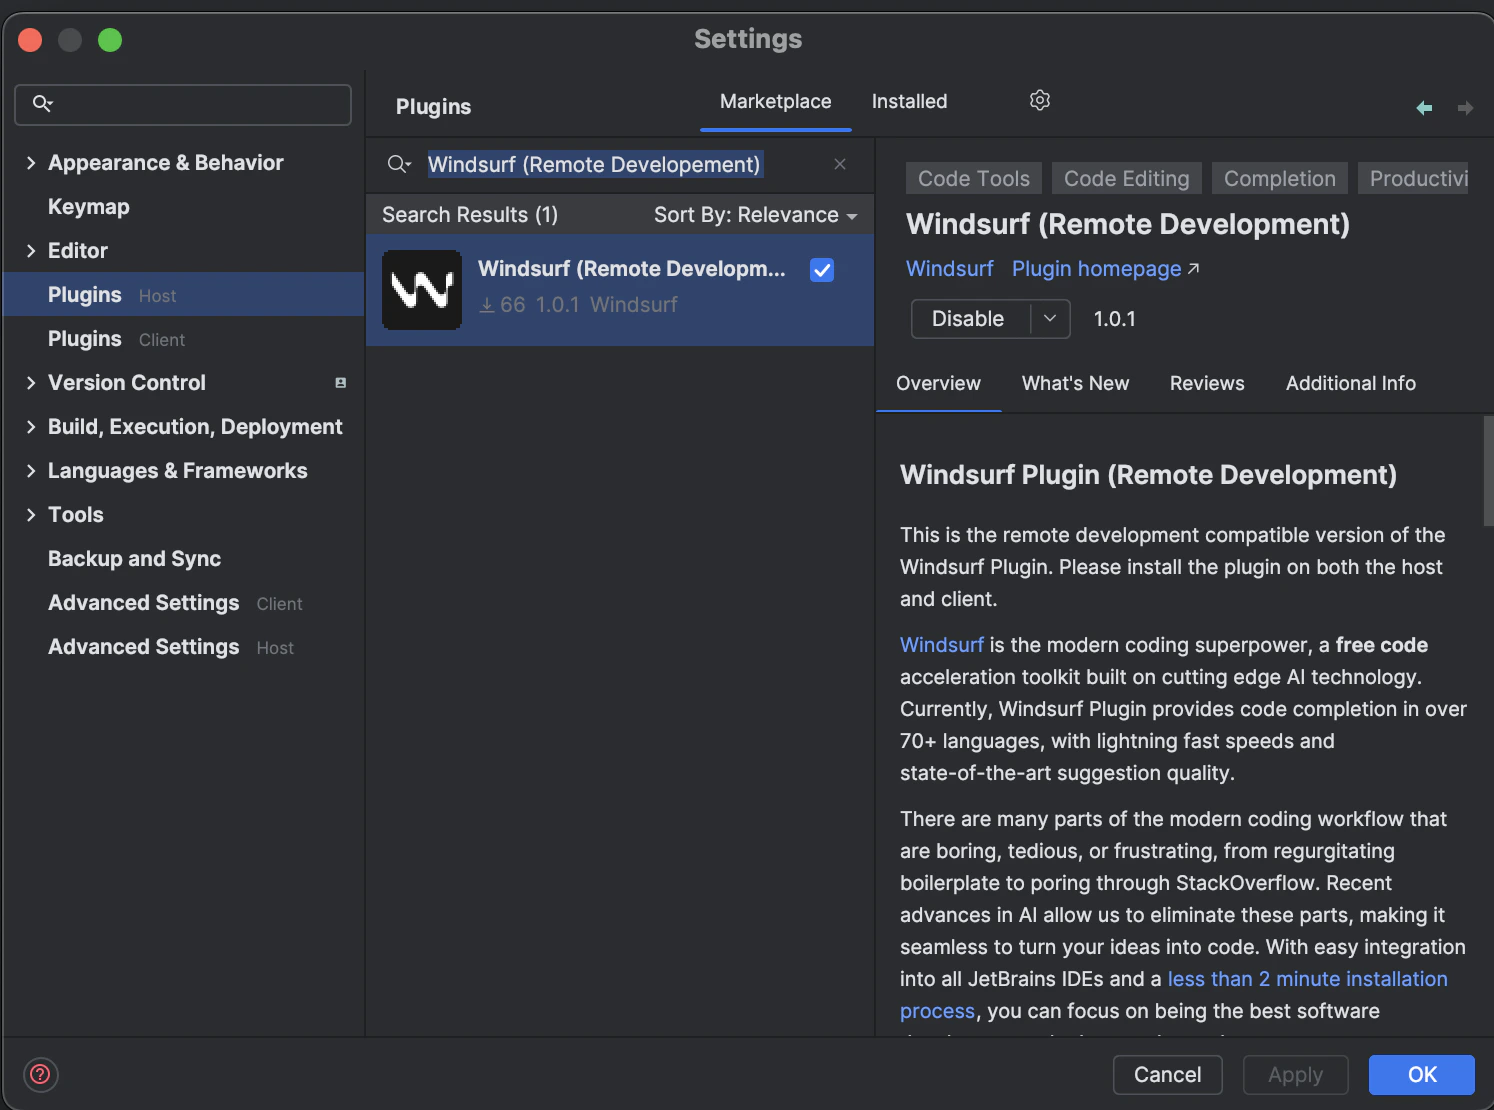
    JetBrains IDE の `Plugins (Host)` メニューを開きます。ショートカットは Mac では `⌘+,`、Linux/Windows では `Ctrl+,` です。Settings メニューから開くこともできます。
    **"Windsurf (Remote Development)"** を検索してインストールします。
    指示が表示されたら IDE を再起動します。

    <Frame>
      <img src="https://mintcdn.com/cognitionai/-PTA3zzo2bR9Qfc8/desktop/assets/jetbrains_remote_plugin_install_host.png?fit=max&auto=format&n=-PTA3zzo2bR9Qfc8&q=85&s=773357231fb9838593fdceed36a10383" width="1494" height="1110" data-path="desktop/assets/jetbrains_remote_plugin_install_host.png" />
    </Frame>
  </Step>

  <Step title="クライアントにインストール">
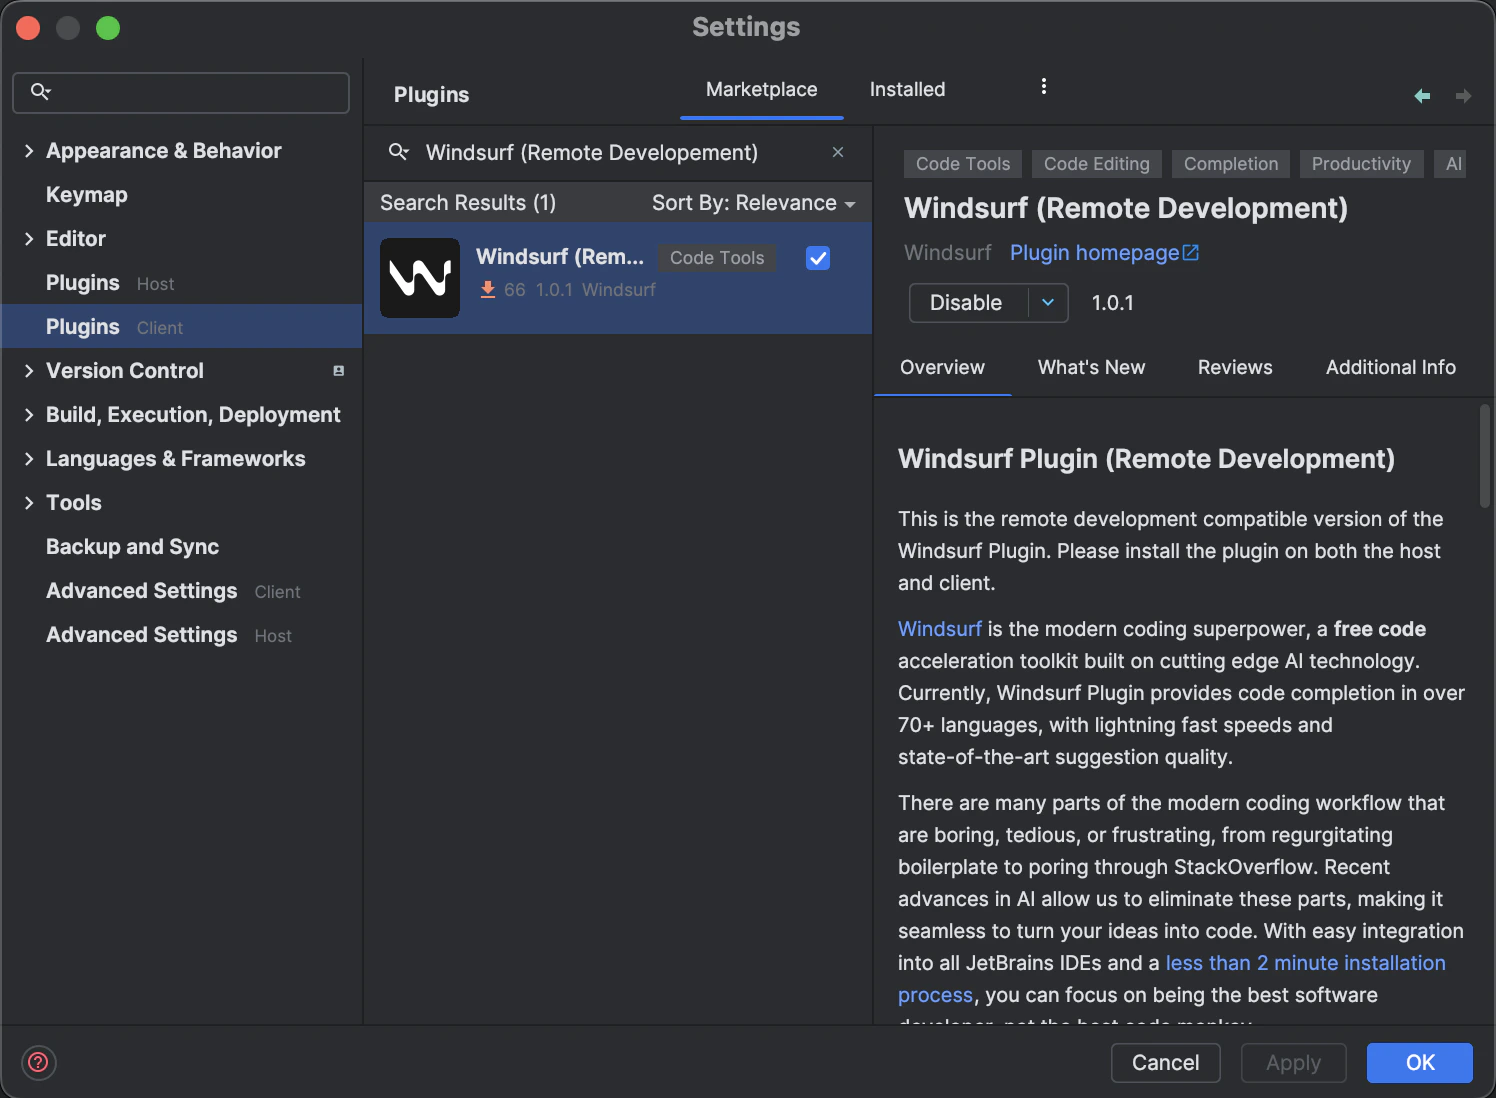
    `Plugins (Client)` メニューを開き、**"Windsurf (Remote Development)"** を検索します。
    プラグインをインストールし、IDE をもう一度再起動します。

    <Frame>
      <img src="https://mintcdn.com/cognitionai/-PTA3zzo2bR9Qfc8/desktop/assets/jetbrains_remote_plugin_install_client.png?fit=max&auto=format&n=-PTA3zzo2bR9Qfc8&q=85&s=3537fc3ebc5fe924a6d1c5f342e8a433" width="1496" height="1098" data-path="desktop/assets/jetbrains_remote_plugin_install_client.png" />
    </Frame>
  </Step>

  <Step title="言語サーバー のダウンロードを待つ">
    ホストにプラグインをインストールすると、Windsurf は 言語サーバー のダウンロードを開始します。
    これは Windsurf の AI 機能を利用するために、API と通信を行うプログラムです。
    ダウンロードには通常 10～20 秒かかりますが、速度はインターネット接続の状況によって異なる場合があります。
    その間も、通常どおり IDE を利用できます。

    右下に、ダウンロードの進行状況を示す通知が表示されます。

    <Frame>
      <img src="https://mintcdn.com/cognitionai/-PTA3zzo2bR9Qfc8/desktop/assets/jetbrains_ls_download_bar.png?fit=max&auto=format&n=-PTA3zzo2bR9Qfc8&q=85&s=7c42a7e984909d4c116541d29e27c821" width="1174" height="158" data-path="desktop/assets/jetbrains_ls_download_bar.png" />
    </Frame>
  </Step>

  <Step title="認証">
    言語サーバー のダウンロードが完了すると、Windsurf から右下に通知ポップアップが表示され、ログインページへのリンクからサインインできます。
    または、下部ステータスバーの右側にあるウィジェットをクリックし、そこからログインを選択することもできます。

    <Frame>
      <img src="https://mintcdn.com/cognitionai/-PTA3zzo2bR9Qfc8/desktop/assets/jetbrains_login_widget.png?fit=max&auto=format&n=-PTA3zzo2bR9Qfc8&q=85&s=b3d4fedf3729ea04c72acf6ee7db8fc7" width="690" height="230" data-path="desktop/assets/jetbrains_login_widget.png" />
    </Frame>

    まだサインインしていない場合は、サインインまたはアカウントの作成を求められます。

    <Frame>
      <img src="https://mintcdn.com/cognitionai/-PTA3zzo2bR9Qfc8/desktop/assets/login_prompt_webpage.png?fit=max&auto=format&n=-PTA3zzo2bR9Qfc8&q=85&s=2dc52c3a7979daa299dc7b652d74cad5" width="1896" height="1442" data-path="desktop/assets/login_prompt_webpage.png" />
    </Frame>

    サインインが完了すると、Web ページに IDE に戻れることが表示されます。
    <Frame>
      <img src="https://mintcdn.com/cognitionai/-PTA3zzo2bR9Qfc8/desktop/assets/login_successful_webpage.png?fit=max&auto=format&n=-PTA3zzo2bR9Qfc8&q=85&s=c4b3cfae5544a8dfcb6199fd3cf3af80" width="1702" height="450" data-path="desktop/assets/login_successful_webpage.png" />
    </Frame>
  </Step>

  <Step title="すべて完了です！">
    セットアップは完了です。Windsurf の AI 機能をリモート環境で利用できます。
  </Step>
</Steps>

<div id="older-plugins">
  ## 旧プラグイン
</div>

高度なエージェント型AI機能と最新機能を利用できるため、Windsurf Editor本体またはJetBrains向けローカルプラグインの使用を強く推奨します。
以下のプラグインはメンテナンスモードです。

<Tabs>
  <Tab title="Visual Studio Code">
    <Steps>
      <Step title="プラグインをインストール">
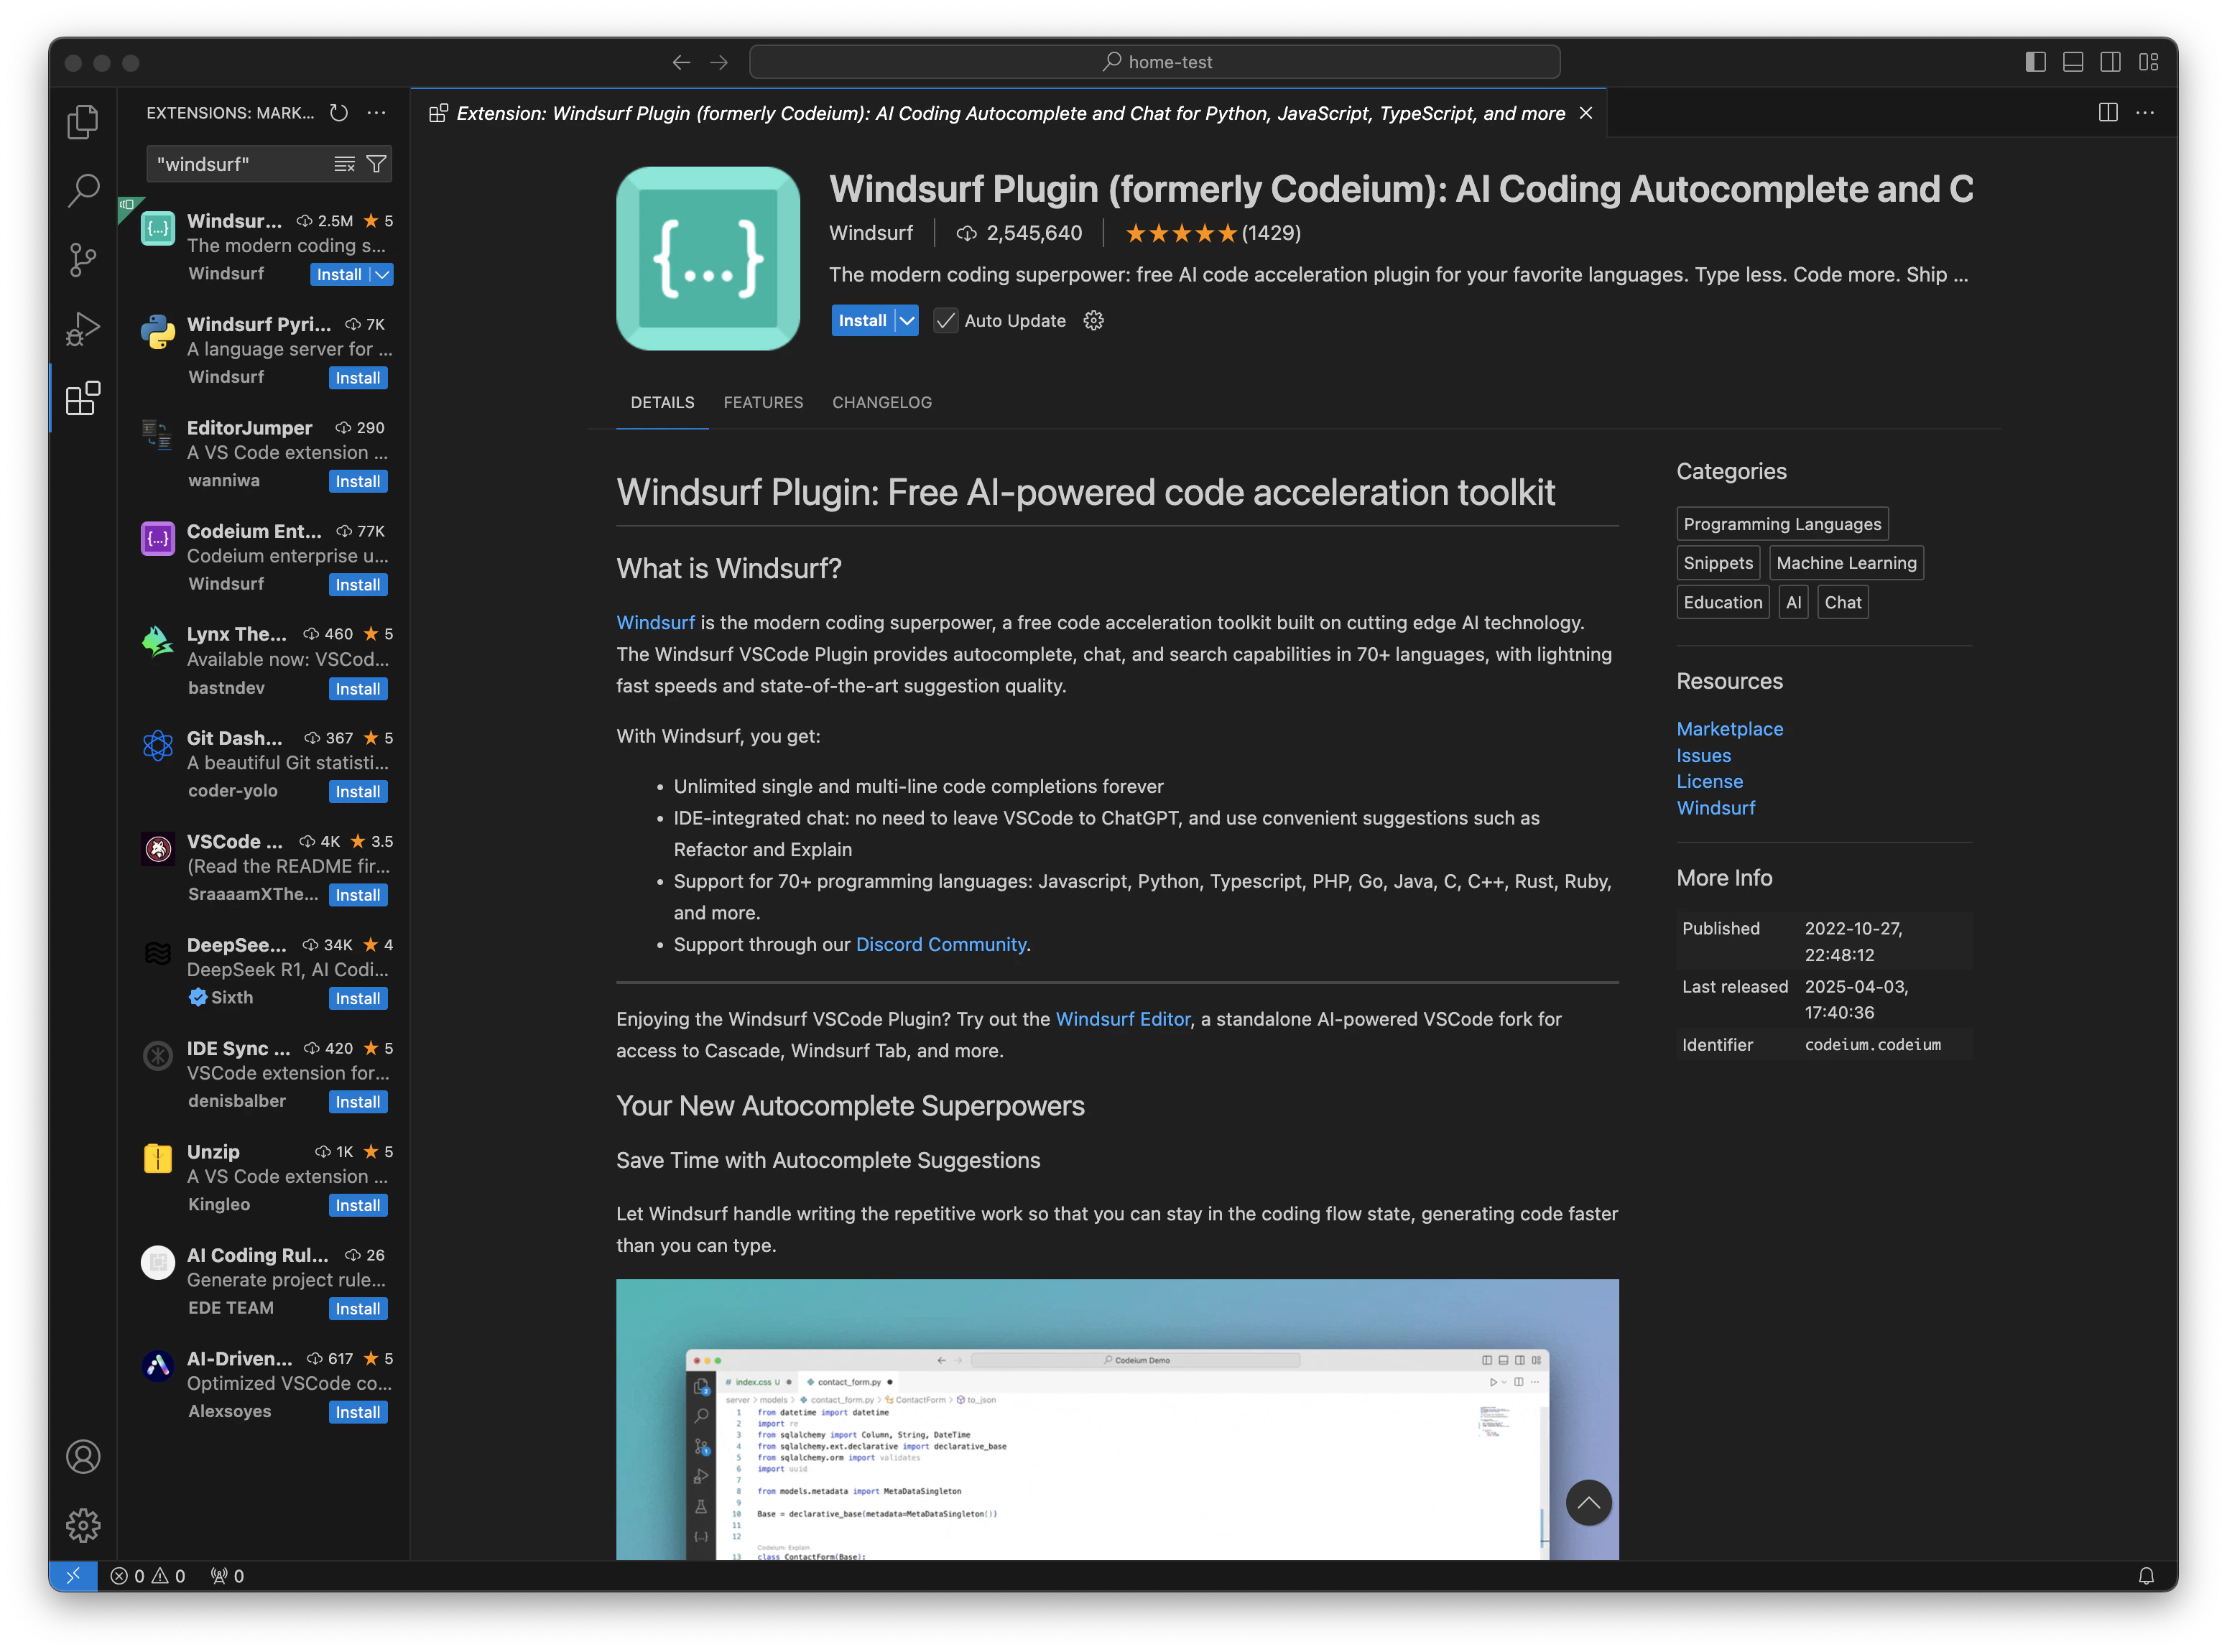
        VS Code marketplaceでWindsurf Plugin (旧Codeium) を見つけて、インストールします。

        <Frame>
          <img src="https://mintcdn.com/cognitionai/hxeMffzXgF_RWx-U/desktop/assets/vscode_extension_page.png?fit=max&auto=format&n=hxeMffzXgF_RWx-U&q=85&s=50e7c72b33c68f441e084184fb50a204" width="3100" height="2300" data-path="desktop/assets/vscode_extension_page.png" />
        </Frame>
      </Step>

      <Step title="認証">
        インストール後、VS Codeの右下に通知が表示され、Windsurfへのサインインを求められます。
        また、左側のサイドバー下部にあるプロフィールアイコンからWindsurfにサインインすることもできます。

        <Frame>
          <img src="https://mintcdn.com/cognitionai/hxeMffzXgF_RWx-U/desktop/assets/vscode_login_init_left.png?fit=max&auto=format&n=hxeMffzXgF_RWx-U&q=85&s=d6d0292cb06afbdbde0c96e7dacbc641" width="1870" height="360" data-path="desktop/assets/vscode_login_init_left.png" />
        </Frame>

        <Note>Visual Studio Codeからリンクをブラウザで開けないことを示すエラーメッセージが表示された場合は、ブラウザを更新してから認証フローをやり直す必要がある可能性があります。</Note>
        まだサインインしていない場合は、サインインまたはアカウントの作成を求められます。

        <Frame>
          <img src="https://mintcdn.com/cognitionai/-PTA3zzo2bR9Qfc8/desktop/assets/login_prompt_webpage.png?fit=max&auto=format&n=-PTA3zzo2bR9Qfc8&q=85&s=2dc52c3a7979daa299dc7b652d74cad5" width="1896" height="1442" data-path="desktop/assets/login_prompt_webpage.png" />
        </Frame>

        サインインすると、Visual Studio Codeにリダイレクトされます。
        <Note>GitPodやCodespacesのようなブラウザベースのVS Code IDEを利用している場合は、アクセストークンを使って認証を完了する方法の案内が表示されます。</Note>
      </Step>

      <Step title="Language Serverを待つ">
        サインインすると、WindsurfはLanguage Serverのダウンロードを開始します。
        これは、WindsurfのAI機能を利用できるようにするために、当社のAPIと通信するプログラムです。
        ダウンロードには通常10～20秒かかりますが、速度はインターネット接続によって異なる場合があります。
        その間も、通常どおりVS Codeを利用できます。
      </Step>

      <Step title="完了しました！">
        これで準備完了です。WindsurfのAI機能であるAutocomplete、Chat、Commandが利用可能になりました。
      </Step>
    </Steps>
  </Tab>

  <Tab title="Vim / Neovim">
    ### 拡張機能のインストール

    <Steps>
      <Step title="プラグインをインストール">
        公開されている [`codeium.vim` リポジトリ](https://github.com/Exafunction/codeium.vim) の **Get Started** の手順に従ってください。以上です。
      </Step>
    </Steps>

    ### Windsurfプラグインの使い方

    <Steps>
      <Step title="セットアップ">
        Windsurf は多くの言語をサポートしていますが、ここでは Python を例に説明します。新しいファイル `test.py` を作成してください。
      </Step>

      <Step title="コードから">
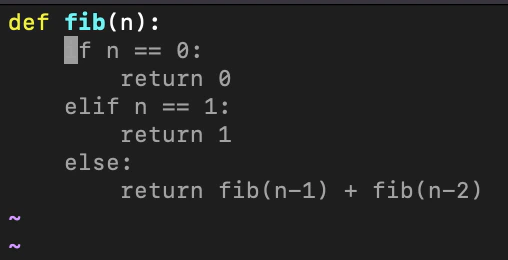
        Windsurf は、関数ヘッダーの一部だけから複数行のコードを提案できます。

        <Frame>
          <img src="https://mintcdn.com/cognitionai/hxeMffzXgF_RWx-U/desktop/assets/vim_tutorial/snippet_one.png?fit=max&auto=format&n=hxeMffzXgF_RWx-U&q=85&s=56cceeb4e57cb230ed4402d80e9321d9" alt="スニペット1" width="508" height="260" data-path="desktop/assets/vim_tutorial/snippet_one.png" />
        </Frame>
      </Step>

      <Step title="提案を受け入れる">
        受け入れるには **Tab** を押します。
      </Step>

      <Step title="コメントから">
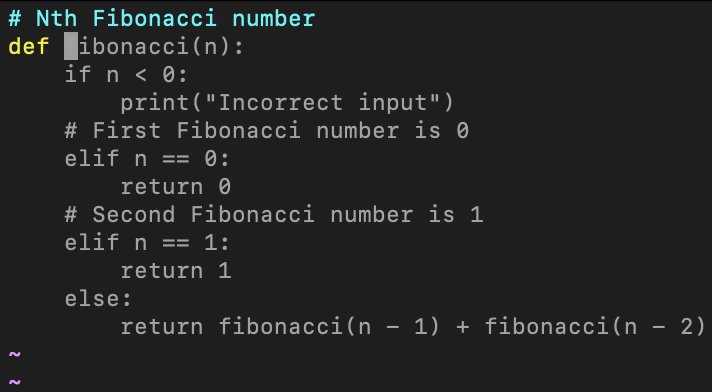
        Windsurf はコメントも理解します。

        <Frame>
          <img src="https://mintcdn.com/cognitionai/hxeMffzXgF_RWx-U/desktop/assets/vim_tutorial/snippet_two.png?fit=max&auto=format&n=hxeMffzXgF_RWx-U&q=85&s=1cb4d83f6c1e5eb79b12b87e7d07b756" alt="スニペット2" width="712" height="392" data-path="desktop/assets/vim_tutorial/snippet_two.png" />
        </Frame>
      </Step>
    </Steps>
  </Tab>

  <Tab title="Visual Studio">
    ### 拡張機能のインストール

    <Steps>
      <Step title="Extension marketplace を開く">
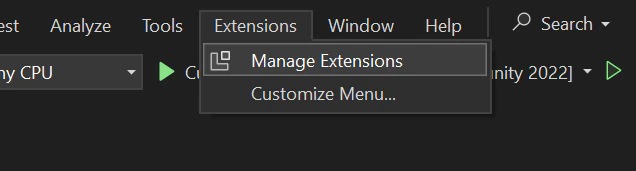
        Visual Studio のメニューバーで、**Extensions → Manage Extensions** をクリックします。

        <Frame>
          <img src="https://mintcdn.com/cognitionai/hxeMffzXgF_RWx-U/desktop/assets/visual_studio_tutorial/manage_extensions.png?fit=max&auto=format&n=hxeMffzXgF_RWx-U&q=85&s=ec281edf92c6e491f1e9378396ed47af" alt="Manage Extensions" width="636" height="171" data-path="desktop/assets/visual_studio_tutorial/manage_extensions.png" />
        </Frame>
      </Step>

      <Step title="Windsurf プラグインをインストール">
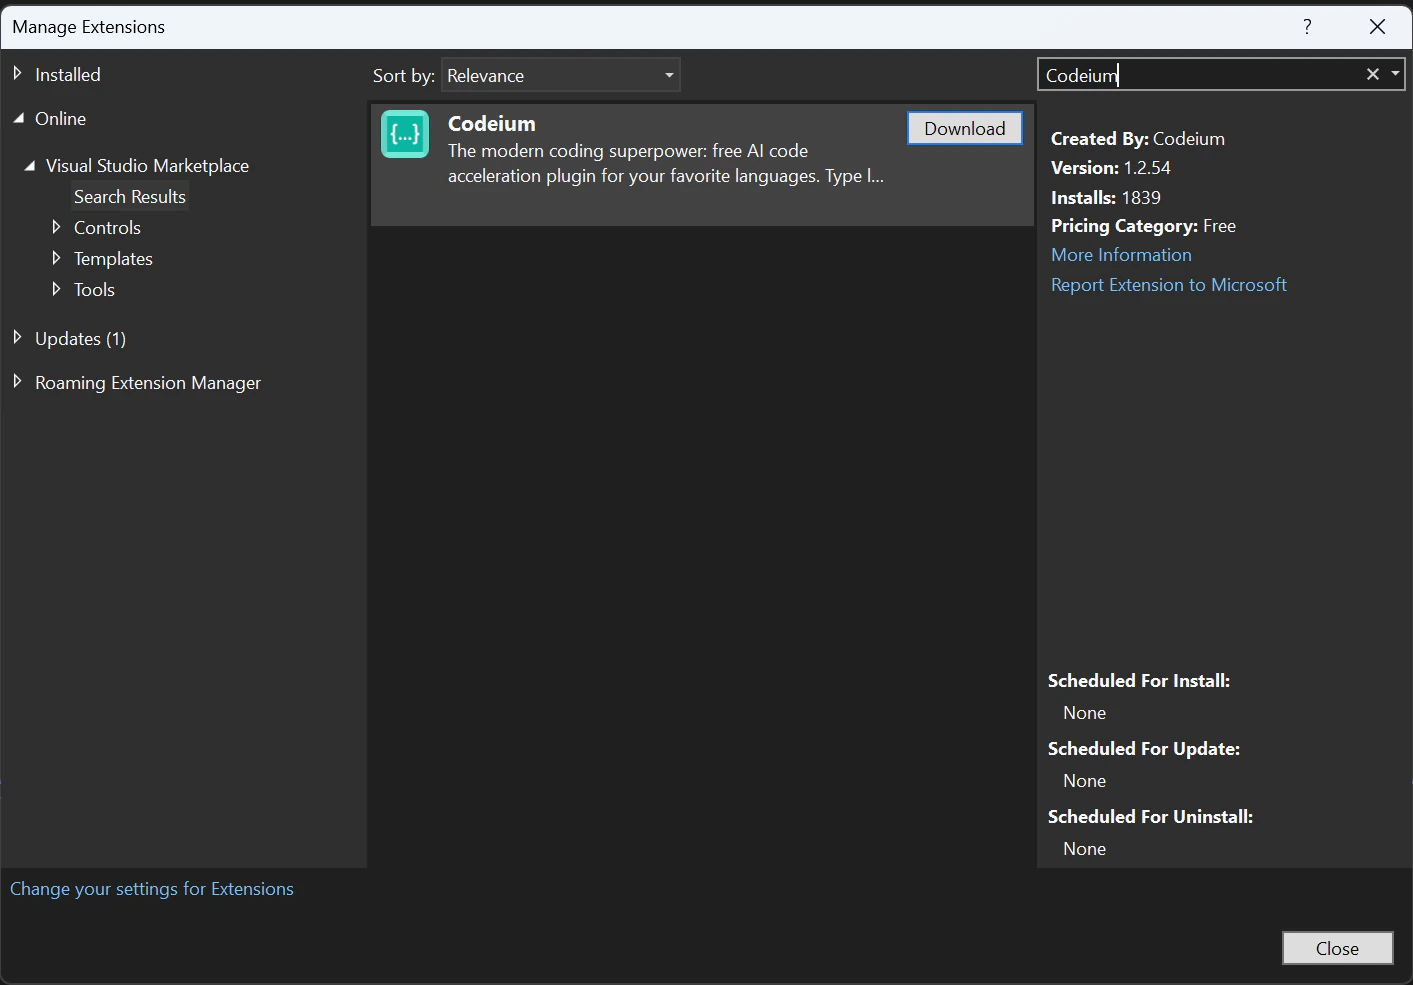
        **Manage Extensions** で **Visual Studio Marketplace** をクリックし、**Windsurf** を検索して、**Download** をクリックします。

        <Frame>
          <img src="https://mintcdn.com/cognitionai/hxeMffzXgF_RWx-U/desktop/assets/visual_studio_tutorial/install.png?fit=max&auto=format&n=hxeMffzXgF_RWx-U&q=85&s=0f44e8fb5cbb523a8c0943e828e4d568" alt="プラグインのインストール" width="1413" height="985" data-path="desktop/assets/visual_studio_tutorial/install.png" />
        </Frame>
      </Step>

      <Step title="Visual Studio を再起動">
        ウィンドウを閉じて、Visual Studio を再起動します。
      </Step>

      <Step title="Windsurf プラグインにサインイン">
        プロジェクトを開くか作成すると、ブラウザーウィンドウが開いてサインインを求められます。
      </Step>

      <Step title="アカウントを作成">
        まだアカウントをお持ちでない場合は、アカウント作成画面にリダイレクトされます。
      </Step>

      <Step title="完了！">
        これで設定は完了です。Windsurf の AI 機能を Visual Studio で利用できます。
      </Step>
    </Steps>

    ### Windsurf プラグインを使う

    <Steps>
      <Step title="セットアップ">
        Windsurf は多くの言語をサポートしていますが、ここでは C# を使って説明します。C# ファイルを作成するか開いてください。
      </Step>

      <Step title="コードから">
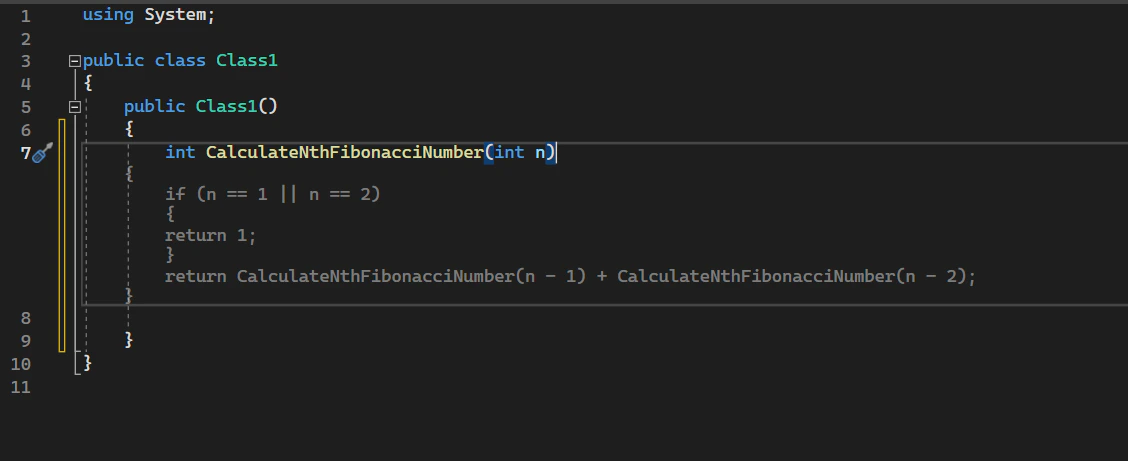
        Windsurf は、関数シグネチャの一部から複数行のコードを提案できます。

        <Frame>
          <img src="https://mintcdn.com/cognitionai/hxeMffzXgF_RWx-U/desktop/assets/visual_studio_tutorial/suggestion.png?fit=max&auto=format&n=hxeMffzXgF_RWx-U&q=85&s=509e9668b87c83b58da01f24d5d7e8d6" alt="提案の例" width="1128" height="461" data-path="desktop/assets/visual_studio_tutorial/suggestion.png" />
        </Frame>
      </Step>

      <Step title="提案を受け入れる">
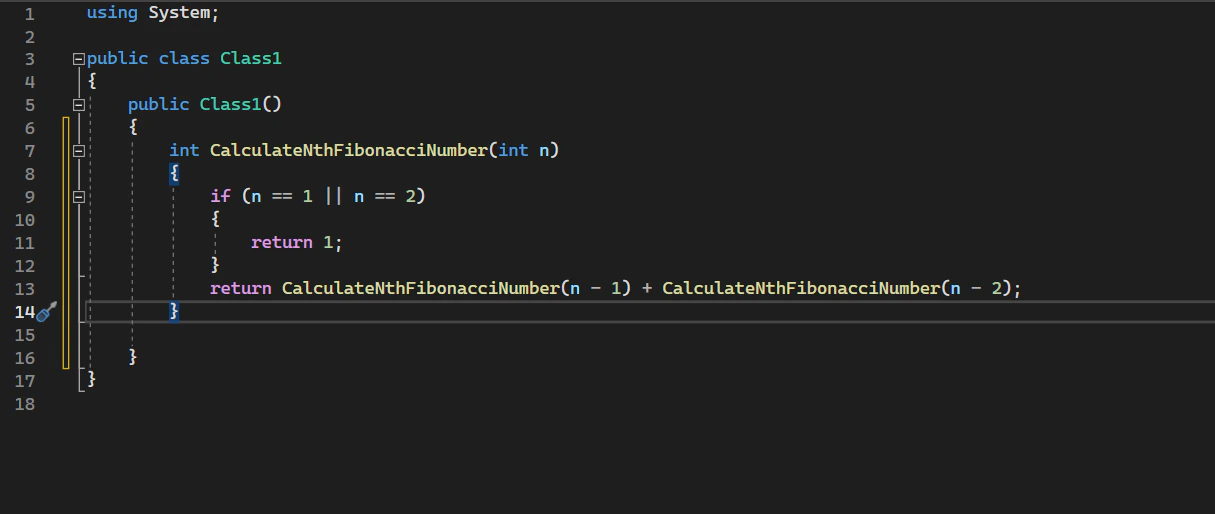
        **Tab** キーを押して受け入れます。

        <Frame>
          <img src="https://mintcdn.com/cognitionai/hxeMffzXgF_RWx-U/desktop/assets/visual_studio_tutorial/post_accept.png?fit=max&auto=format&n=hxeMffzXgF_RWx-U&q=85&s=dbbd4947df7b36439b12455e291d321d" alt="受け入れ後" width="1215" height="514" data-path="desktop/assets/visual_studio_tutorial/post_accept.png" />
        </Frame>
      </Step>
    </Steps>
  </Tab>

  <Tab title="Jupyter Notebook">
    ### Windsurf プラグインをインストールする

    <Steps>
      <Step title="Jupyter 拡張機能をインストール">
        新しい Jupyter Lab セッションを開きます。セルに以下を貼り付け、`Shift+Enter` で実行します。

        ```python theme={null}
        import sys
        !{sys.executable} -m pip install -U pip --user
        !{sys.executable} -m pip install -U codeium-jupyter --user
        ```

        仮想環境内の場合は、次を実行します。

        ```python theme={null}
        import sys
        !{sys.executable} -m pip install -U pip
        !{sys.executable} -m pip install -U codeium-jupyter
        ```

        コマンドの実行が完了したら、ノートブックを閉じて Jupyter サーバーを停止します。
      </Step>

      <Step title="Jupyter を起動">
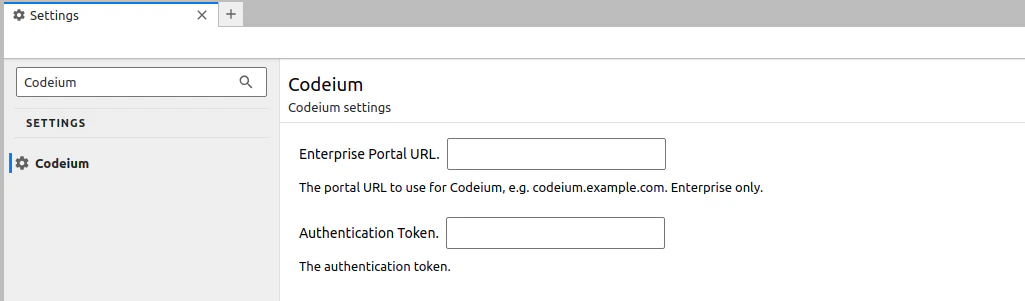
        Jupyter を再起動してノートブックを開きます。設定 (<kbd>Ctrl</kbd> + <kbd>,</kbd>) を開き、**Windsurf** セクションに移動します。Enterprise URL とトークンの入力欄が表示されます。

        <Frame>
          <img src="https://mintcdn.com/cognitionai/-PTA3zzo2bR9Qfc8/desktop/assets/jupyter_tutorial/codeium_settings.png?fit=max&auto=format&n=-PTA3zzo2bR9Qfc8&q=85&s=a48ed36e9986ebce74a70957d0de9a56" alt="設定 UI" width="1025" height="301" data-path="desktop/assets/jupyter_tutorial/codeium_settings.png" />
        </Frame>

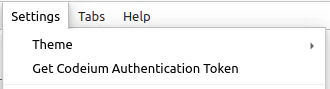
        **Get Windsurf Authentication Token** をクリックし、リンク先の案内に従います。取得したトークンを設定ダイアログに貼り付けます。
        <Frame>
          <img src="https://mintcdn.com/cognitionai/-PTA3zzo2bR9Qfc8/desktop/assets/jupyter_tutorial/settings_menu.png?fit=max&auto=format&n=-PTA3zzo2bR9Qfc8&q=85&s=e65377b54144633bcceeccc570112a64" alt="設定メニュー" width="330" height="89" data-path="desktop/assets/jupyter_tutorial/settings_menu.png" />
        </Frame>

        <Note>Windsurf の設定が見つからない場合は、Jupyter を再起動していない可能性があります。サーバーを停止し (Ctrl+C) 、<code>jupyter lab</code> でもう一度起動してください。</Note>
      </Step>

      <Step title="アカウントを作成">
        Windsurf アカウントを持っていない場合は、作成するよう求められます。
      </Step>

      <Step title="認証">
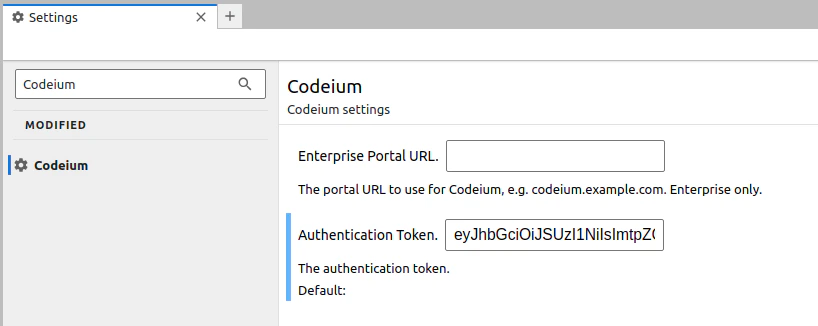
        サインイン後、トークンをコピーして設定ダイアログに貼り付けます。

        <Frame>
          <img src="https://mintcdn.com/cognitionai/-PTA3zzo2bR9Qfc8/desktop/assets/jupyter_tutorial/auth_token_setting.png?fit=max&auto=format&n=-PTA3zzo2bR9Qfc8&q=85&s=797b0858e6c28fdd3788dd4da99738fd" alt="認証トークン欄" width="818" height="326" data-path="desktop/assets/jupyter_tutorial/auth_token_setting.png" />
        </Frame>
      </Step>

      <Step title="完了！">
        これで準備完了です。Windsurf の AI 機能が Jupyter で利用できるようになります。
      </Step>
    </Steps>

    ### Windsurf プラグインを利用する

    <Steps>
      <Step title="コードから">
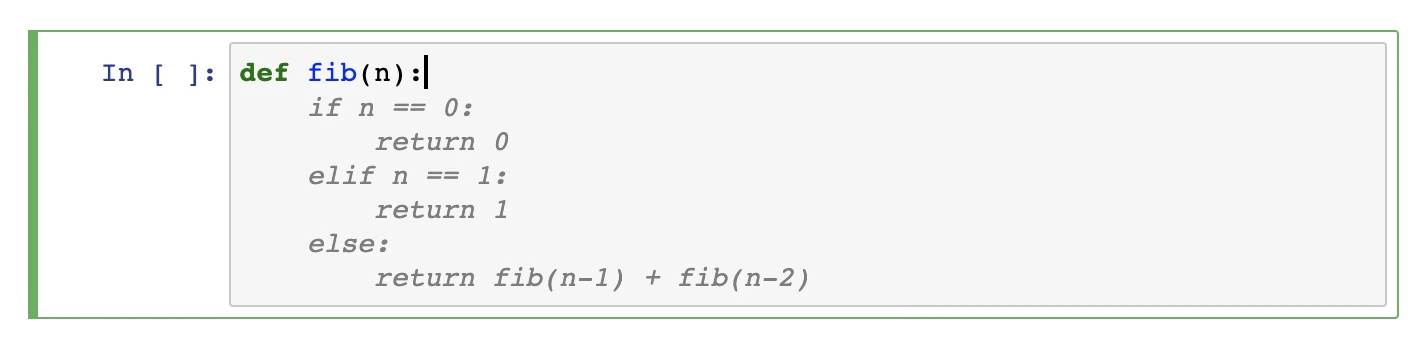
        Windsurf は、不完全な関数ヘッダーから複数行のコードを提案できます。

        <Frame>
          <img src="https://mintcdn.com/cognitionai/-PTA3zzo2bR9Qfc8/desktop/assets/jupyter_tutorial/snippet_one.png?fit=max&auto=format&n=-PTA3zzo2bR9Qfc8&q=85&s=937093abad3726215c8dc00360dc3077" alt="スニペット 1" width="1420" height="346" data-path="desktop/assets/jupyter_tutorial/snippet_one.png" />
        </Frame>
      </Step>

      <Step title="提案を受け入れる">**Tab** を押して受け入れます。</Step>

      <Step title="コメントから">
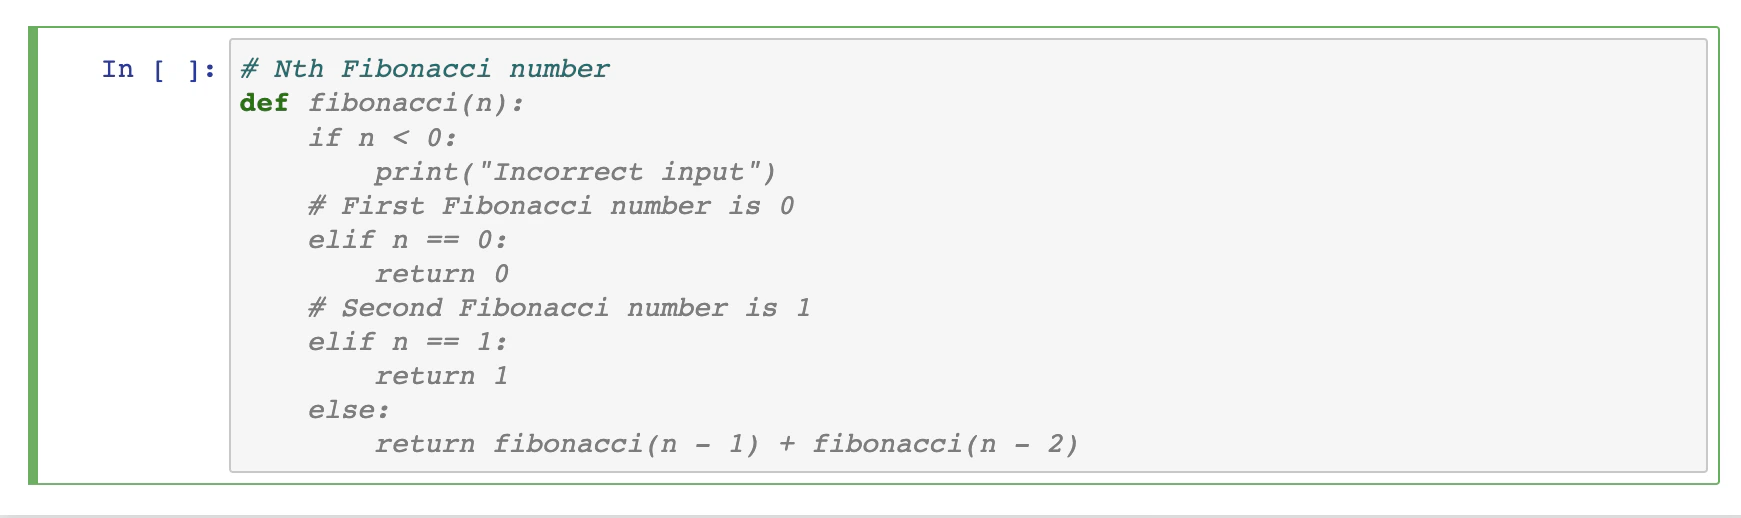
        Windsurf はコメントも理解します。

        <Frame>
          <img src="https://mintcdn.com/cognitionai/-PTA3zzo2bR9Qfc8/desktop/assets/jupyter_tutorial/snippet_two.png?fit=max&auto=format&n=-PTA3zzo2bR9Qfc8&q=85&s=0d61f52f85e4b65729f665b24555af6a" alt="スニペット 2" width="1741" height="518" data-path="desktop/assets/jupyter_tutorial/snippet_two.png" />
        </Frame>
      </Step>
    </Steps>
  </Tab>

  <Tab title="Chrome">
    ### Windsurf をインストール

    <Steps>
      <Step title="Chrome 拡張機能をインストール">
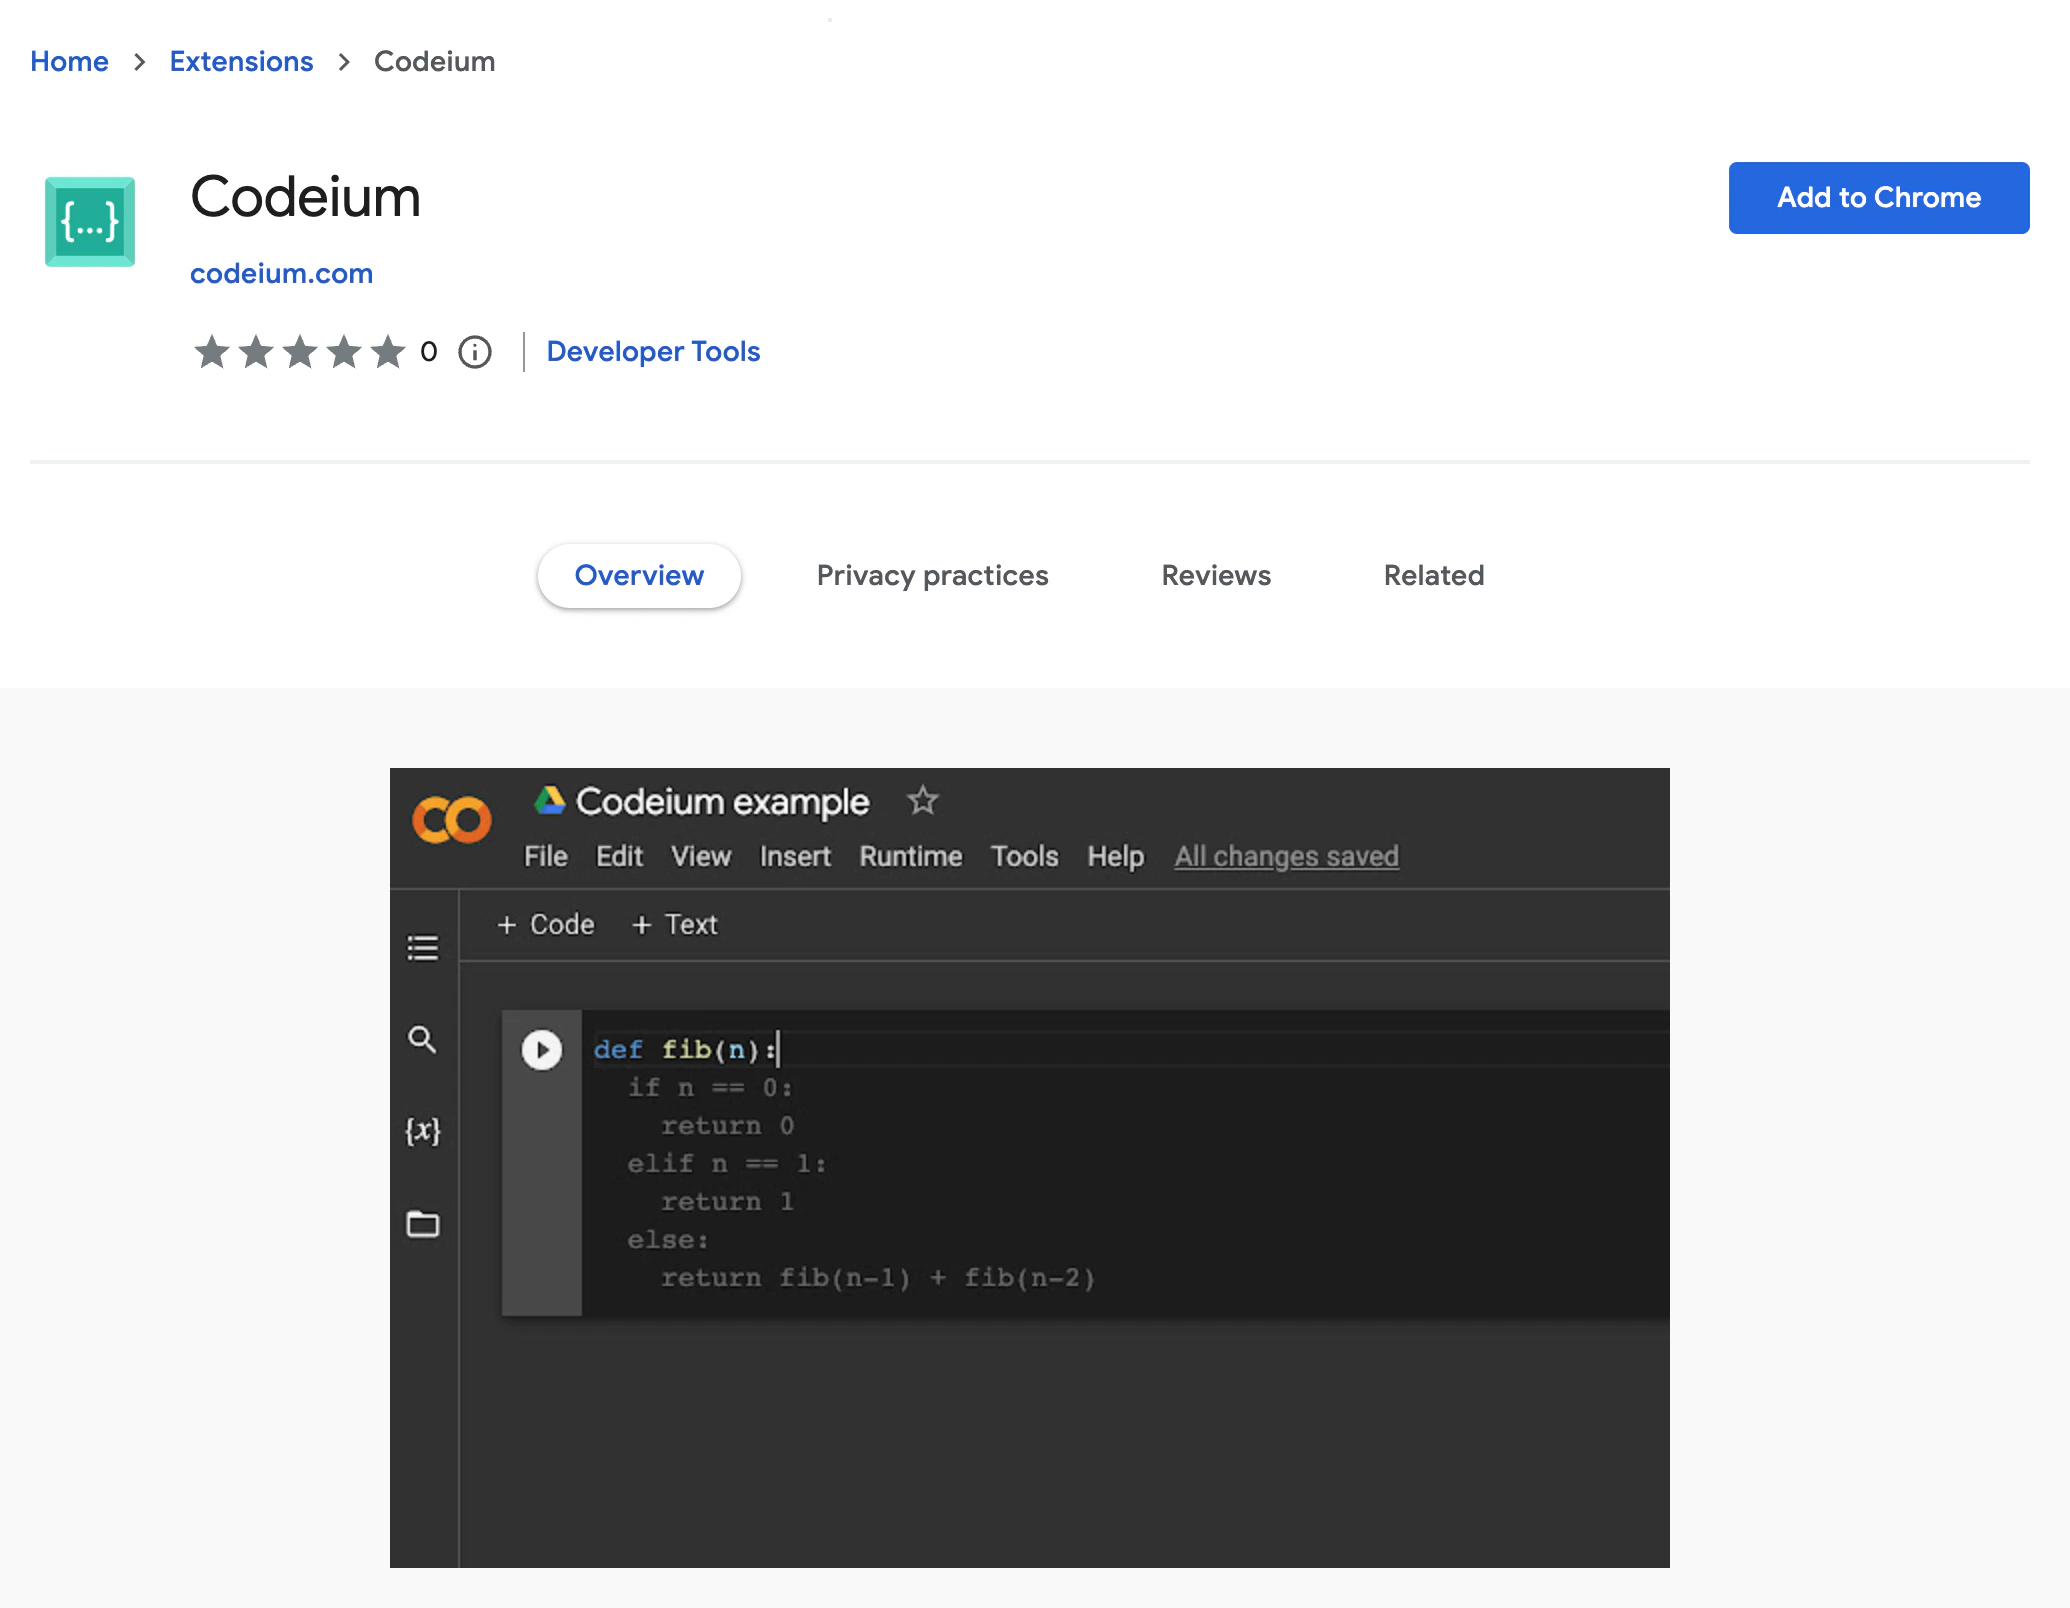
        [Chrome Web Store ページ](https://chrome.google.com/webstore/detail/codeium/hobjkcpmjhlegmobgonaagepfckjkceh)にアクセスし、**Add to Chrome** をクリックします。

        <Frame>
          <img src="https://mintcdn.com/cognitionai/-PTA3zzo2bR9Qfc8/desktop/assets/chrome_tutorial/chrome_web_store.png?fit=max&auto=format&n=-PTA3zzo2bR9Qfc8&q=85&s=c053874a5b39229322bf55675ce8050d" alt="Chrome Web Store" width="2070" height="1608" data-path="desktop/assets/chrome_tutorial/chrome_web_store.png" />
        </Frame>
      </Step>

      <Step title="拡張機能を固定">
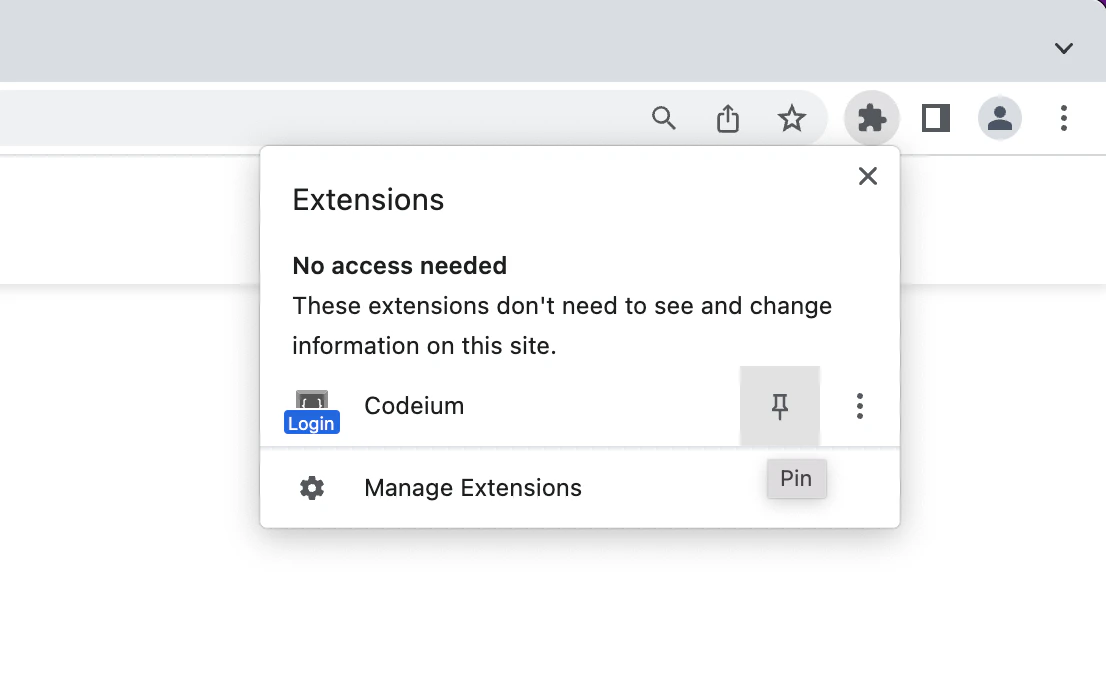
        拡張機能メニューを開き、Windsurf アイコンが常に表示されるよう **Pin** アイコンをクリックします。

        <Frame>
          <img src="https://mintcdn.com/cognitionai/-PTA3zzo2bR9Qfc8/desktop/assets/chrome_tutorial/pin_extension.png?fit=max&auto=format&n=-PTA3zzo2bR9Qfc8&q=85&s=2a53cf606cf60491cfa8098d56a04a84" alt="拡張機能を固定" width="1106" height="674" data-path="desktop/assets/chrome_tutorial/pin_extension.png" />
        </Frame>
      </Step>

      <Step title="サインイン">
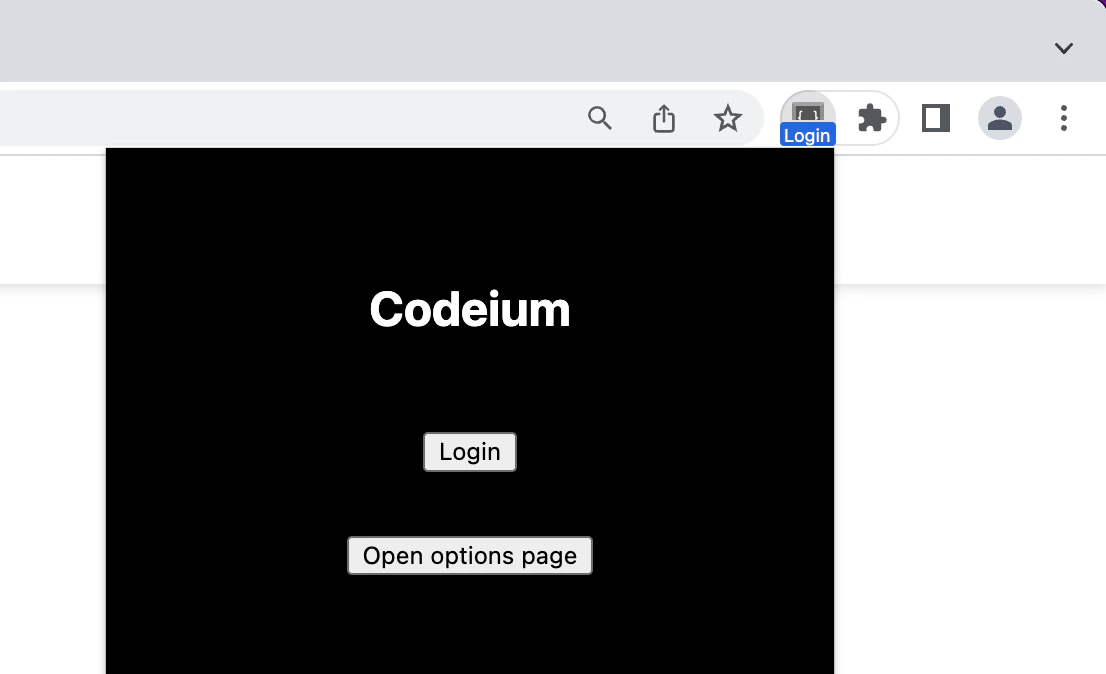
        拡張機能を開くと、ログインページが自動的に表示されます。表示されない場合は、拡張機能のアイコンをクリックしてリンク先に進んでください。

        <Frame>
          <img src="https://mintcdn.com/cognitionai/-PTA3zzo2bR9Qfc8/desktop/assets/chrome_tutorial/sign_in.png?fit=max&auto=format&n=-PTA3zzo2bR9Qfc8&q=85&s=38a23f844da99a94f3c5fab13cda037e" alt="サインイン" width="1106" height="674" data-path="desktop/assets/chrome_tutorial/sign_in.png" />
        </Frame>
      </Step>

      <Step title="これで完了です！">
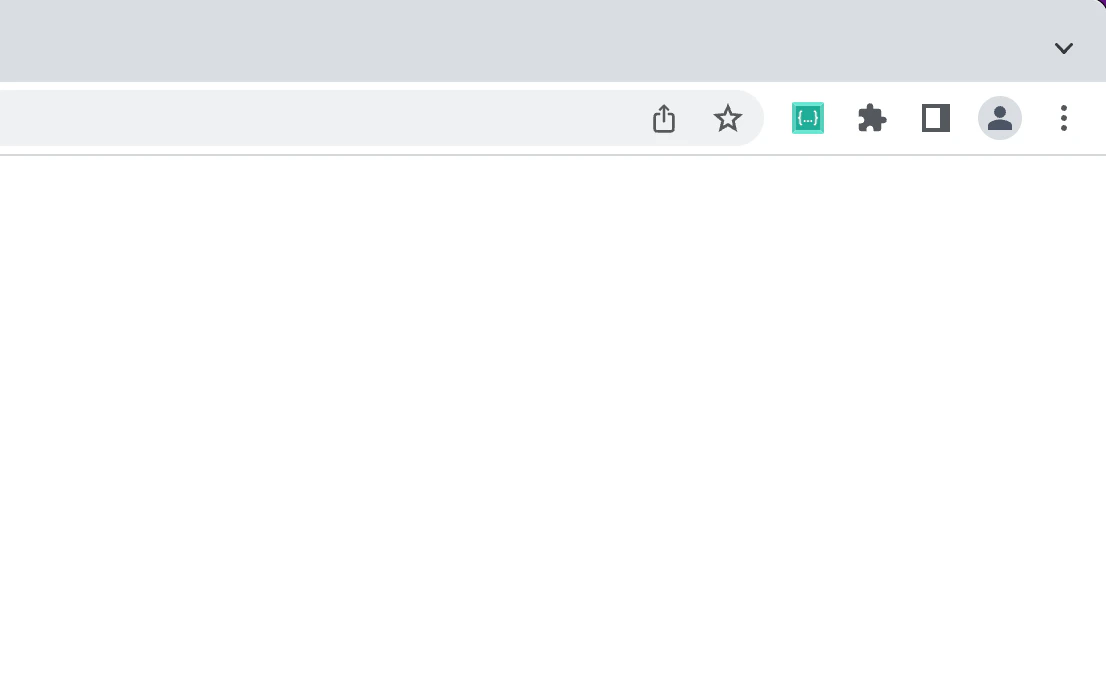
        準備完了です。[新しい Colab ノートブックを作成して](https://colab.research.google.com/#create=true)試してみましょう。

        <Frame>
          <img src="https://mintcdn.com/cognitionai/-PTA3zzo2bR9Qfc8/desktop/assets/chrome_tutorial/signed_in.png?fit=max&auto=format&n=-PTA3zzo2bR9Qfc8&q=85&s=aa954333be317ef5b43bbd2efead831a" alt="サインイン済み" width="1106" height="674" data-path="desktop/assets/chrome_tutorial/signed_in.png" />
        </Frame>
      </Step>
    </Steps>

    ### Windsurf の使い方

    <Steps>
      <Step title="コードから">
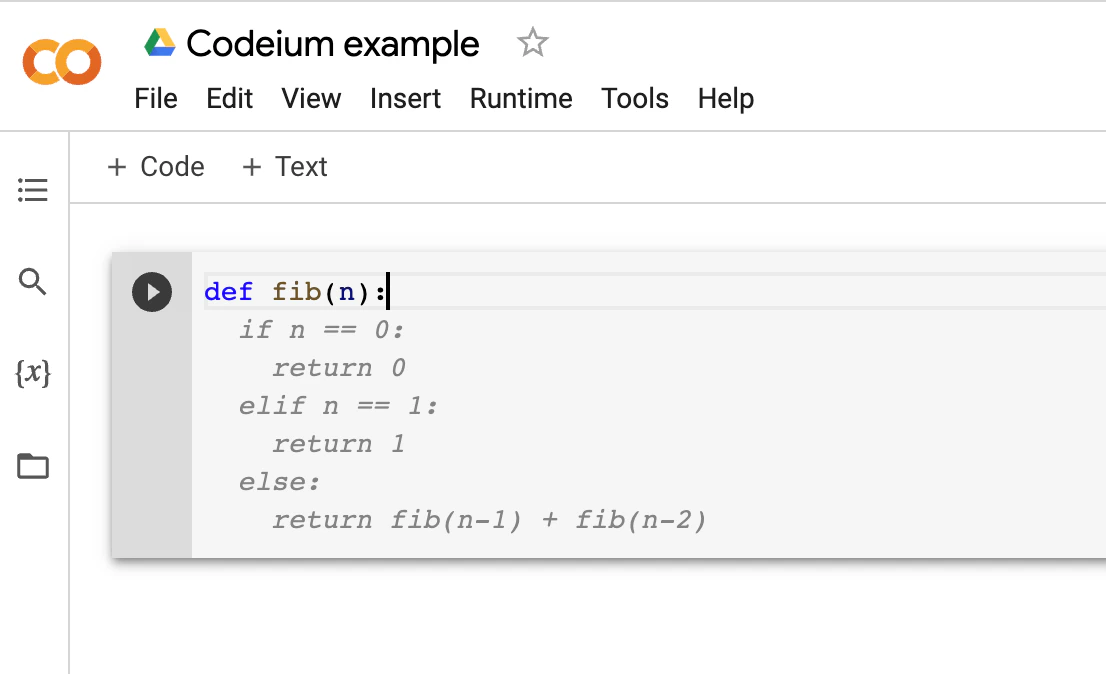
        Windsurf は、関数ヘッダーの一部から複数行のコードを提案できます。

        <Frame>
          <img src="https://mintcdn.com/cognitionai/-PTA3zzo2bR9Qfc8/desktop/assets/chrome_tutorial/snippet_one.png?fit=max&auto=format&n=-PTA3zzo2bR9Qfc8&q=85&s=c385f4aad6c7f6dd37375dd008f42faa" alt="スニペット 1" width="1106" height="674" data-path="desktop/assets/chrome_tutorial/snippet_one.png" />
        </Frame>
      </Step>

      <Step title="提案を受け入れる">受け入れるには **Tab** キーを押します。</Step>

      <Step title="コメントから">
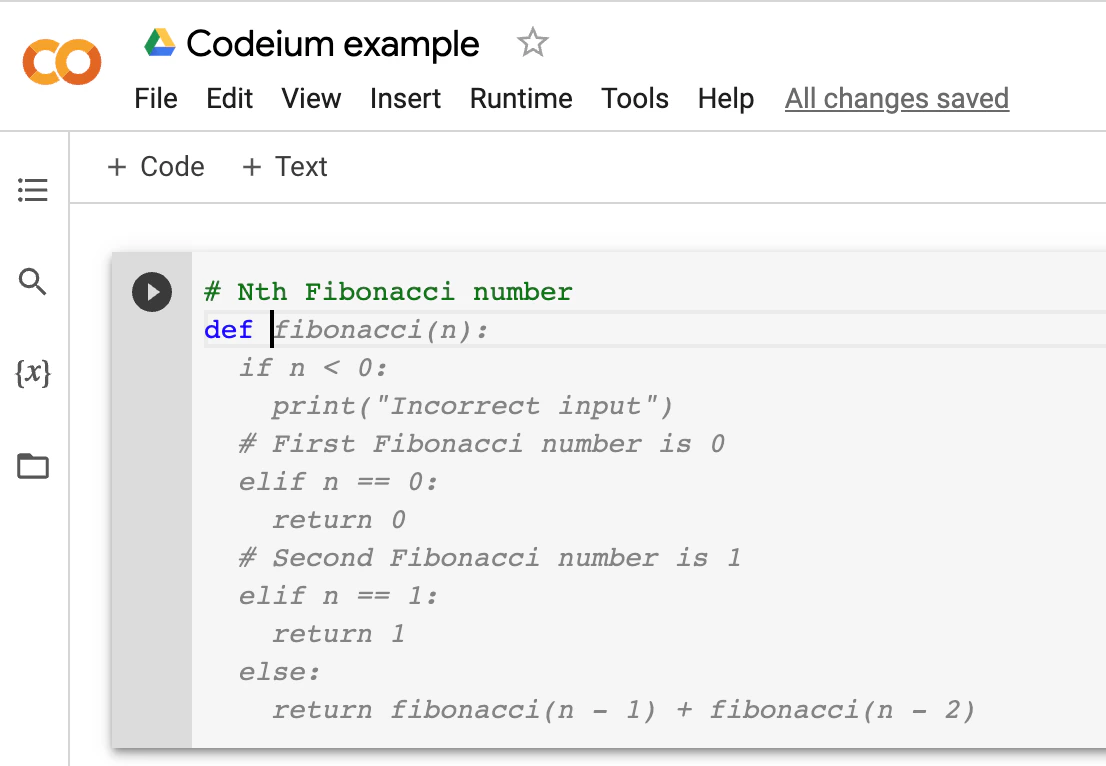
        Windsurf はコメントも理解できます。

        <Frame>
          <img src="https://mintcdn.com/cognitionai/-PTA3zzo2bR9Qfc8/desktop/assets/chrome_tutorial/snippet_two.png?fit=max&auto=format&n=-PTA3zzo2bR9Qfc8&q=85&s=ea9c51230baaa6e15b0281b7c58f9cc2" alt="スニペット 2" width="1106" height="766" data-path="desktop/assets/chrome_tutorial/snippet_two.png" />
        </Frame>
      </Step>
    </Steps>
  </Tab>

  <Tab title="Eclipse">
    ### 拡張機能のインストール

    <Steps>
      <Step title="Install ボタンをドラッグ">
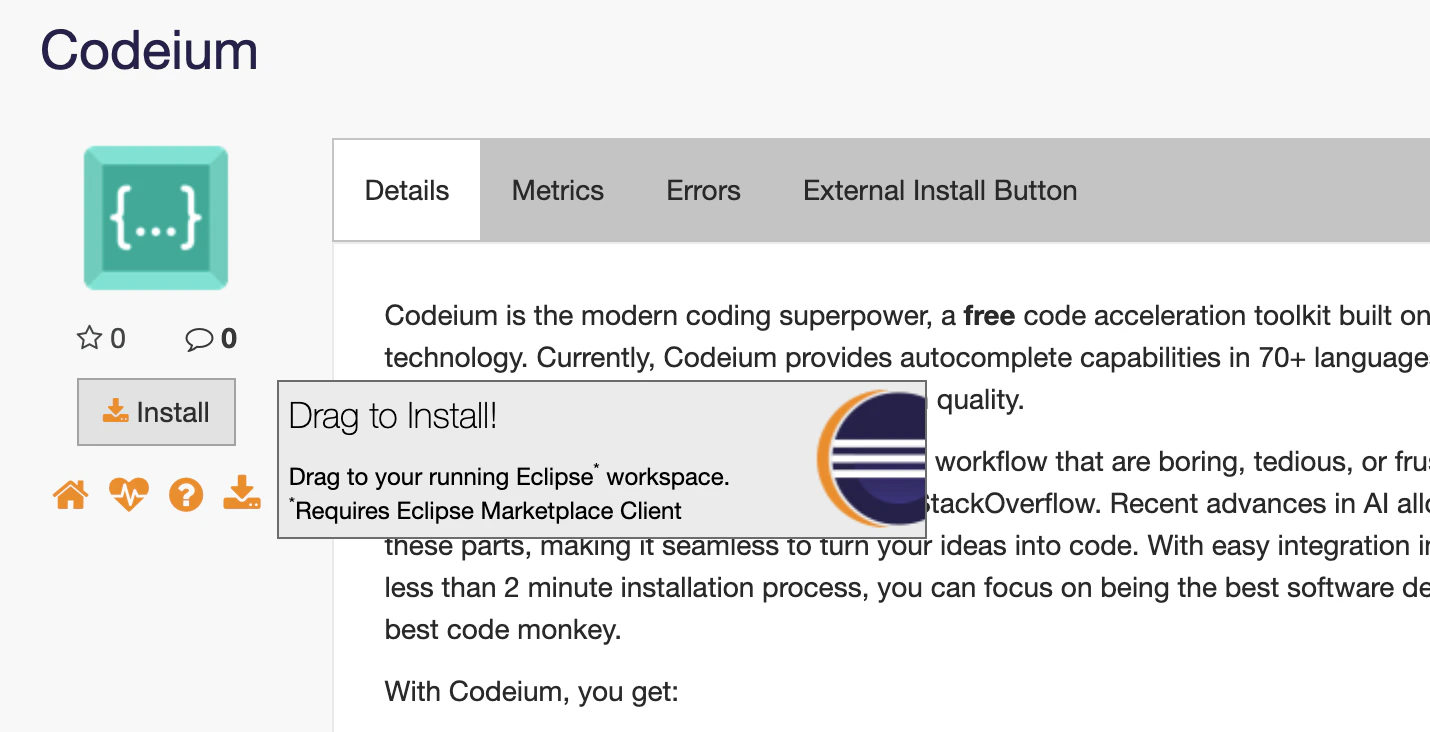
        [Eclipse Marketplace の Windsurf Plugin ページ](https://marketplace.eclipse.org/content/codeium)にアクセスし、**Install** ボタンを Eclipse のツールバーにドラッグします。

        <Frame>
          <img src="https://mintcdn.com/cognitionai/-PTA3zzo2bR9Qfc8/desktop/assets/eclipse_tutorial/drag.png?fit=max&auto=format&n=-PTA3zzo2bR9Qfc8&q=85&s=e4331b14785272e8cbb239c1cef54cc3" alt="Install ボタンをドラッグ" width="1430" height="732" data-path="desktop/assets/eclipse_tutorial/drag.png" />
        </Frame>
      </Step>

      <Step title="選択した機能を確認">
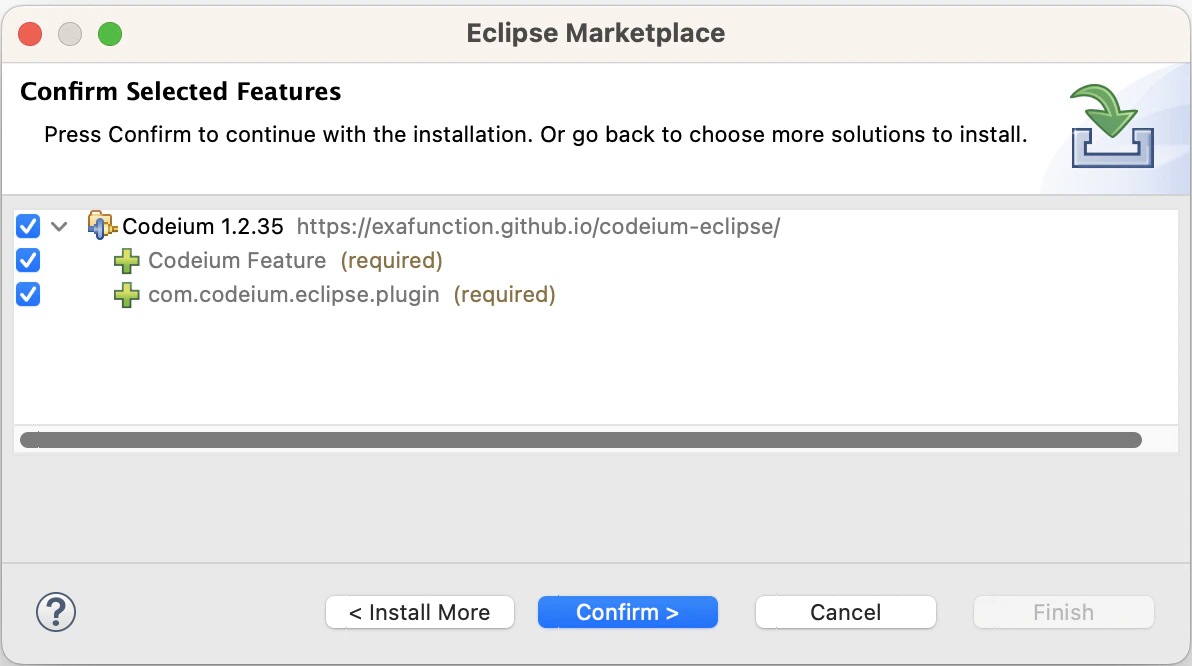
        **Confirm Selected Features** プロンプトで、**Confirm** をクリックします。

        <Frame>
          <img src="https://mintcdn.com/cognitionai/-PTA3zzo2bR9Qfc8/desktop/assets/eclipse_tutorial/confirm.png?fit=max&auto=format&n=-PTA3zzo2bR9Qfc8&q=85&s=f82052920f3911172320e6ada23bd925" alt="機能を確認" width="1192" height="666" data-path="desktop/assets/eclipse_tutorial/confirm.png" />
        </Frame>
      </Step>

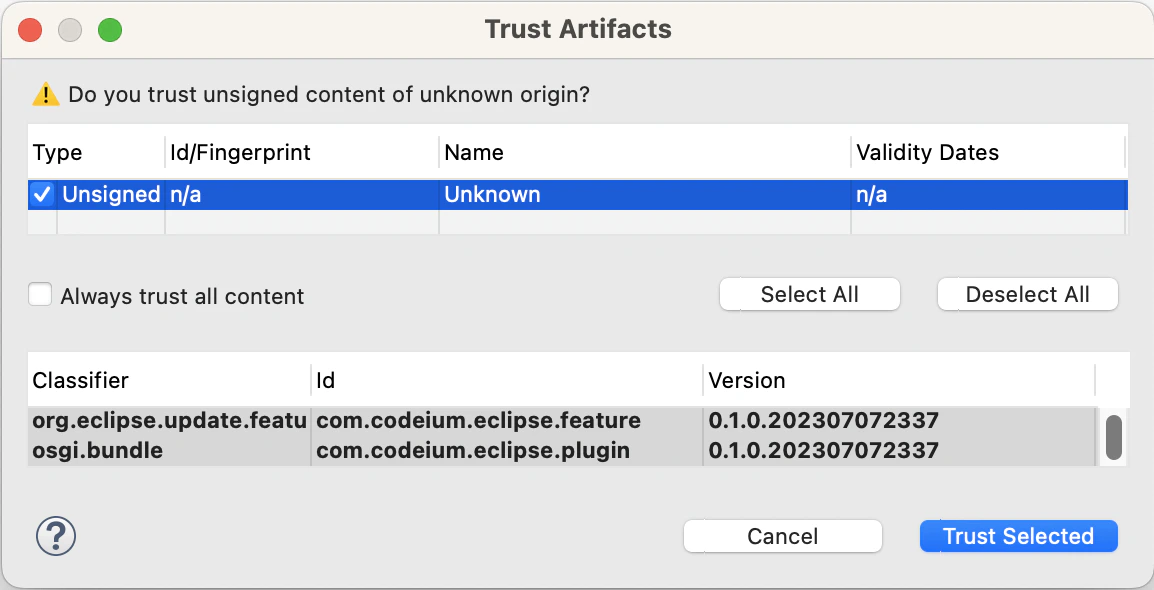
      <Step title="署名されていないコンテンツを信頼">
        **Trust Artifacts** プロンプトで、**Unsigned** を選択し、**Trust** をクリックします。

        <Frame>
          <img src="https://mintcdn.com/cognitionai/-PTA3zzo2bR9Qfc8/desktop/assets/eclipse_tutorial/trust.png?fit=max&auto=format&n=-PTA3zzo2bR9Qfc8&q=85&s=1c32f353f88969e41656b9827026bd1c" alt="署名されていないコンテンツを信頼" width="1154" height="590" data-path="desktop/assets/eclipse_tutorial/trust.png" />
        </Frame>
      </Step>

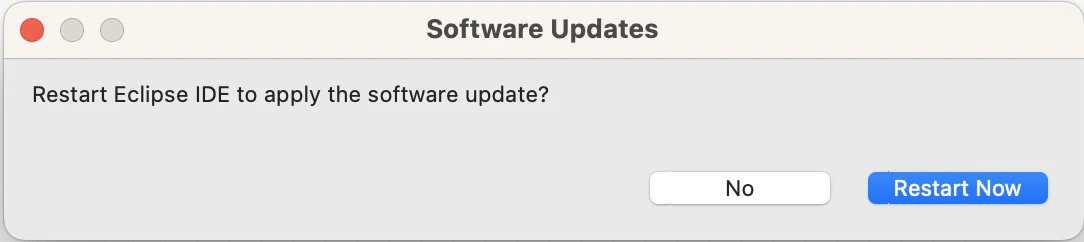
      <Step title="Eclipse を再起動">
        メッセージが表示されたら、インストールを完了するために Eclipse を再起動します。

        <Frame>
          <img src="https://mintcdn.com/cognitionai/-PTA3zzo2bR9Qfc8/desktop/assets/eclipse_tutorial/restart.png?fit=max&auto=format&n=-PTA3zzo2bR9Qfc8&q=85&s=a45ba0c0b8c12c6630560cf50f1a2958" alt="Eclipse を再起動" width="1084" height="242" data-path="desktop/assets/eclipse_tutorial/restart.png" />
        </Frame>
      </Step>

      <Step title="作成 / サインイン">
        ブラウザーが開いたら、サインインするかアカウントを作成して、Eclipse に戻ります。
      </Step>

      <Step title="すべて完了！">これで準備完了です。Windsurf の AI 機能が Eclipse で利用できるようになりました。</Step>
    </Steps>

    ### Windsurf を使う

    <Steps>
      <Step title="セットアップ">
        Windsurf は多くの言語に対応していますが、ここでは Java を使って説明します。新しいファイル `Fib.java` を作成します。
      </Step>

      <Step title="コードから">
        Windsurf は、関数ヘッダーの一部から複数行のコードを提案できます。

        ```java theme={null}
        package test;

        public class Fib {

            public int fib(int n) {
            }

        }
        ```
      </Step>

      <Step title="提案を受け入れる">受け入れるには **Tab** キーを押します。</Step>
    </Steps>
  </Tab>
</Tabs>